- Get Started
- Users and Acccess Privileges
- Create Application Users
- Using Identity Domain
5.3.2 Using Identity Domain
To create users in Identity Domain, perform the following steps:
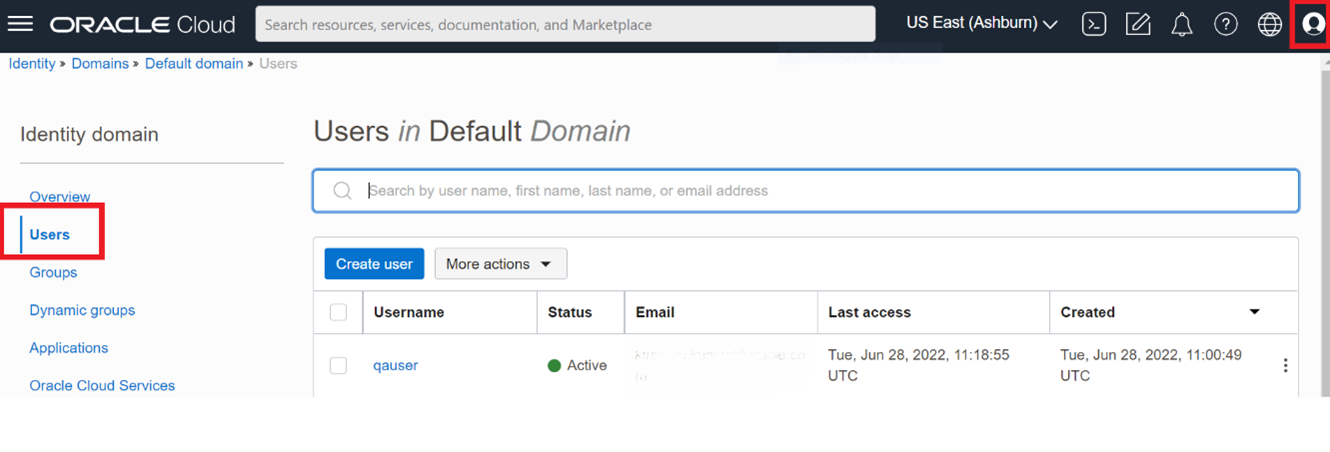
- Click the Profile Icon
 and select Identity Domain: default.
 - From the LHS menu, select the Users option and click Create
user to add the Application Users.

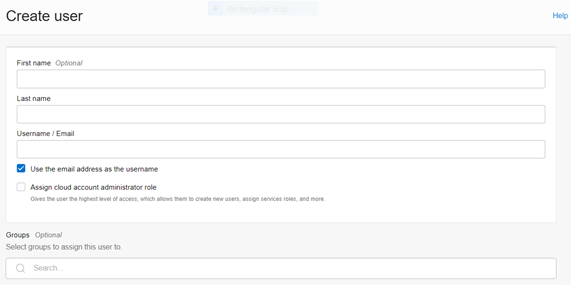
- In the Create User page, enter the following information:
- The First Name and Last Name of the user.
- The user's Email Address or the User Name.
Note:
- Do not enter your email address as the Username and do not select the Use the email address as the username check box.
- Enter a maximum of 20 characters.
- Enter Alphanumeric Characters.
- Enter only Hyphen (-) and Underscore (_) Special Characters

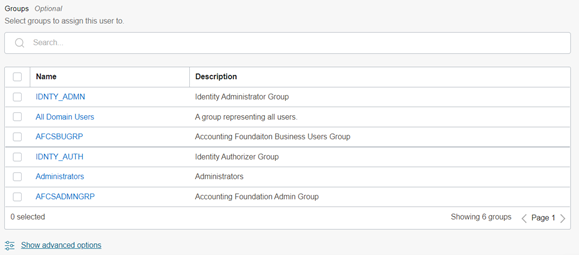
- In the Groups (Optional) section, select the User Groups according to your user-specific groups or access.
- To create an Identity Administrator or Authorizer User, assign the users to the
following:
- IDNTY_ADMIN: You can use this option to create an Administrator User.
- IDNTY_AUTH: You can use this option to create an Authorizer User.
Figure 5-4 Assign User to Groups Window

- Click Create.After the user is successfully created, they will receive an email to activate their account. The user must activate the account to use the service.
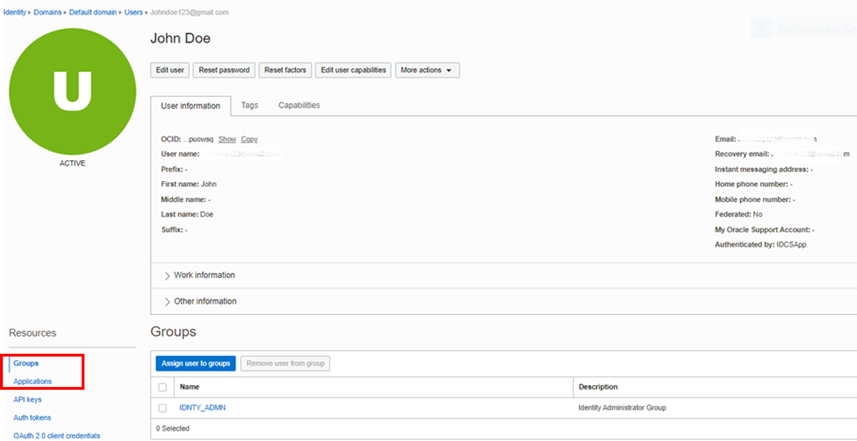
- From the Users window, you can access the newly created user and edit
the user details.
Figure 5-5 User Details Window

- From the LHS menu, in the Groups section, select the required group and click Assign user to groups.
- From the LHS menu, click Applications and then click
Assign Applications. Select the appropriate
Application Instance to grant access to your user as mentioned here.For example:
- AFCS xxxxx-prd (For Production)
- AFCS xxxxx-nprd (For Non-Production)
Note:
Based on this mapping the users will be able to access the appropriate instance. - Click Assign.

For more information, see Create User Accounts - Using the Console section.