10.4 Ledger Configuration
Ledger configuration was added in the release 22C. Before you execute a SLA,
ensure that both Product Information and Ledger
Configuration are complete (show 100%).
You must perform ledger configuration each time a change to ledger
assignment is done.
To perform ledger configuration, click the bar next to
Ledger Configuration to launch the configuration UI. The
headers are pre-populated based on the selections you have made while performing Ledger
Assignment. Data is pulled from either the dimension table or from the seeded LOV (List
of Values) table. Depending on whether the dimension table or LOV tables have data, the
UI presents drop-down lists or text boxes for you to select or enter values for the
attributes, respectively.
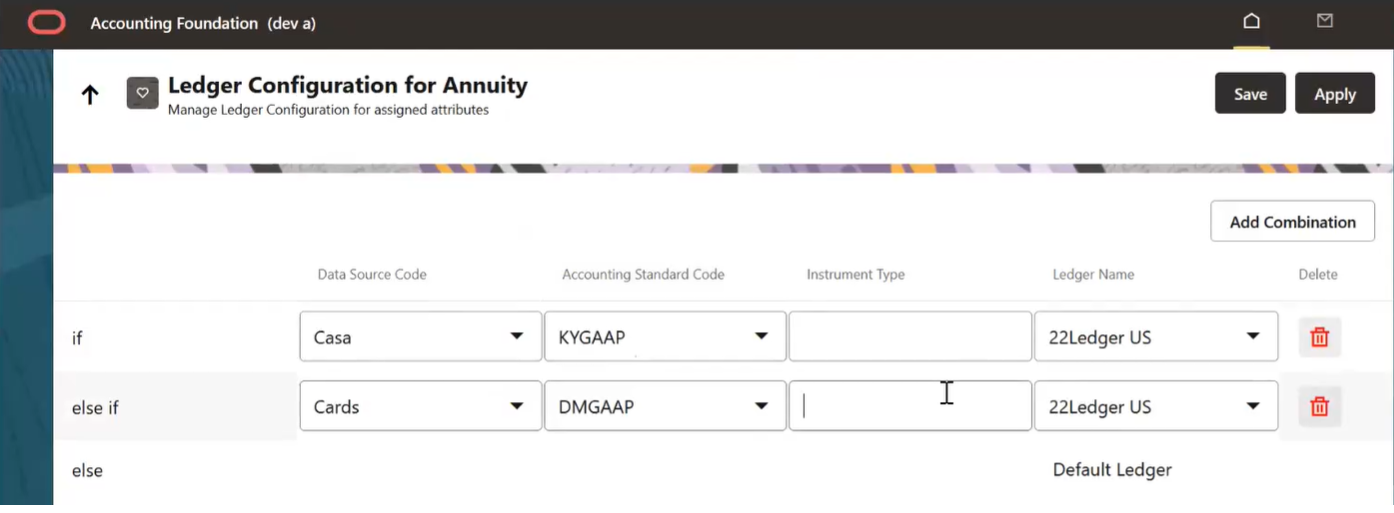
The configuration specifies precedence using the if, else if, else
logic. This means, you specify the first combination with values for the attributes. If
this condition is not satisfied, the next combination is executed, and so on, until the
final option is reached which is assignment to the default ledger (user- specified). You
can select a maximum of 30 attributes per combination and an unlimited number of
combinations.
Depending on your access privilege, you will see the Save
and Apply buttons. Users belonging to AFCSBUGRP can
only save the changes. Users belonging to the AFCSAPVRGRP can apply the changes. Before
saving the changes, AFCS performs validations such as ensuring duplicate combinations
are not present, all mandatory fields have values, and values chosen are validated and
should not exceed limits set by Data Catalog.
Note that when one user is applying changes, another user cannot modify the same
until the changes being applied are complete. After configuring the ledger, the SLA can
be executed and based on the ledger configuration specified, records will be assigned
with ledger name.
The ledger configuration can be defined only for the following
conditions:
- The SLA should be in Configured or Available status.
- There should be more than one ledger selected during ledger assignment in the SLA.
- Only distinct attributes used in ledger assignment will be available in the ledger configuration UI.
After configuring the ledger, the SLA can be executed and based on the ledger
configuration specified, records will be assigned with ledger name.
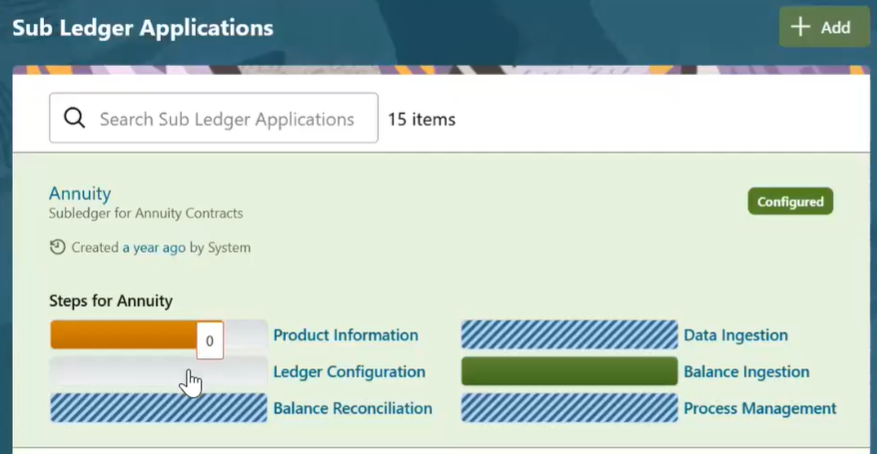
- Click the bar next to Ledger Configuration
to launch the configuration UI. At this point, the ledger
configuration is shown as 0%.
Figure 10-3 Subledger Configuration for Annuity_ step 1

- On the Ledger Configuration UI, select or
enter values for the attributes for the first combination.
Figure 10-4 Subledger Configuration for Annuity_step 2

- Click Add Combination and enter values for
attributes for the second combination.
You can select a maximum of 30 attributes per combination and an unlimited number of combinations.
Figure 10-5 Subledger Configuration for Annuity_step 3

- Repeat step 3 for as many combinations as you require.
- Click Save. Validations are performed and the added combinations are saved.
- In the Sub Ledger Applications summary page, Ledger Configuration status is shown as 50% for this SLA.
- If you are a member of the AFCSAPVRGRP, you can click Apply to apply the changes. While the changes are being applied, ledger configuration status is shown as 75%.
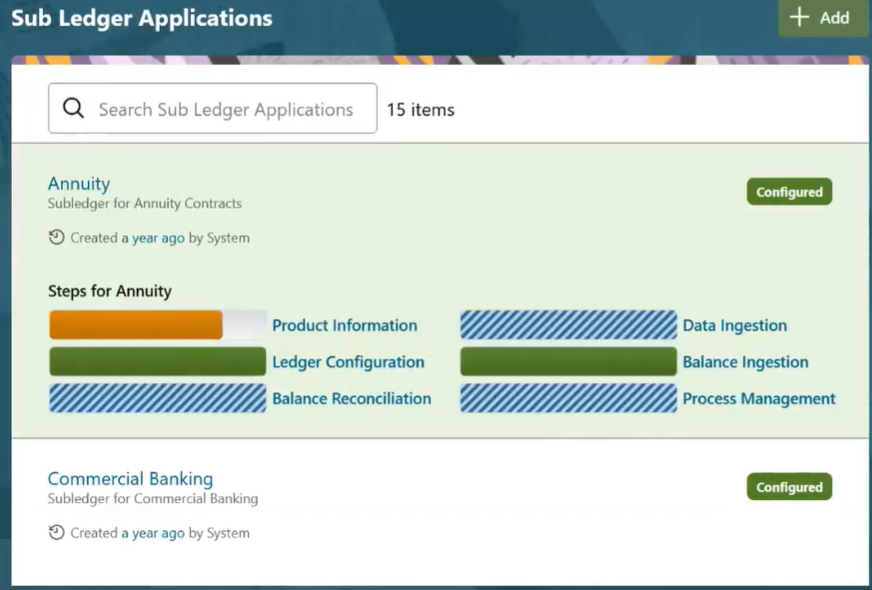
- After all the changes are applied, the ledger configuration status
shows 100%.
Figure 10-6 Subledger Configuration for Annuity_step 4
