Deploy the EAR/WAR Files on WebSphere
Deploying the EAR/WAR files on WebSphere.
To deploy the Infrastructure application in WebSphere:
- Navigate to the
/<Websphere_Installation_ Directory>/
                        IBM/WebSphere/AppServer/profiles/<Profile_Name>/bin/
directory - Start the WebSphere profile by executing:
./startServer.sh
                        server1
. - Open the URL
http://<ipaddress>:<Administrative Console
                        Port>/ibm/console
(https, if SSL is enabled) in a browser to access the Login window.Figure 8-9 WebSphere Login Window
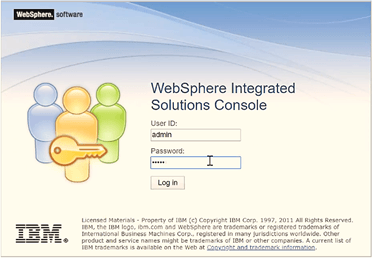
- Enter the user credentials with administrator rights and click Log in.
- From the navigation, select Applications, and then
select New Application to access the New
Application window.
Figure 8-10 New Application

- Click New Enterprise Application to display the
Preparing for the application installation
window.
Figure 8-11 Preparing for the application installation
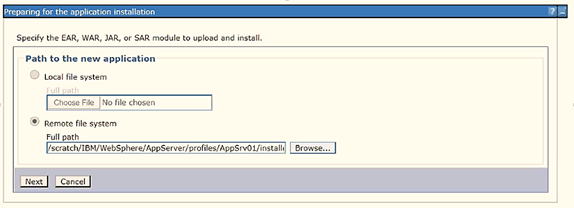
- Select the Remote File System and click Browse.
- Select the EAR file (generated for OFSAAI) to upload and install. Click
Next.
Figure 8-12 Installation Options

- Select the Fast Path option and click
Next to display the Install New
Application window.
Figure 8-13 Install New Application
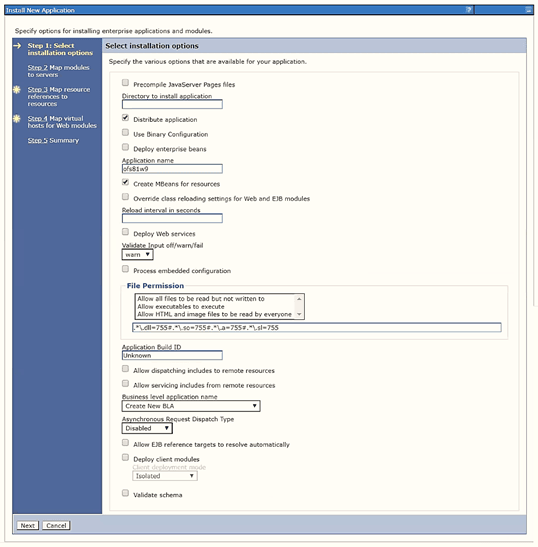
- Enter the required information and click Next to display
the Map Modules to the Servers window.
Figure 8-14 Map Modules to Servers
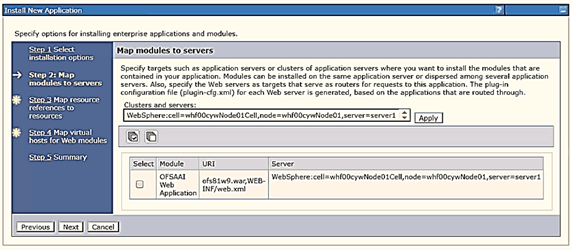
- Select the Web Application and click Next to display the
Map Resource References to Resources window.
Figure 8-15 Map Resource References to Resources
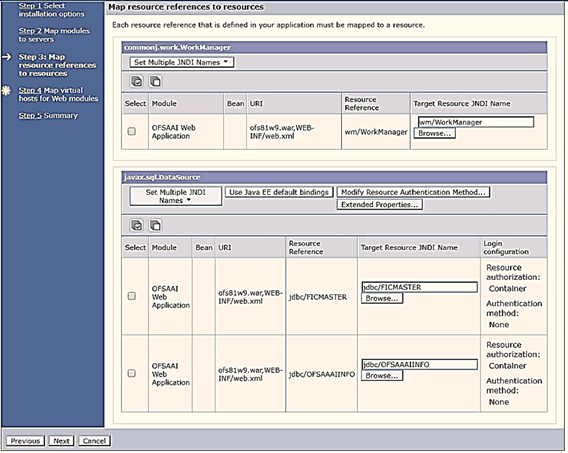
- Map each resource defined in the application to a resource JNDI name defined earlier.
- Click Modify Resource Authentication Method and specify
the authentication method created earlier.
Note:
Specify "config" forFICMASTERresource or "atomic" for the atomic resource as the authentication method. - Select OFSAAI Web Application and click
Next to display the Map Virtual hosts for
Web Modules window.
Figure 8-16 Map Virtual host for Web Modules
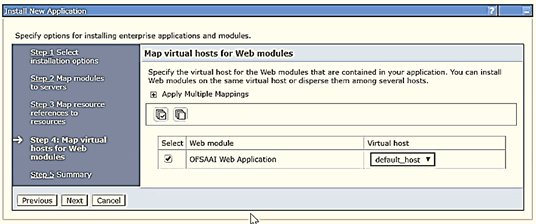
- Select OFSAAI Web Application and click
Next to display the Summary
window.
Figure 8-17 Summary

- Click Finish to deploy the Infrastructure Application on WebSphere.
- Click Save to save the master file configuration. The details are displayed in the Master File Configuration window.