25.1 Creating Data Creation Process
To create a new Data Creation process, perform the following steps:
- Navigate to the Data Creation Process Summary Page.
- Click Add . The Create Data Creation
Process page is displayed.
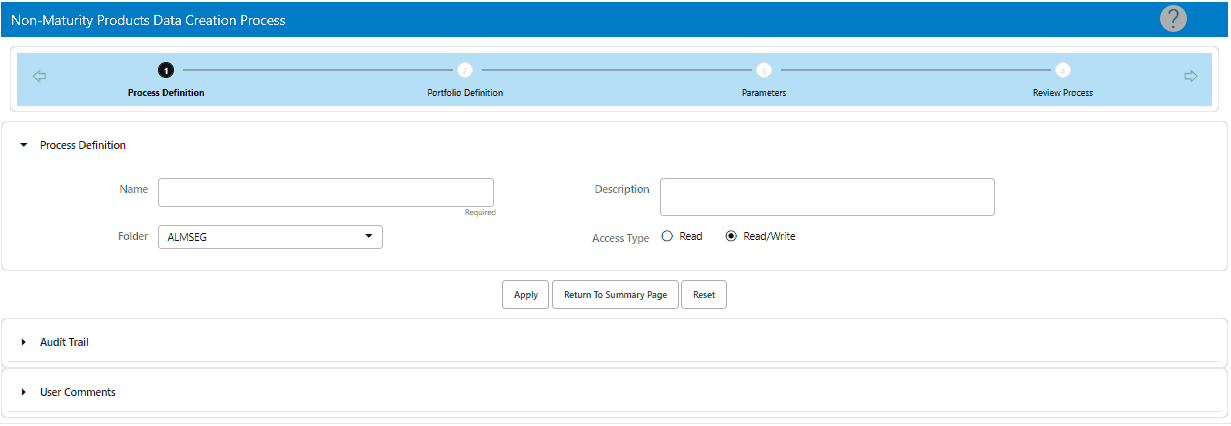
Figure 25-1 Create Data Creation Process

- Enter the details shown in the following table.
Table 25-3 List of process details used for Creating Data Creation Process
Parameter Description Name Enter the name of the Data Creation Process Rule. The Data Creation Process Name should be unique. Any special characters are not applicable. Description Enter the description of the Data Creation Process Rule. The maximum limit of this field is 300 characters. You can enter special characters in this field. Folder Select the Folder where the Data Creation Process needs to be saved. Access Type Select the Access Type as Read-Only or Read/Write. - Click Apply to navigate to the
Product Selection section.
Figure 25-2 Product Selection Section

- Enter the Portfolio Selection details shown in the following table.
Table 25-4 List of Product Selection details used for Creating Data Creation Process
Parameter Description Hierarchy (Folder) Select the Folder from which you want to pick the Hierarchy. Product Hierarchy You can specify some processing parameters at product-currency combination. Hierarchies in selected Folder will be listed and you can select one from the available list of hierarchies. Product Select the product. This field shows the Product list based on any node/leaf or any combination. Currency Select the Currency. The Currency drop-down displays the list of active currencies. You can select multiple currencies as well. - Click Apply to navigate to the
Parameters section.
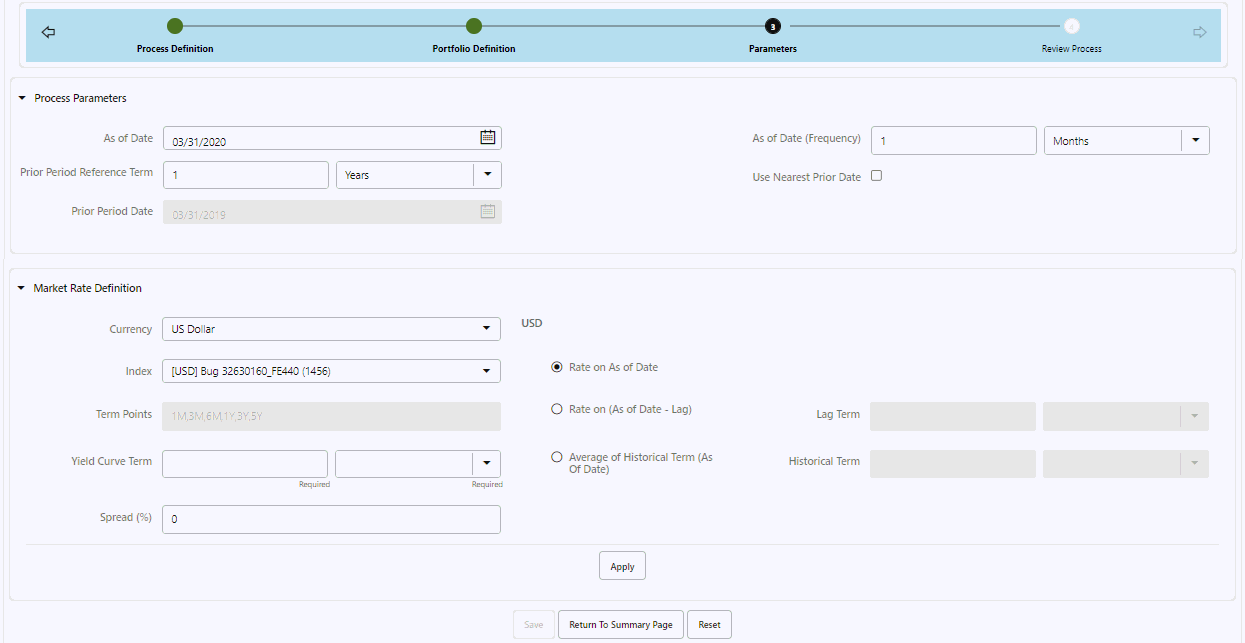
Figure 25-3 Parameters Section.

- Enter the Parameters as shown in the following table.
Table 25-5 List of Parameters details used for Creating Data Creation Process
Parameter Description As of Date As of Date and prior period reference term allows you to define the period. By default, As of Date is picked from Application Preferences. Here, you can change this date if required. Prior Period Reference Term As per the prior period reference term (default value 1 Year), the prior period date is auto calculated. Prior Period Date Displays the Prior Period Date. You cannot edit this field as it is calculated as per the Prior Period Reference Term. As of Date ( Frequency) The Default value of this field is 1 month. As of Date (Frequency) is provided to select any value in days, months, or years as 1 Day, 3 Months, 1 Year, and so on. So, starting prior period date, data snaps will be taken at defined snap frequency till As of Date.
For each date, EOD balance (CUR_PAR_BAL) for the account on Data Snap Date, Account Origination Date (which will be required to calculate account age/vintage at each Data Snap Date), and Deposit Rate (CUR_NET_RATE) will be captured, along with market rate as per the index selected.
Use Nearest Prior Date
If Use Nearest Prior Date checkbox is selected, the system picks the nearest date (current period as of date) as per the last successful Run (default checked). If it is selected, then you cannot edit the prior period reference term field and the Prior Period Date is picked from the last successful Run for the same Data creation process. Market Rate Definition The Market Rate Definition parameters allow you to define the Market Rate Parameters such as, Index, Currency, Term Points, Yield Curve Term, Spread, and IRC Effective Date.
- Currency: This will list down all the currencies for which portfolio is defined in portfolio definition UI.
- Index: As per the selected currency from the drop-down; all the interest rate curves defined will be given for selection. User can choose one from which market rate will be picked.
- Term Points: Shows the term points.
- Yield Curve Term: As per the selected interest rate curve, user can choose one term point, rate corresponding to the selected term point will be picked. For intermediate term points interpolation is done.
- Spread: Default value is 0. This field accepts all positive, negative integers/decimals in the range of -100% to +100%), you can enter the spread in percentage format. Enter the spread in percentage on top of rate picked from selected IRC and term point.
- IRC Effective Date : Rates will
be picked as per the IRC effective date selected on one
of following options:
- Rate on As of Date: Effective Date is same as As of Date
- Rate on (As of Date- Lag): Effective date is As of Date minus some lag. If you select Rate on (As of Date- Lag), then Lag Term field will be enabled to enter term and tenor.
- Average of Historical Term (As Of Date): Effective date is not just one date, but a period starting As of Date; over which arithmetic average will be taken to smooth out any interest rate fluctuations If you select Average of Historical Term (As Of Date), then Historical Term field will be enabled to enter term and tenor.
- Click Apply and navigate to the Review Proces Section. Here, you can review all the entered details in the preceding stages and edit them if required.
- Verify the changes and click Apply.