5.2.2.1.11 Excel Import or Export
To aid in data entry, use the Excel Import or Export functionality to add or edit rate data to historical rates. This is an optional step.
To export the data, follow these steps:
- Excel Export:
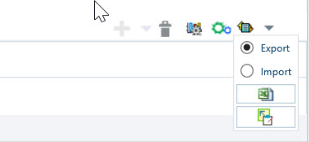
- On the Interest Rates toolbar, click the Excel icon.
- Click Export to export data for the chosen selected effective
date range. Within the same block, select Export to Excel,
which launches the Excel application and displays the data window including
headers.
Figure 5-6 Export and Import options for Historical Rates data

- Excel Import:
You can add rows to the pane in the same format. After complete data is entered (or existing data is edited), copy the range of the pane you want to append and go back to the Historical Rates pane. In the same block, click the Import. The data copied from excel will appear in the Historical Rates pane.
- If appending data that pre-existed for the same effective date, the import will overwrite existing data.
- In some cases, some fields will be output to the pane that is not editable, such as bucket start and end dates (when defining forecast assumptions). Add or edit data in the columns that would be editable only in the UI itself.
Data Input Helper:
Use the Data Input Helper feature to copy from a row where you have already defined the interest rate definition or apply a fixed value down the page. This is an optional step. To use data input helper, follow these steps:
- Select the check box next to the rows that you want to work with or use the Select All option by selecting the check box on the header row.
- Select Data Input Helper.
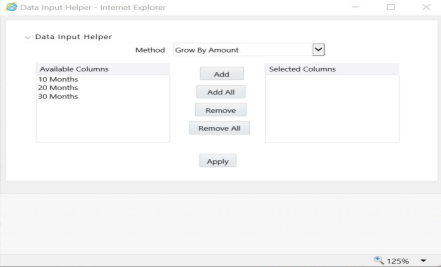
- From the Data Input Helper window, select method - Grow by Amount or some other appropriate method.
- Select the term points from the Available Columns list and
click Add or Add All to move the data
to the Selected Columns list.
Figure 5-7 Data Input Helper window

Based on the selected method, the list of Available Columns will vary. If Method is selected as Increment By Months, Increment By Days, or Increment By Years, then only the Effective Date option is displayed in the Available Columns list.
- Click Apply to modify the Start date and enter the Incremental Value.