Applying Filter Condition on Run Pipeline

This section details how to apply filter conditions at the Run Pipeline level. You can apply filter conditions on the Sub Pipeline level also.
To apply a filter on a Run Pipeline:
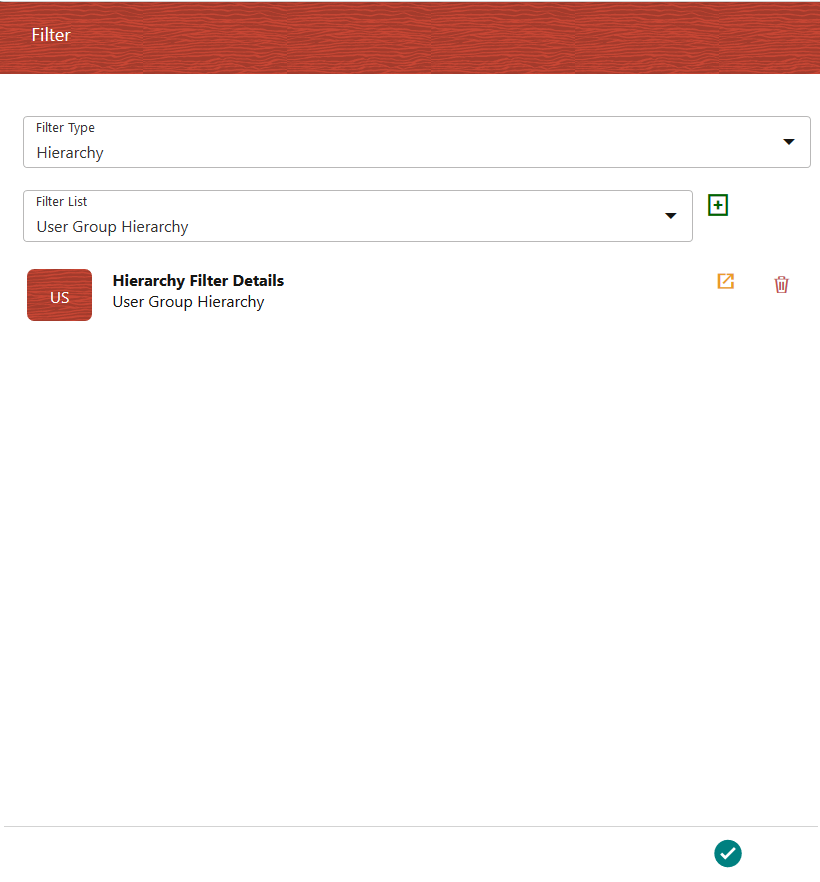
  1. From the Process Modeller Summary window, click the submenu icon corresponding to the Run Pipeline for which you want to apply filter condition and click Filter. The Filter Details window is displayed.

    Figure 5-6 Filter Details window


    The image displays the Filter Details window.

  2. Select the Filter Type as Hierarchy from the drop-down list. Currently, only Hierarchy Filter is supported.
  3. Select the Filter from the Filter List drop-down list. This list displays all Business Hierarchies defined in the information domain.
  4. Click Add Filter. The Filter is displayed under the Hierarchy Filter Details window.
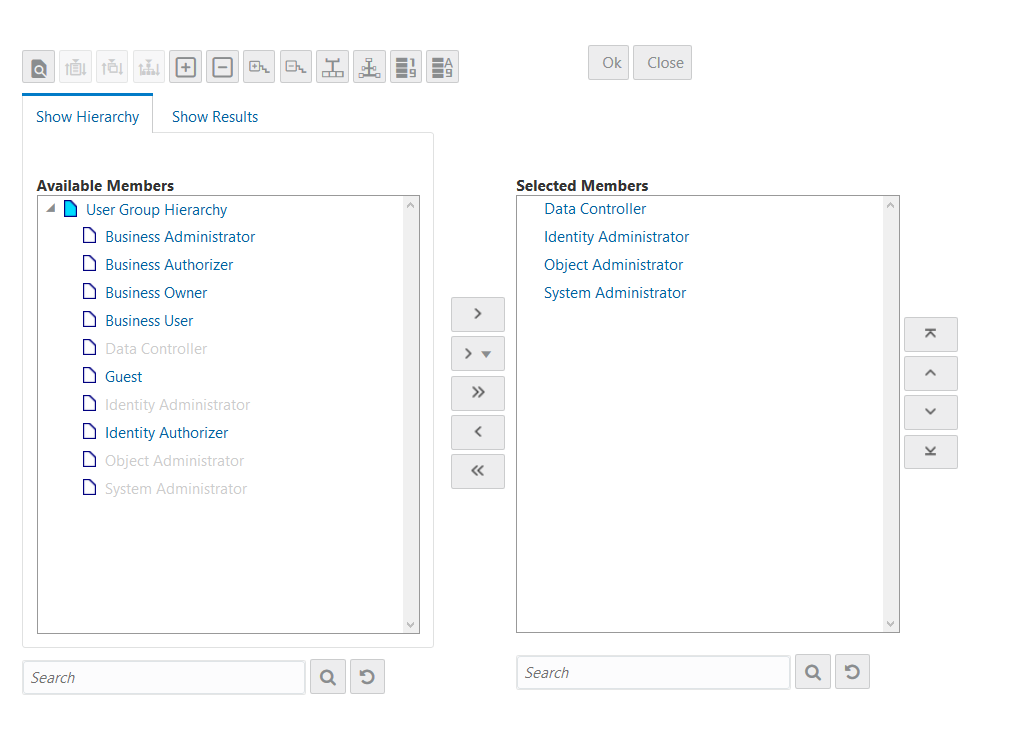
  5. Click to view the Hierarchy Browser window and select the hierarchy members.

    Figure 5-7 Hierarchy Browser window


    This image displays the Hierarchy Browser window.

  6. Select a member/node and click to select the same. Click to select the member as Self, Self-Children, Parent, Siblings, and Children.
    For more information, see Hierarchical Member Selection Modes.

    In the Hierarchy Browser window you can also:

    • Click sort icon to sort members based on the path.
    • Click sort icon ascending or descending to sort hierarchy (top to bottom).
    • Click sort icon level to sort based on level.
    • Click expand or collapse icon to expand or collapse the members under a node
    • Click expand or collapse icon of ranch to expand a branch or collapse the selected branch
    • Click to focus only on the selected branch. The Available Values pane shows the members of the selected branch only. Click to go back to normal view
    • Click numeric icon to display member's numeric codes in the right. The icon changes to numeric.
    • Click numeric icon to display member's numeric codes on the left. The icon changes to numeric icon sorted to left
    • Click numeric icon to show only member names. This is the default view. The icon changes to member view icon with numbers.
    • Click member icon to display member's alphanumeric codes in the right. The icon changes to member view towards the right.
    • Click member icon to display member's alphanumeric codes on the left. The icon changes to number icon.
    • Click member icon to display only member names. This is the default view. The icon changes to members on left icon.
    • Select a member and click the top icon or to bottom icon re-arrange the members in the Selected Values pane.
    • Select a member and click the move to top icon to move it to the top or click the move to bottom icon to move it to the bottom.
    • Click the search icon to launch the Search panel. Here you can search based on Dimension Member Numeric Code, Dimension Member Name, or Dimension Member Alphanumeric Code. You can also search in the grid based on member name using the Search field.
  7. Click OK to save.
  8. 8. Click Delete to remove any selected filters.