Creating a Business Pipeline

Click the Add icon in the Process Modeller Summary window.
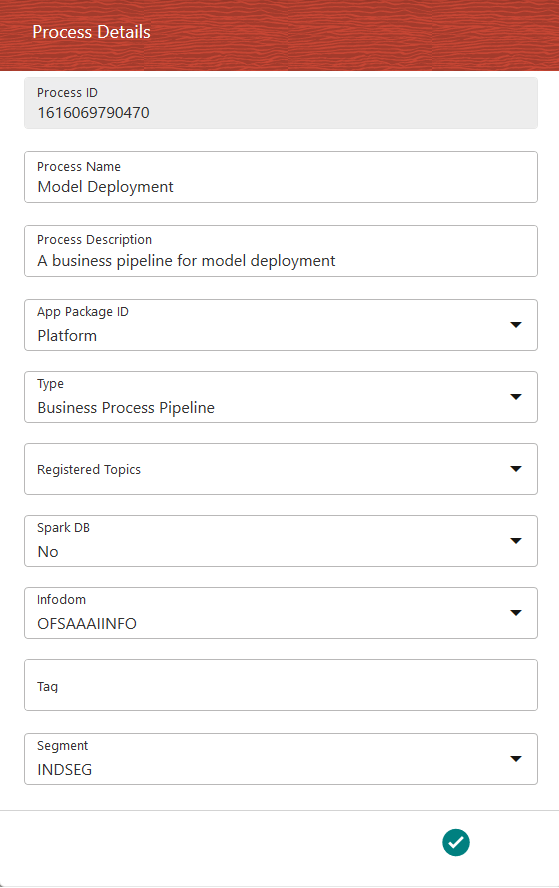
Figure 5-2 Process Details window to create a Business Pipeline

This image displays the Process Details window to create a Business Pipeline.

  1. Enter a unique Process Name and a description. The system creates the unique Process ID.
  2. Select the appropriate app package in which you want to create the process. For more information, see Application Package.
  3. Select Business Process Pipeline from the Type drop-down list.
  4. Select the information domain in which you want to create the Business Pipeline, from the Infodom drop-down list. The list displays all the Infodoms that are mapped to the applications configured in your OFSAA instance.
  5. Click the Accept icon to save it. The Process Flow canvas is displayed.

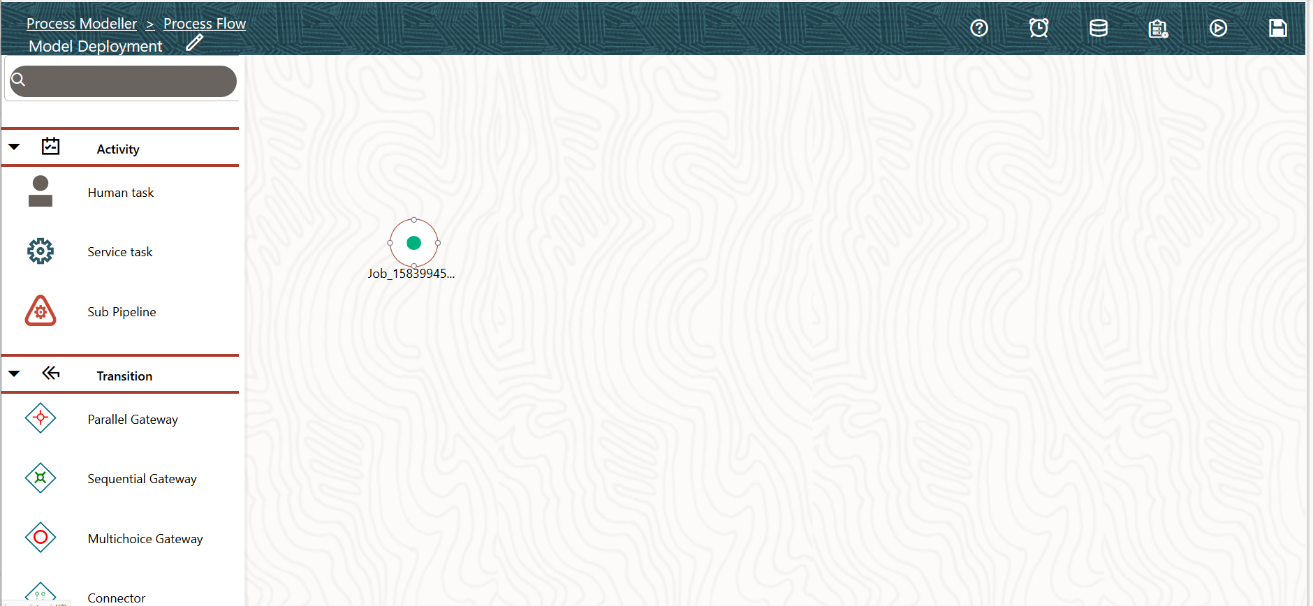
    Figure 5-3 Process Flow Canvas


    This image displays a Process Flow Canvas.

  6. By default, the START icon from the toolbar appears. This START activity indicates the beginning of the Process.
  7. Design your Process with various components available in the Process Flow tab. For more information on each component, see the Components for Designing Your Process Flow section.