Adding a Management Ledger
To add a new Management Ledger, perform the following steps:
- Navigate to the Summary screen, and click the Add Management
Ledger tile to display the Add Management Ledger screen.
Figure 4-8 Add Management Ledger Screen
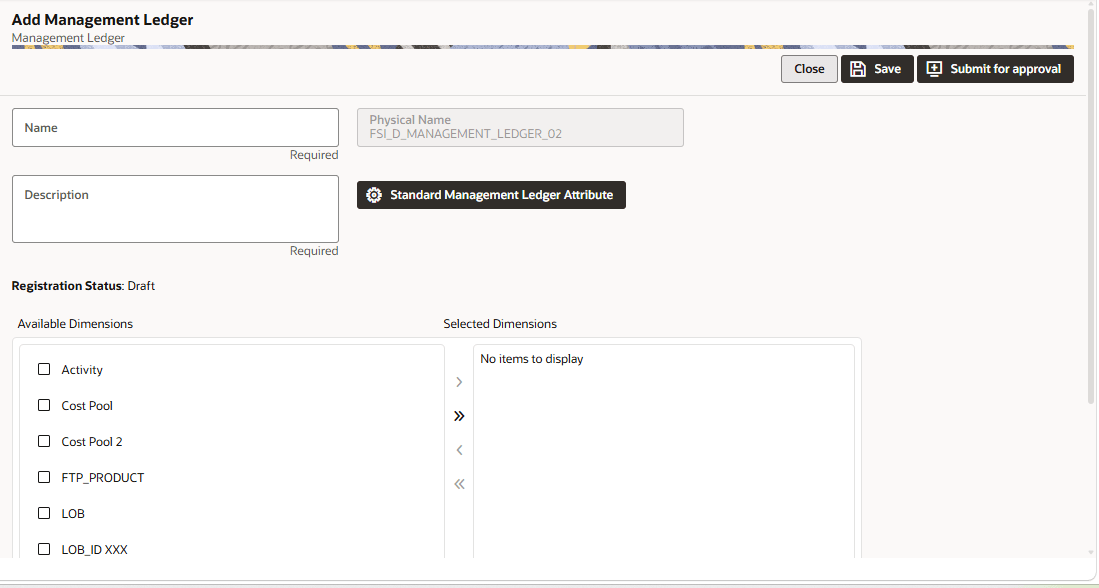
The Add Management Ledger screen is displayed. The Registration Status is set to Draft.
- Enter the following details:
- Name: This is a mandatory field. Specify the logical name of the Management Ledger.
- Physical Name: System-generated field. This value is displayed automatically and cannot be edited.
- Description: This is a mandatory field. Specify the description of the Management Ledger.
- Registration Status: Displays the current status of the registration (for example, Draft) for reference. This field is read-only and updates automatically as the registration moves through the approval workflow.
- To configure standard ledger attributes, click Standard Management Ledger Attribute.
- In the Available Dimensions section, select the required dimensions.
- Use the move buttons to transfer dimensions between the lists:
- > moves the selected dimension to Selected Dimensions.
- >> moves all available dimensions to Selected Dimensions.
- < removes the selected dimension from Selected Dimensions.
- << removes all selected dimensions.
- Click Save to save the details as a Draft. The Management Ledger is displayed on the Summary screen, and you can return to edit the Name, Description, and Selected Dimensions later.
- Click Submit for Approval to send the column details for
approval.The details are sent to the Supervisor or Approver for approval. The newly added Management Ledger is displayed on the summary screen in a new tile.
Note:
- You can delete a registration when it is in Draft state.
- If the selected Management Ledger table is in Approved state, then the Actions Menu displays only View, Edit, and Submit for Approval actions.