Create Delete Policy
This section provides the details on deleting the data from selected tables based on user defined criteria.
To create Delete Policy, follow these steps:
- Navigate to New Policy page.
- Follow the steps mentioned in below sections:
- Step 1: Policy Definition
- Step 2: Condition
- Step 3: Preview and Submit
Step 1: Policy Definition section
- From Policy Details tab, click
Start. The Policy Definition
page is displayed.
Figure 4-41 Policy Definition section
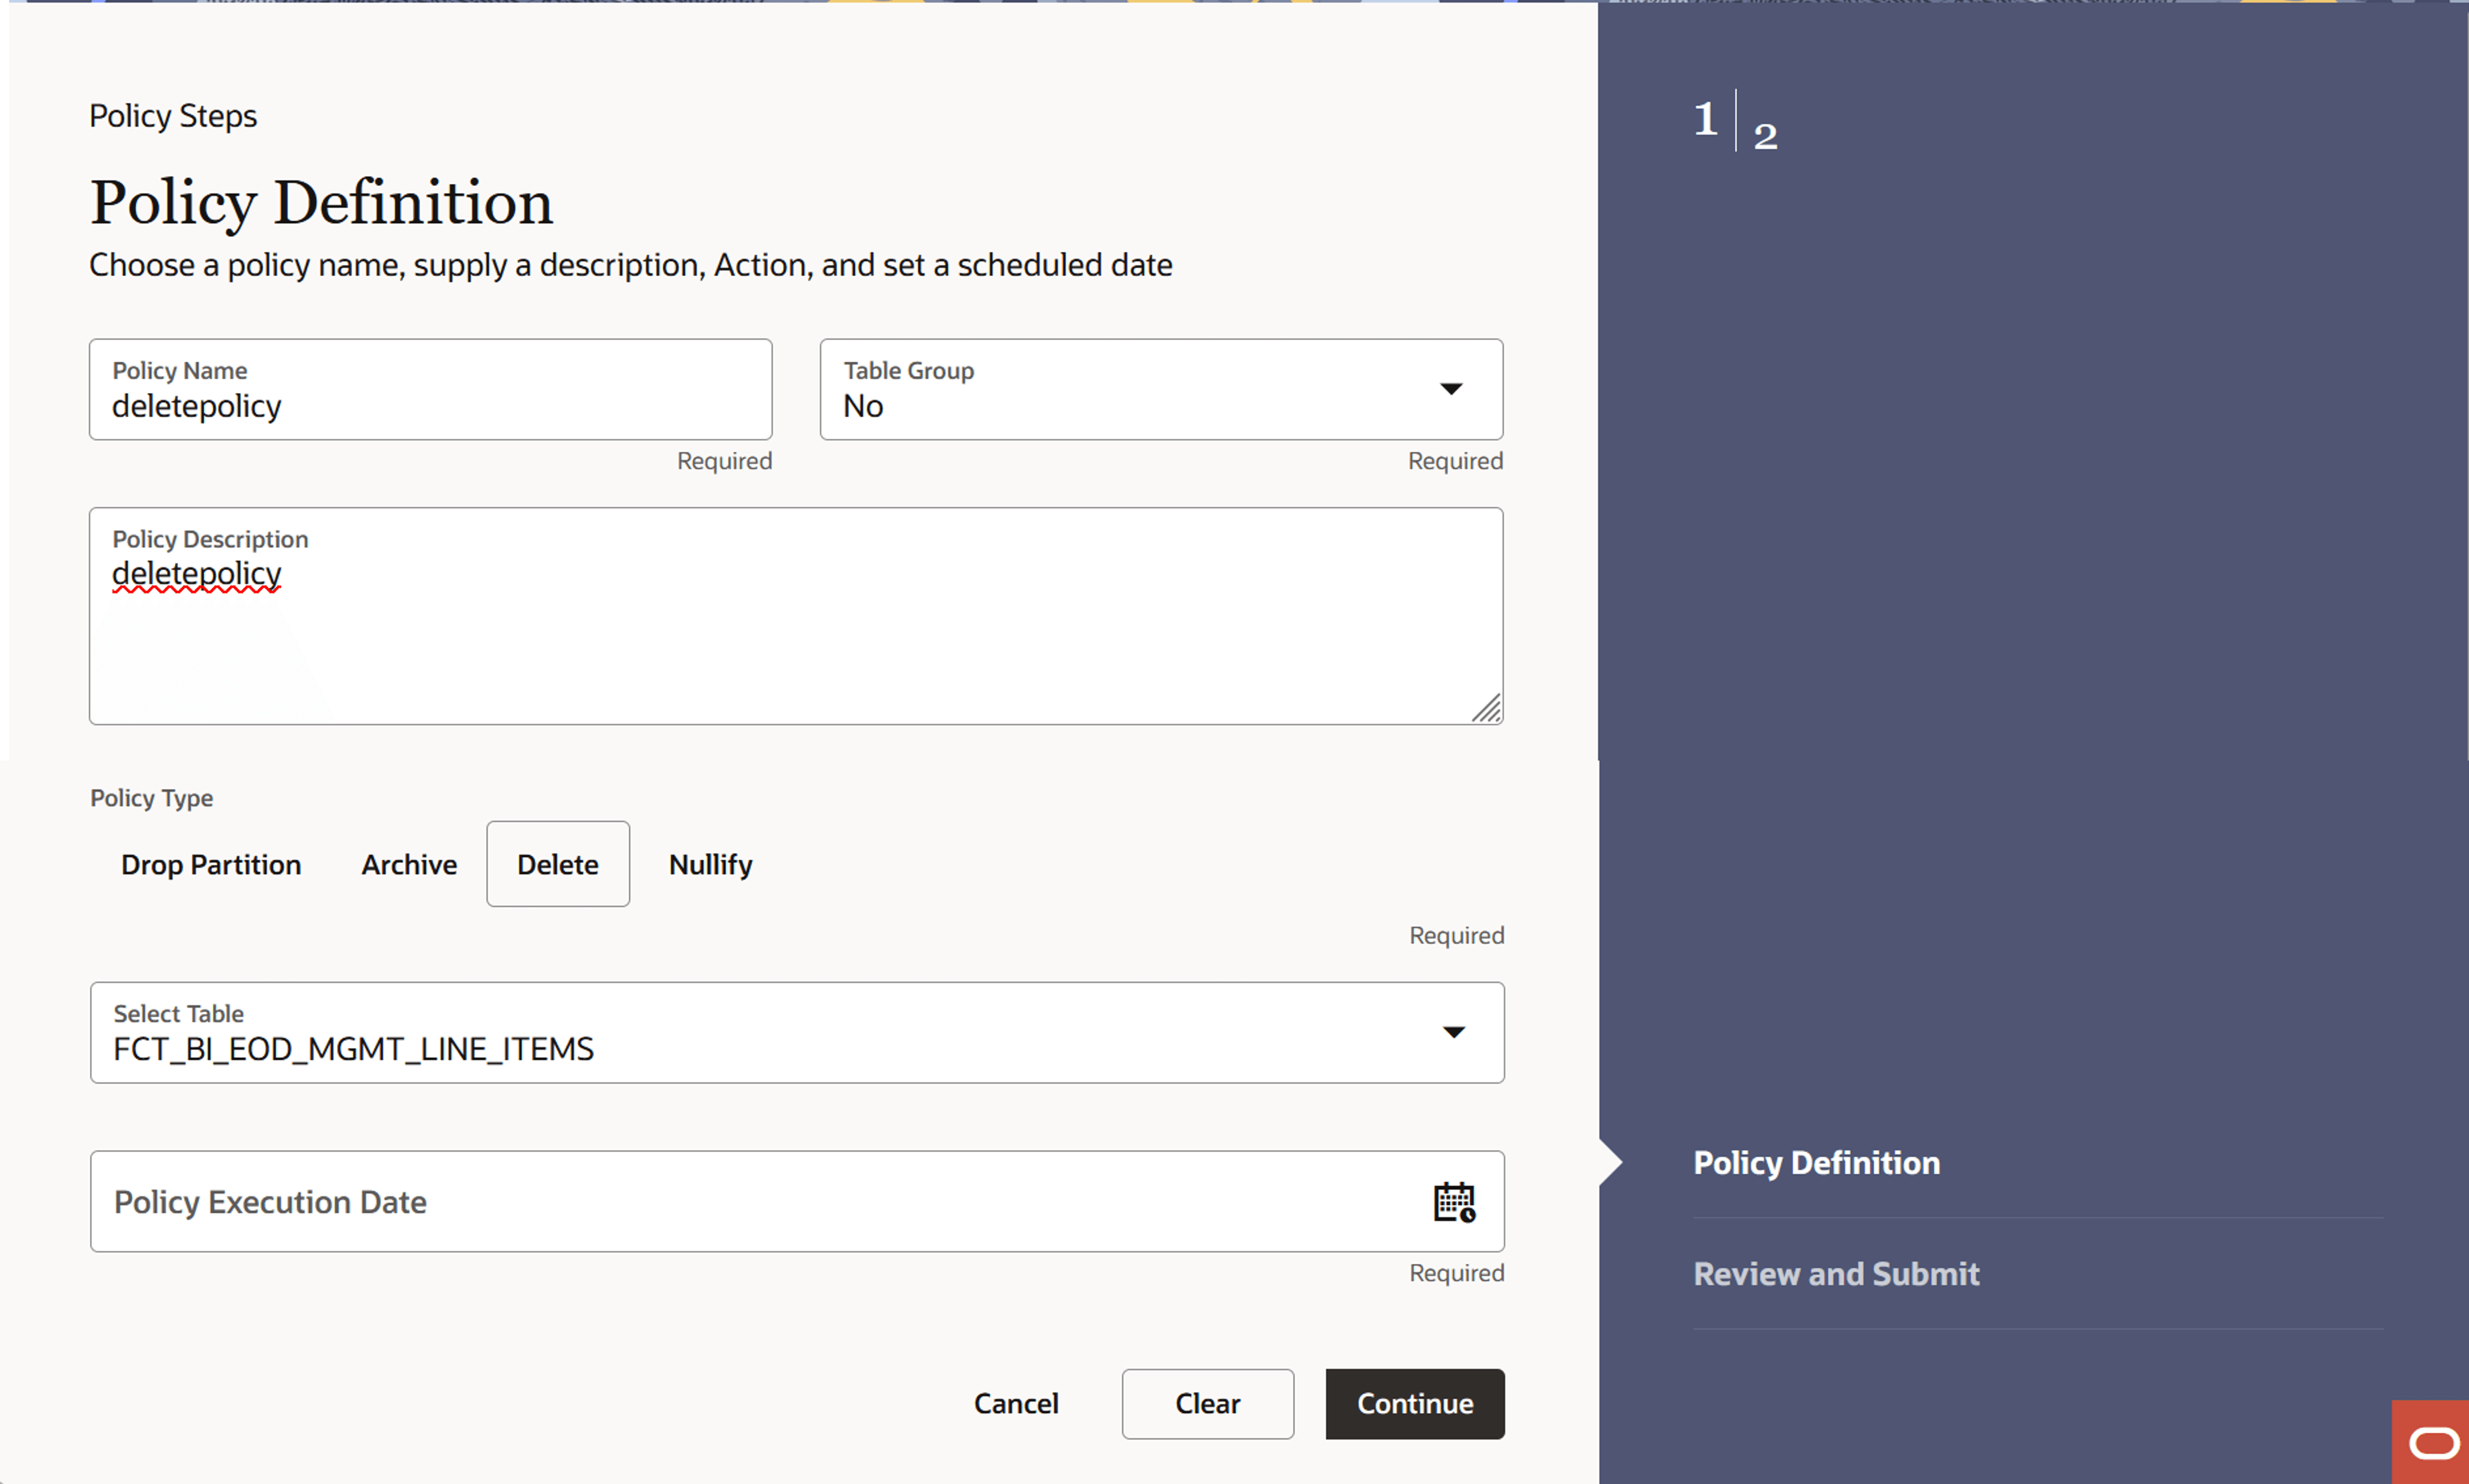
- Enter the following details:
- Name: Name of Policy
- Description: Description of Policy
- Table Group: If this option is selected as No, then you can select Policy Type as Drop Partition.
- Type: Type of Policy as Delete
- Policy Execution Date: Select the execution date and time of policy using calendar
Step 2: Conditions
This section allows you to define the conditions(s) to Delete the table.
- Navigate to the Conditions section.
Figure 4-42 Conditions section
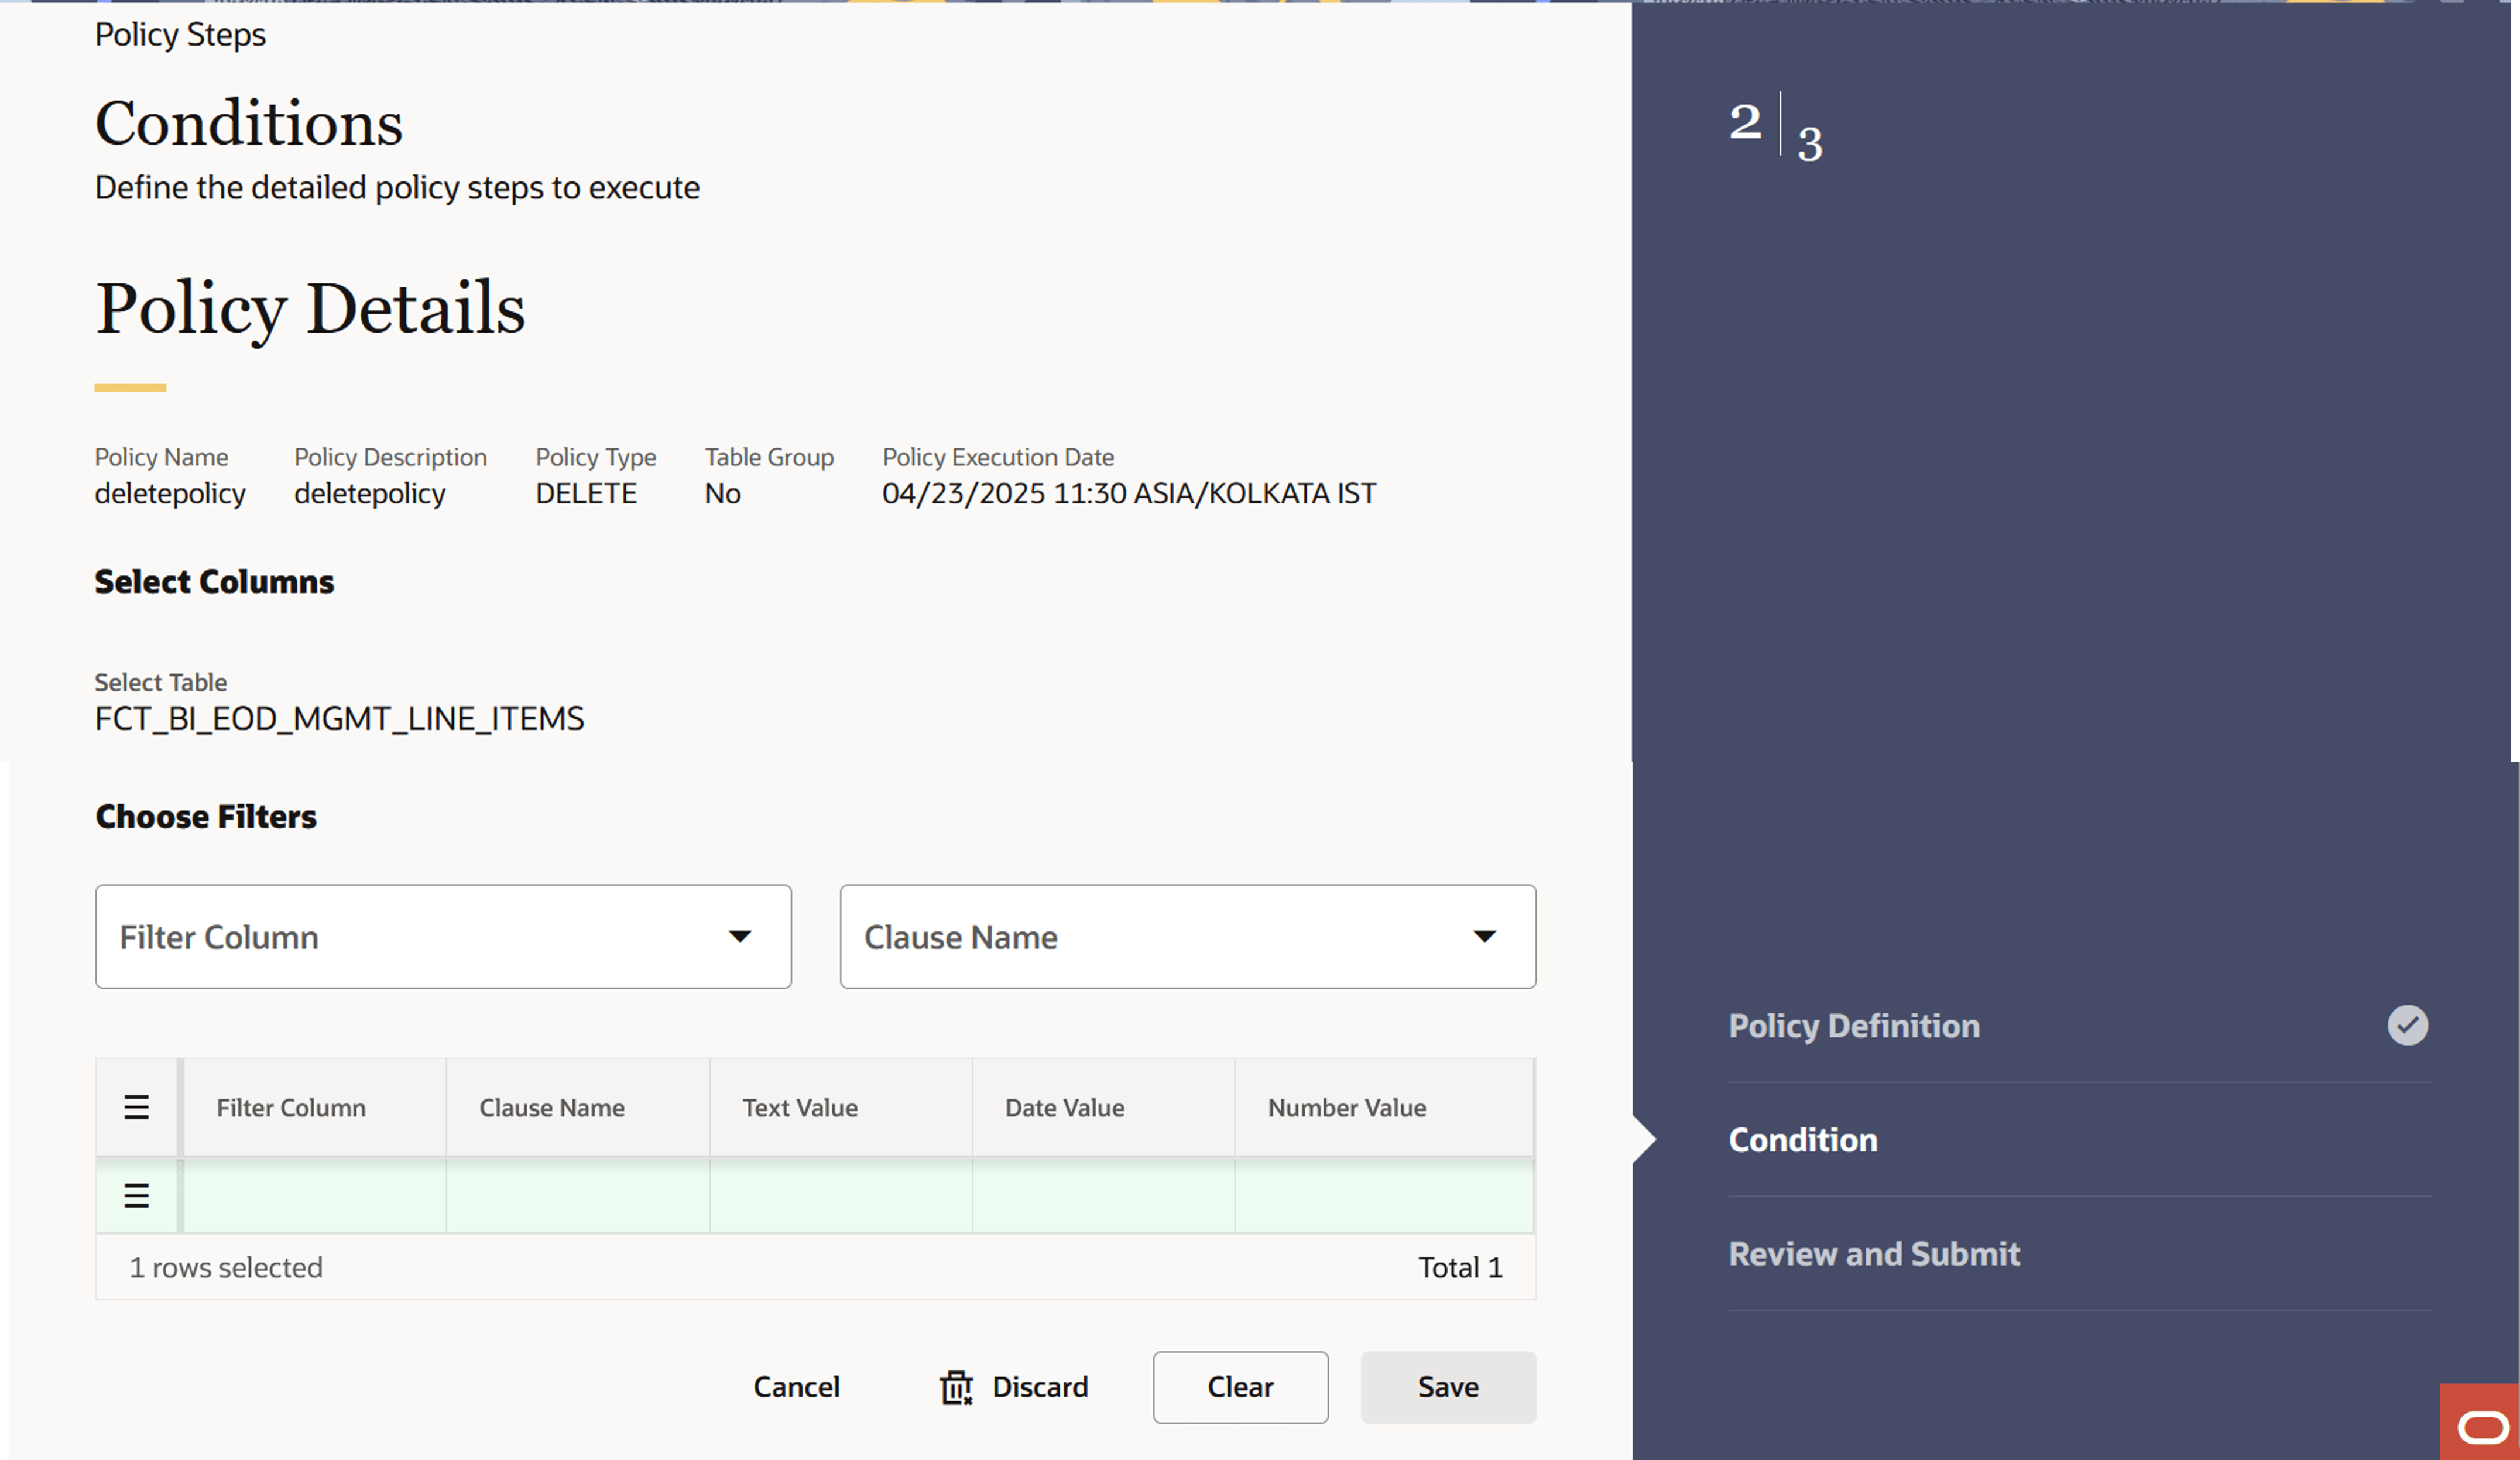
- Select the column(s) using Filter Column.
- Select operator from Clause Name drop-down. The list of operators
displays based on the selected Column Name.
Note:
You must select at least one condition to avoid the full table Delete. Use AND if you want to use multiple columns. You can select columns from pre-defined list. Don’t use wlid card characters. Supported operators are: >, <, <=, and =>.
- Enter condition value for selected column.
For example, If you have selected Column as Account Number, then select Equals operator from Clause Name drop-down, and enter alphanumeric value in Value field.
Click Row Actions icon to view single row, add a new row, create duplicate row, delete row, refresh row, or revert changes.
To add more conditions, define the condition and click Save.
- Click Continue.
Step 3: Preview and Submit section
- Navigate to Preview and Submit section. Review the policy details.
Figure 4-43 Preview and Submit section
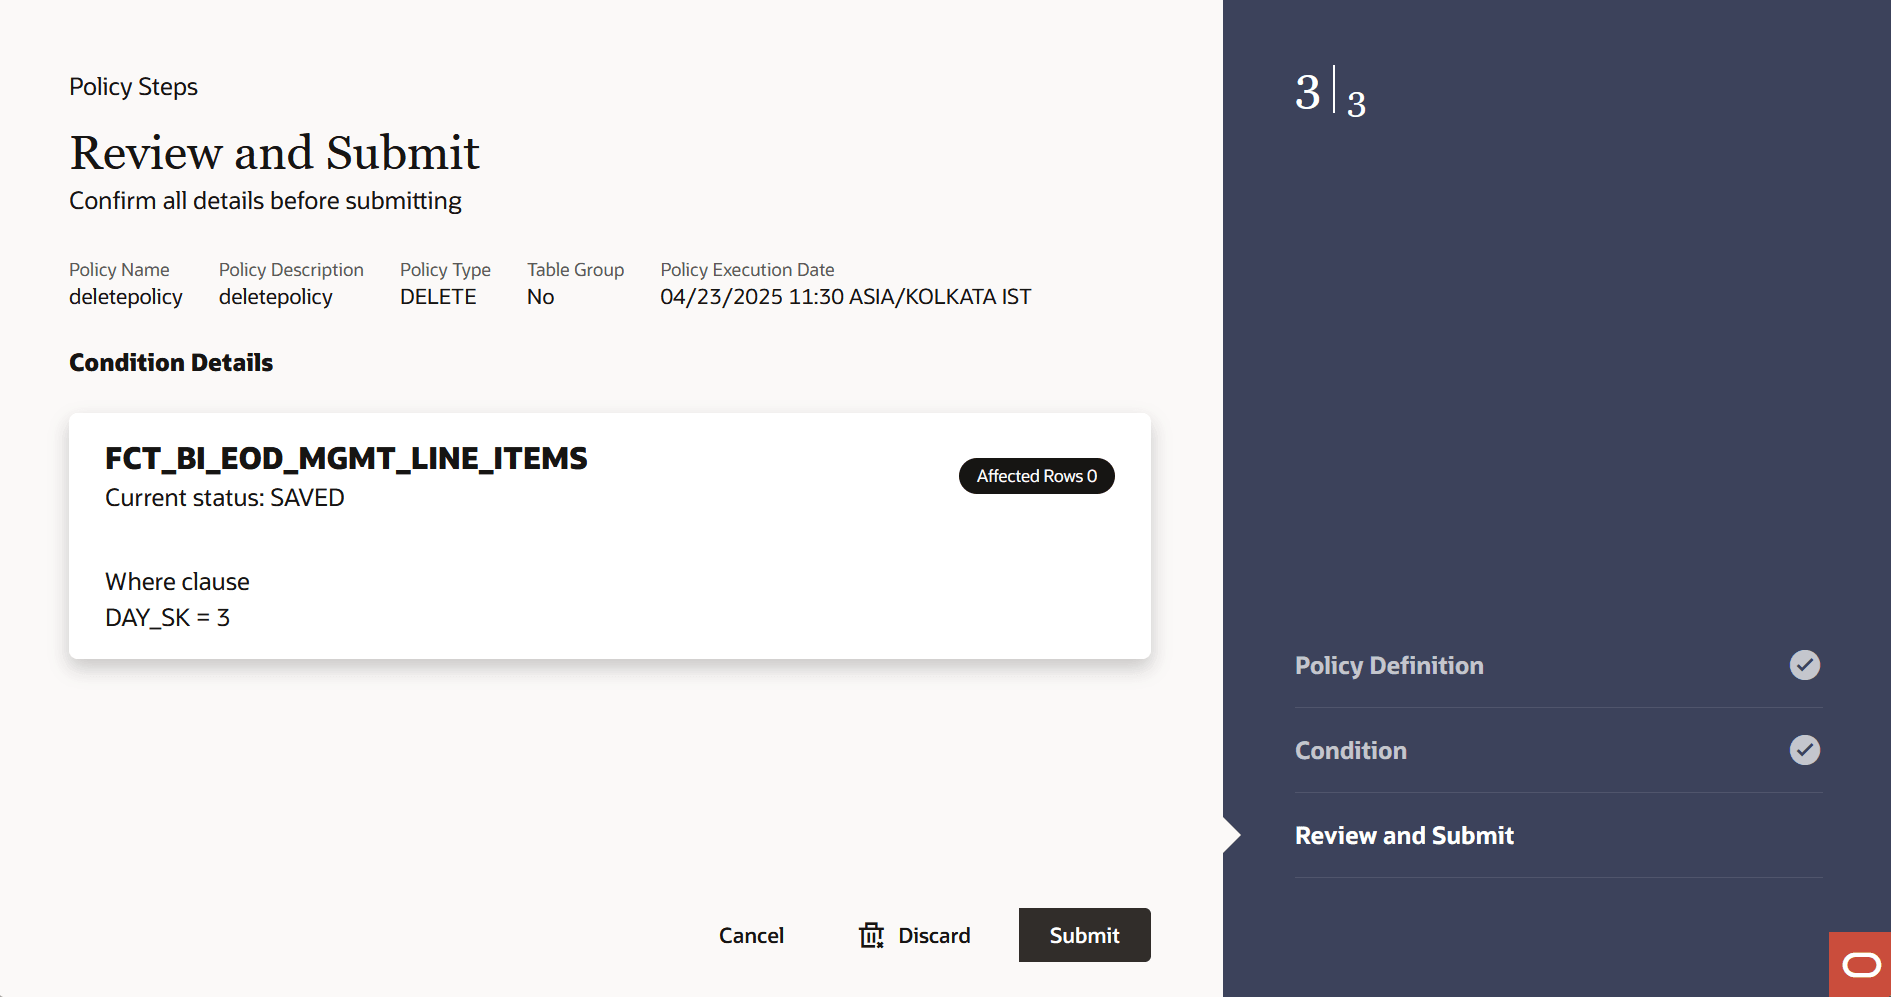
- For a Delete policy, the Preview and Submit screen displays the number of rows that will be affected (deleted) based on the conditions defined in Step 2, so you can verify the impact before submitting.
- Click Submit to create the policy. The created policy will be displayed on Data Housekeeping Summary page.