Adding a Checkpoint to a Rule Pattern
When defining checkpoints in a rule pattern through the Edit Rule dialog box, follow the same process as for adding sub-rules with the following exceptions:
- Checkpoints search for primary rule and sub-rule bindings. They do not search from their own datasets as they do not have a dataset.
- Checkpoints do not allow you to add variables or focus attributes when defining checkpoints since all searches are based on the primary and sub-rule constraints.
- Use the Edit Rule dialog box for Checkpoint adding checkpoints to a rule.
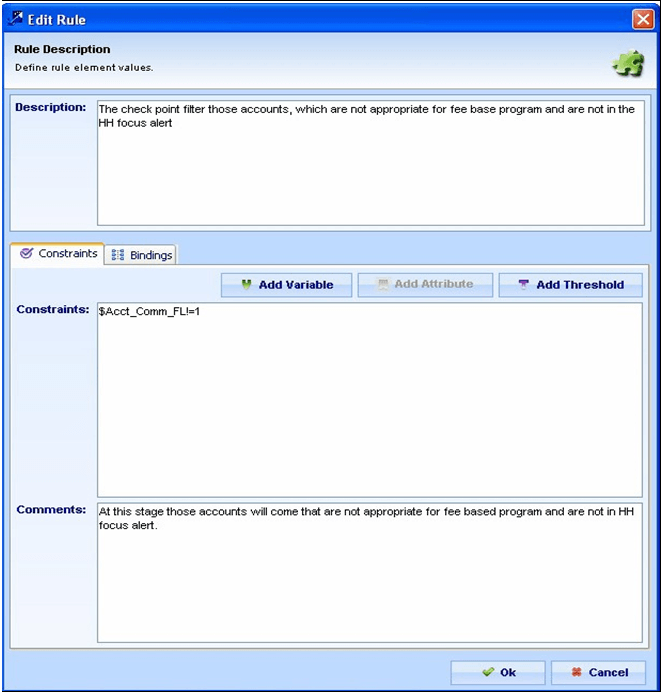
The Edit Rule dialog box for Checkpoint enables you to specify constraints and bindings for any checkpoint that you add to the rule pattern.
Figure 8-10 Edit Rule Dialog Box—Checkpoint

The Edit Rule dialog box for Checkpoint contains the Description field, in which you can specify a description for a checkpoint. The specified value displays in the Pattern Editor area of the Rule Scenario Editor dialog box (Checkpoint [value]).
To add a checkpoint to a rule pattern, follow these steps:
- From the Windows menu of the DataSet Editor, select Rule
Patterns.
The Rule Scenario Editor window displays.
- From the scenario navigation tree area, navigate to the desired pattern element.
- Select the primary rule in the Pattern Editor area of the Rule Scenario
Editor.
The Add Checkpoint button enables.
- Click Add Checkpoint.
The new rule displays as Checkpoint [NO DESCRIPTION] in the Pattern Editor area.
- Double-click the Checkpoint [NO DESCRIPTION] string.
The Edit Rule dialog box for Checkpoint displays showing the Checkpoint you want to name
- Type the description of the checkpoint in the Description field.
- Click Ok.
The Rule Scenario Editor window displays the specified description in the Pattern Editor area.
You are now ready to define constraints and bindings for the added checkpoint. Refer to Adding Constraints to a Checkpoint and Adding Bindings to a Checkpoint, for more information about using these functions.