Reporting Preferences
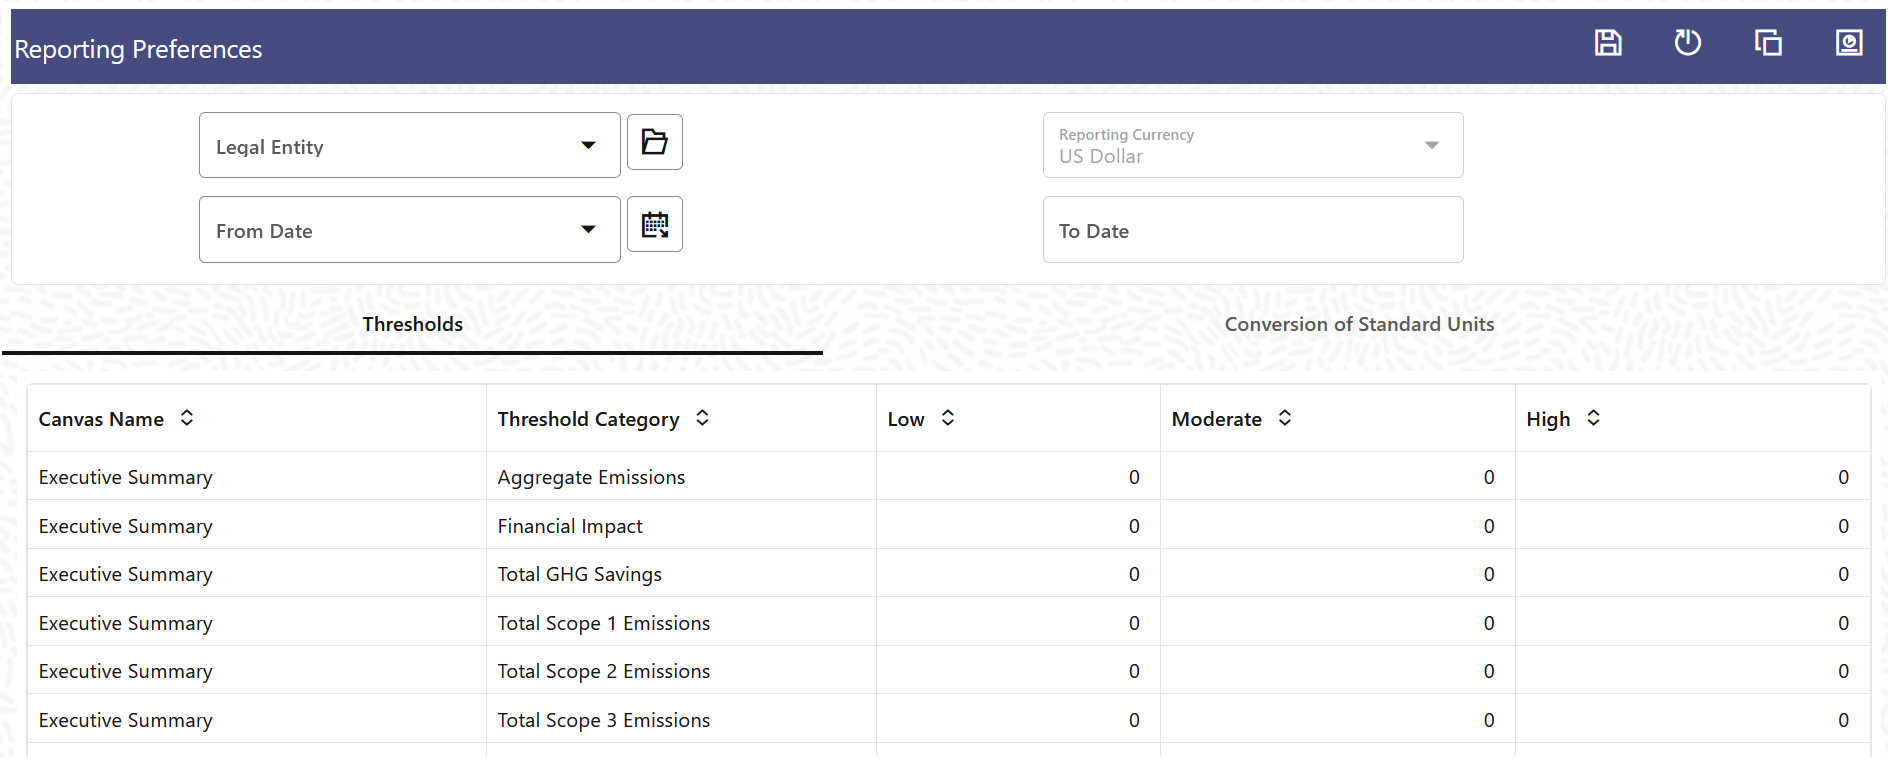
Figure 9-1 The Reporting Preferences Page

- Select a Legal Entity from the Legal Entity drop-down
list:
- Click the folder icon to open the add legal entities window.
- In this window, select the Legal Entity that you want to add to the Legal Entity drop-down list.
- Click Apply.
The selected Legal Entities are added to the Legal Entity list.
The Copy as option allows you to make it applicable to other entities.
- If you want to remove the selected Legal Entity from the Legal Entity drop-down list, then click the folder icon to open the add legal entities window.
- In this window, remove the Legal Entity that you want to
remove from the Legal Entity drop-down list and then click
Apply.
The Legal Entity will not appear in the Legal Entity drop-down list.
- The Reporting Currency field is selected and disabled by default.
- In the From Date drop-down list, select a
date from the drop-down list or select the Calendar icon
and select a date.
The selected date is added to the From Date drop-down list.
Depending on the From Date that was configured, the To Date field is automatically populated.
- In the canvas and threshold category table, set the Low, Moderate and High threshold values for the canvases.
- Click the Conversion of Standard Units tab.
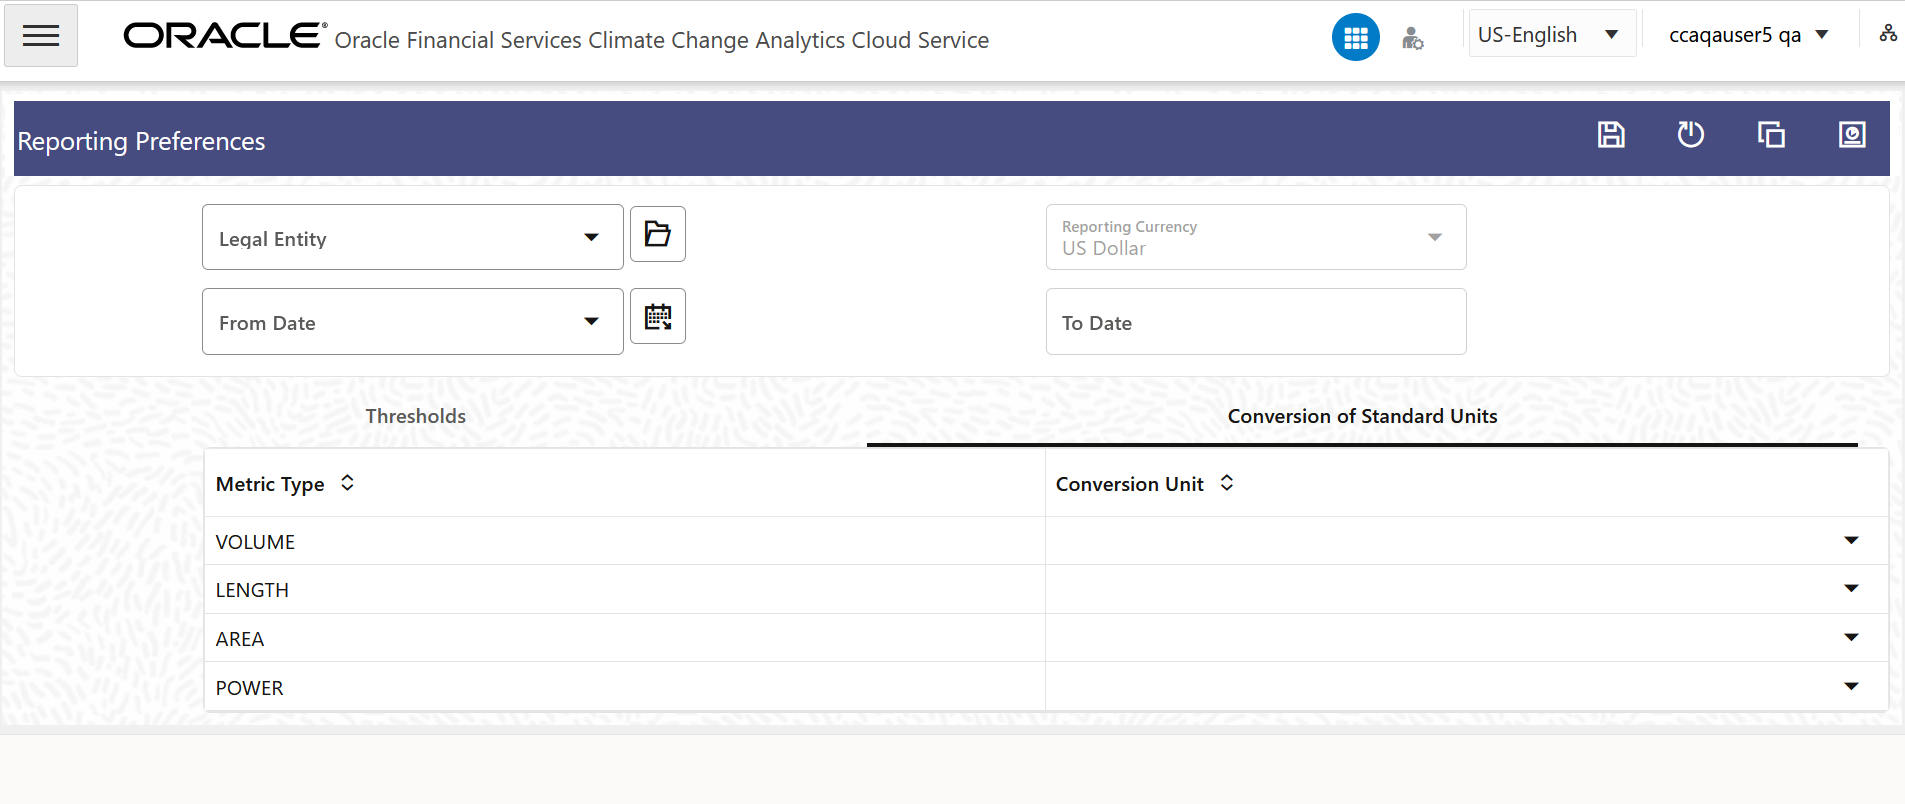
Figure 9-2 The Conversion of Standard Units Tab

- Select a conversion unit for the Volume metric type from
the drop-down list:
- Kiloliters
- Liter
- Gallon
- Select a conversion unit for the Length metric type from
the drop-down list:
- Meters
- Kilometers
- Select a conversion unit for the Area metric type from
the drop-down list:
- Square Kilometer
- Acre
- Select a conversion unit for the Power metric type from
the drop-down list:
- Horsepower
- Watts
- To copy the configurations from one Legal Entity, click the
Copy icon:
- In the pop-up window, select the legal entity, from the Legal Entity drop-down list that you want to copy the configurations to.
- In the adjacent drop-down list, select the Legal Entity that you want to copy the previous Legal Entity's configurations to and click Apply.
- To rest the Threshold configurations to its' default state, click the Reset icon.
- Click the Summary View icon, to view a specific canvas's
configurations and information:
- In the Canvas Name field, select a canvas from the drop-down list.
- In the Property Name field, select a property
name from the drop-down list.
The selected canvas's details appear in a table format.
- Additionally, click the Download icon to download the threshold details in a .csv format.
- Click Save.