Create a Heatmap Definition
The application enables the creation of Heatmap definition. Only an Analyst and Admin user can create a Heatmap definition.
- On the Heatmaps Summary page, click the Add icon to open the Heatmap window.
- Populate the Definition Details tab as
tabulated:
Figure 8-2 Definition Details pane

Table 8-3 Definition Details pane
Field Description Name (Definition details pane) Enter a name for the Heatmap definition. This is a mandatory field.
Description (Definition details pane) Add a description for the definition. This is a mandatory field.
Auto Approve Select this check box to auto-approve the definition. When this checkbox is selected, the definition is auto-approved when the definition is saved.
This check box is enabled only for users who have Approver User rights.
- Populate the Basic Settings pane as
tabulated:
Figure 8-3 Basic Settings pane

Table 8-4 Basic Settings pane
Field Description Customer Category This field contains two customer categories; Corporate and Retail. The Corporate customer type is selected by default. Customer Type This field is used to define the type of customer. The customer must be defined by the user. Select a customer type from the drop-down list. An example of the customer types are; Large-Scale, Small-Scale, SME etc. Industry Classification Select an Industry Classification from the drop-down list. The available options are: - European Classification of Economic Activities (NACE)
- Global Industry Classification Standard (GICS)
- North American Industry Classification System (NAICS)
- Sustianable Investments and Climate Solutions (SICS)
- Standard Industrial Classification (SIC)
Industry Sector Select an option from the drop-down list. Industry Type Select an option from the drop-down list. - Populate the Climate Risk Impact tab as
tabulated:
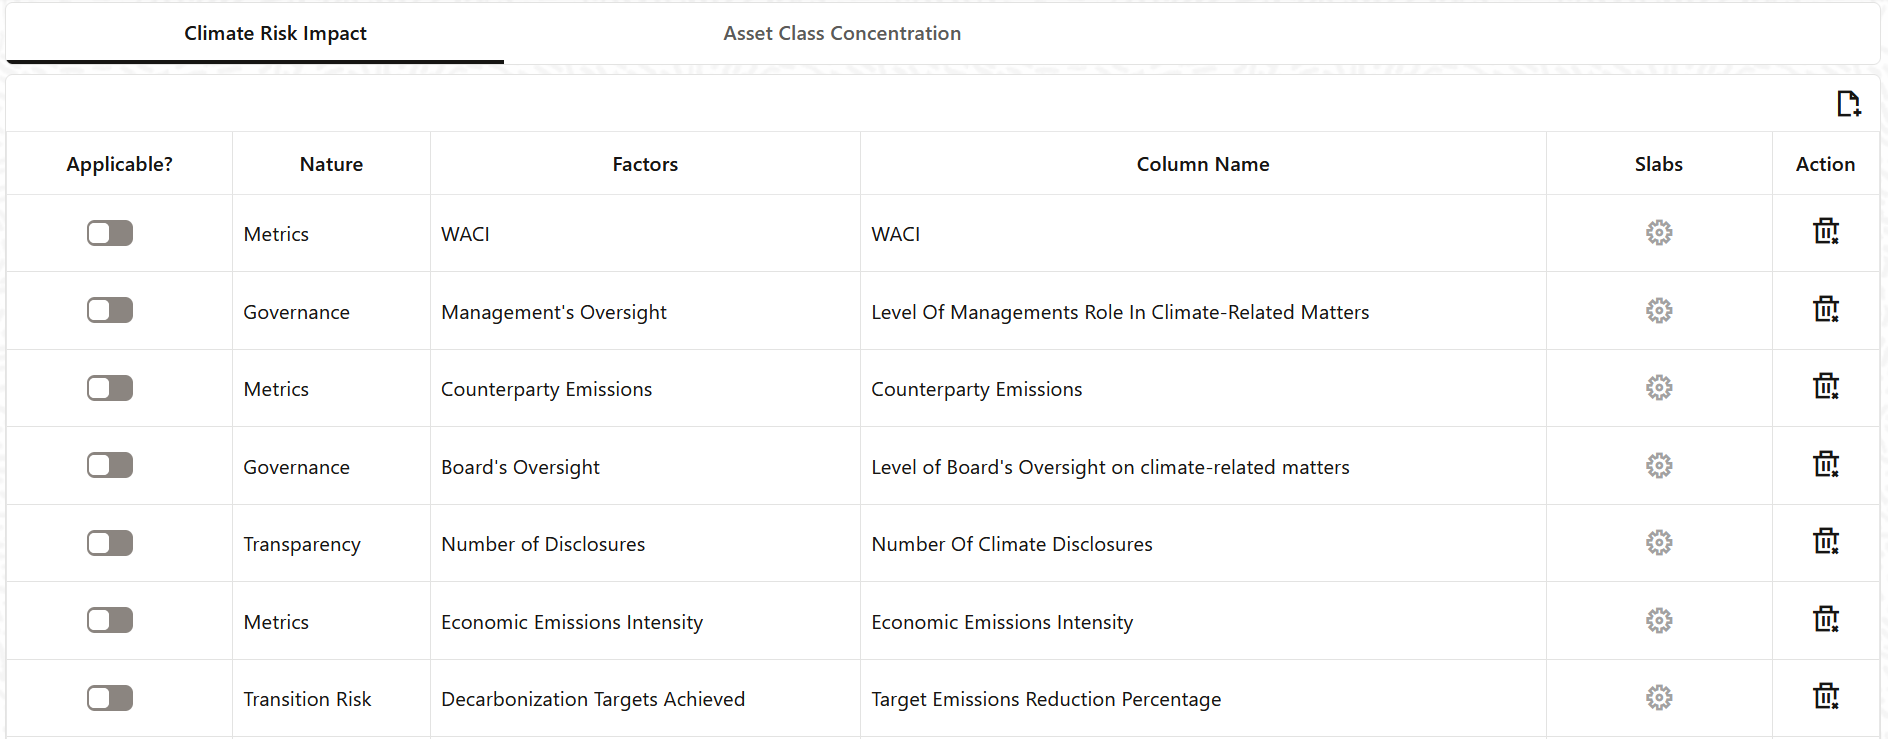
Figure 8-4 Climate Risk Impact tab

Table 8-5 Climate Risk Impact
Field Description Add Click this icon to Add or modify a slab: - Modify
- Select a slab and then click the Modify icon to open the Factor List window.
- Select a nature from the Nature of Factor drop-down list.
- Select a factor type from the Factor Type drop-down list.
- Click Add.
The selected slab is modified.
- Add
- Click the Add icon to open the Factor List window.
- Enter a name in the Factor Name field.
- Select a nature from the Nature of Factor drop-down list.
- Select a nature from the Column Name drop-down list.
- Select a factor type from the Factor Type drop-down list.
- Click Add.
The selected slab is available in the factor list.
Applicable? Click the slider to enable a slab. When a <row> is enabled, the settings icon for the slab is enabled.
Slab Enter values in the Lower Limit and Upper Limit fields for each vulnerability score. Note:
If the values for each limit are not entered correctly, then when the Apply button is clicked in this window, the application displays an error message informing that the slab limits are not valid.Delete In the Action column, click the delete icon to delete a slab. - Modify
- Populate the Asset Class Concentration tab as
tabulated:
Figure 8-5 Asset Class Concentration

Table 8-6 Asset Class Concentration
Field Description Add Click this icon to Add a slab: - Click the Add icon to open the Asset Class Concentration window.
- Enter a name in the Asset Class field.
- Enter a name in the Factors field.
- Click Apply.
The slab is added in the Asset Class Concentration List.
Applicable? Click the slider to enable a slab. When a <row> is enabled, the settings icon for the slab is enabled.
Slab Enter values in the Lower Limit and Upper Limit fields for each vulnerability score. Additionally, click the refresh icon to rest the values to its' default state. Note:
If the values for each limit are not entered correctly, then when the Apply button is clicked in this window, the application displays an error message informing that the slab limits are not valid.Delete In the Action column, click the delete icon to delete a slab. - Click Save. The status changes to Draft and the definition is saved.
- Click Submit. The status changes to Pending for Authorization, and is submitted to the Approver.
The new definition will appear in the list of Heatmap definition on the Heatmaps Summary page with the status as Draft or Pending for Authorization.