7.21.1 OBIEE Configuration - Deploy OFS CRA Analytics
The OFS CRA Analytics Application release 8.1.2.0.0 is based upon a dedicated reporting mart built from the new Fusion Financial Services Data Model. OFS CRA Analytics 8.1.2.0.0 leverages several components of Oracle Business Intelligence Enterprise Edition (OBIEE) or Oracle Analytics Server (OAS) Technology including Dashboards and Answers.
Follow these steps to configure the OFS CRA Analytics:
- Make sure Oracle Business Intelligence 12.2.1.4.0 or OAS 5.5.0 installation is completed and available. See Installing and Configuring Oracle Business Intelligence 12c (12.2.1.4) (E91876-03) or Installing and Configuring Oracle Analytics Server 5.5.0 (F27232-03) for more details.
- Configure the ODBC Data Source to connect to the Oracle BI
Server:
- Navigate to Control Panel , select Administrative Tools , and then select Data Sources (ODBC) .
- Select the System DSN tab and click Add .
- Select a driver-specific to Oracle BI Server 2.2.1.4.0 or OAS 5.5 and click Finish .
- Enter the Name and Server details (specify the Hostname or IP Address of the BI Server) and click Next .
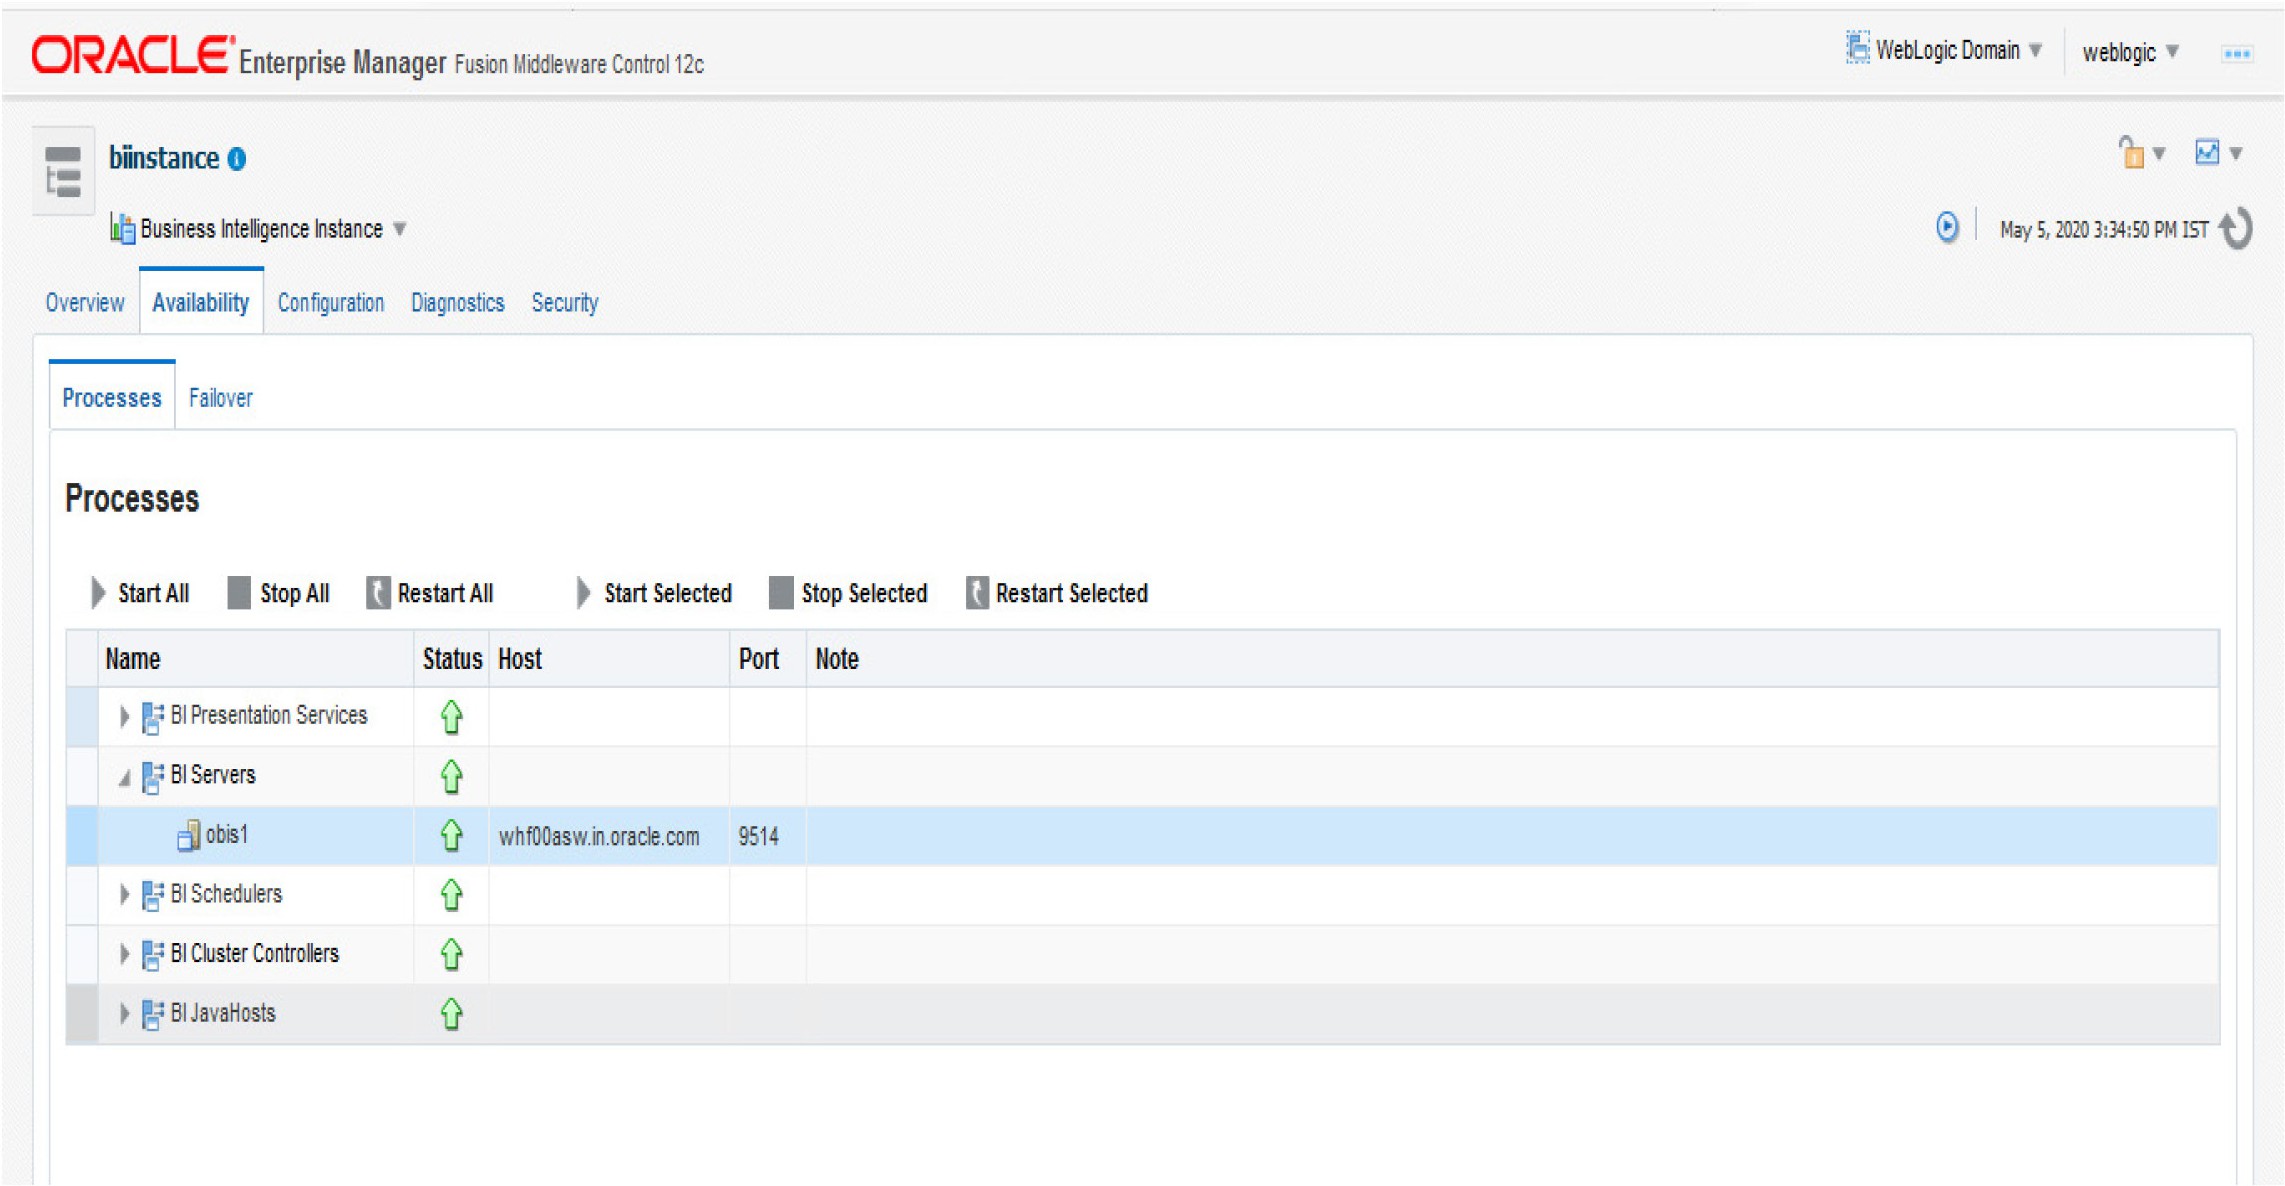
- Enter the Oracle BI Server login ID and password (Enter the Username and Password created at the time of OBIEE or OAS Installation). Update the port with the port number available for the BI Server in the Availability Tab of Business Intelligence in the Enterprise Manager.
For example: In the following figure, the port number is 9514.
Figure 7-9 Update Port Number in the BI Server
- Click Next.
- Navigate to the RPD and Catalog folders available in the following directories. Copy the RPD and required Catalog files in the server where the BI client tools are installed:
$FIC_HOME/OFS_CRA_DASHBOARDS/12.2.1.4.0/datamodeldirectory containing theCRMBI.rpdfile in the Data Model Directory.- CRMBI.catalog file in the
$FIC_HOME/OFS_CRA_DASHBOARDS/12.2.1.4.0/content/catalogdirectory.
- Click Finish .
- Modify the connection pool and set the properties.
- Open the OBI Administration Tool.
- Select Start , select Programs , select Oracle Business Intelligence , and then select BI Administration .
- Select File , select Open , select Offline , and then select the
CRMBI.rpdfile. - In the Open dialog box, select and open the
CRMBI.rpdfile. - Enter the Repository password. See the MOS Doc ID: 2691681.1 for the password.
- In the Physical layer, double-click the Connect Pool : CRMBI to open its properties.
- In the General Tab, edit and check the following entries:
- Call Interface : (OCI 10g/11g).
- Data source name : <TNS Entry connecting to OFSAA atomic schema>
For example:
(DESCRIPTION=(ADDRESS_LIST=(ADDRESS=(PROTOCOL=TCP)(HOST=<Databas e IP address>)(PORT=1521)))(CONNECT_DATA=(SERVICE_NAME=<Database Name>))) - User name : <enter atomic db user name>.
- Password : <enter atomic db user password>.
- Confirm the password and click OK to close the window.
- Similarly, configure the connection pools for CRMBITRANS and CRMBI_INIT_BLOCK and CRMBI.
- Check Global Consistency , that is, press Ctrl+k.
- Double-click on the warning (if you are using OAS).
- Click Reset to defaults and click OK .
- Click Save .
- Click Yes for the Global Consistency Message. No warnings should be generated at this stage.
- Close the RPD file (close the file and exit).
- Log in to the OFS Credit Risk Analytics application using the
URL:
http:// <ipaddress>:<port>/analytics(replace the port number based on your setup). - Perform the following OBIEE Presentation Server Configuration
steps:
- Navigate to the
<<Oracle BI Instance Home>/config/fmwconfig/biconfig/OBIPSdirectory. - Edit the
instanceconfig.xmlfile. - Insert the following code within the XML tag <Views> </Views>.
<Views> </Views>. <Views> </Views> <Charts> <MaxVisibleColumns>50000</MaxVisibleColumns> <MaxVisiblePages>25000</MaxVisiblePages> <MaxVisibleRows>10000000</MaxVisibleRows> <MaxVisibleSections>50000</MaxVisibleSections> <JavaHostReadLimitInKB>10240</JavaHostReadLimitInKB> </Charts> - Insert the following code within the XML tag <Views> </Views>.
<Views> </Views>
<Views> </Views> <Table> <DefaultRowsDisplayedInDelivery>75</DefaultRowsDisplayedInDelivery> <DefaultRowsDisplayedInDownload>6500</DefaultRowsDisplayedInDownload> <MaxCells>4000000</MaxCells> <MaxVisibleRows>140000</MaxVisibleRows> </Table> <Narrative> <MaxRecords>500000</MaxRecords> <DefaultRowsDisplayed>25</DefaultRowsDisplayed> </Narrative> - Insert the following code within the XML tag
<Views> </Views> <Pivot> <DefaultRowsDisplayedInDelivery>70000 </DefaultRowsDisplayedInDelivery> <DefaultRowsDisplayedInDownload>70000 </DefaultRowsDisplayedInDownload> <DisableAutoPreview>false</DisableAutoPreview> <MaxCells>10000000</MaxCells> <MaxVisibleRows>140000</MaxVisibleRows> <MaxVisibleSections>600000</MaxVisibleSections> <MaxVisibleColumns>50000</MaxVisibleColumns> <MaxVisiblePages>10000</MaxVisiblePages> </Pivot> - Insert the following code within the XML tag
<Views> </Views> <Cube> <CubeMaxRecords>10000000</CubeMaxRecords> </Cube> - Insert the following code within the XML tag
<Views> </Views> <Charts> <MaxVisibleColumns>50000</MaxVisibleColumns> <MaxVisiblePages>600000</MaxVisiblePages> <MaxVisibleRows>900000</MaxVisibleRows> <MaxVisibleSections>600000</MaxVisibleSections> </Charts> - Save and close the file.
- Navigate to the
- Perform the following OBIEE BI server configuration steps:
- Navigate to the <<Oracle BI Instance Home>/config/fmwconfig/biconfig/OBIS directory.
- Edit the NQSConfig.INI file.
- Update the following code within the NQSConfig.INI file
NULL_VALUES_SORT_FIRST =ON;
- Save the file and restart the BI services.
Note:
Take a backup of the instanceconfig.xml and NQSConfig.INI files before making any changes.