- Enterprise Modeling User Guide
- Managing Stress Testing
- Scenario Management
- Adding Stress Testing Scenario
Adding Stress Testing Scenario
- Select the Add icon from the Scenario List toolbar. The
Add button is disabled if you have selected any checkbox in the grid. The
Scenario Definition window is displayed.
Figure 10-7 Scenario Definition window

- Enter the Scenario details as described in the following table:
Table 10-4 Scenario Definition - Field Descriptions
Field Description Fields marked in red asterisk (*) are mandatory. Scenario Name Enter a name for the scenario. Ensure that there are no special characters like `, {,},", ', ~, <,>, /, \, and multiple spaces. Scenario Description Enter the required description for the scenario. To add Variable Shock to the scenario, follow these steps:- Select the Add icon from the Variable Shocks
toolbar.
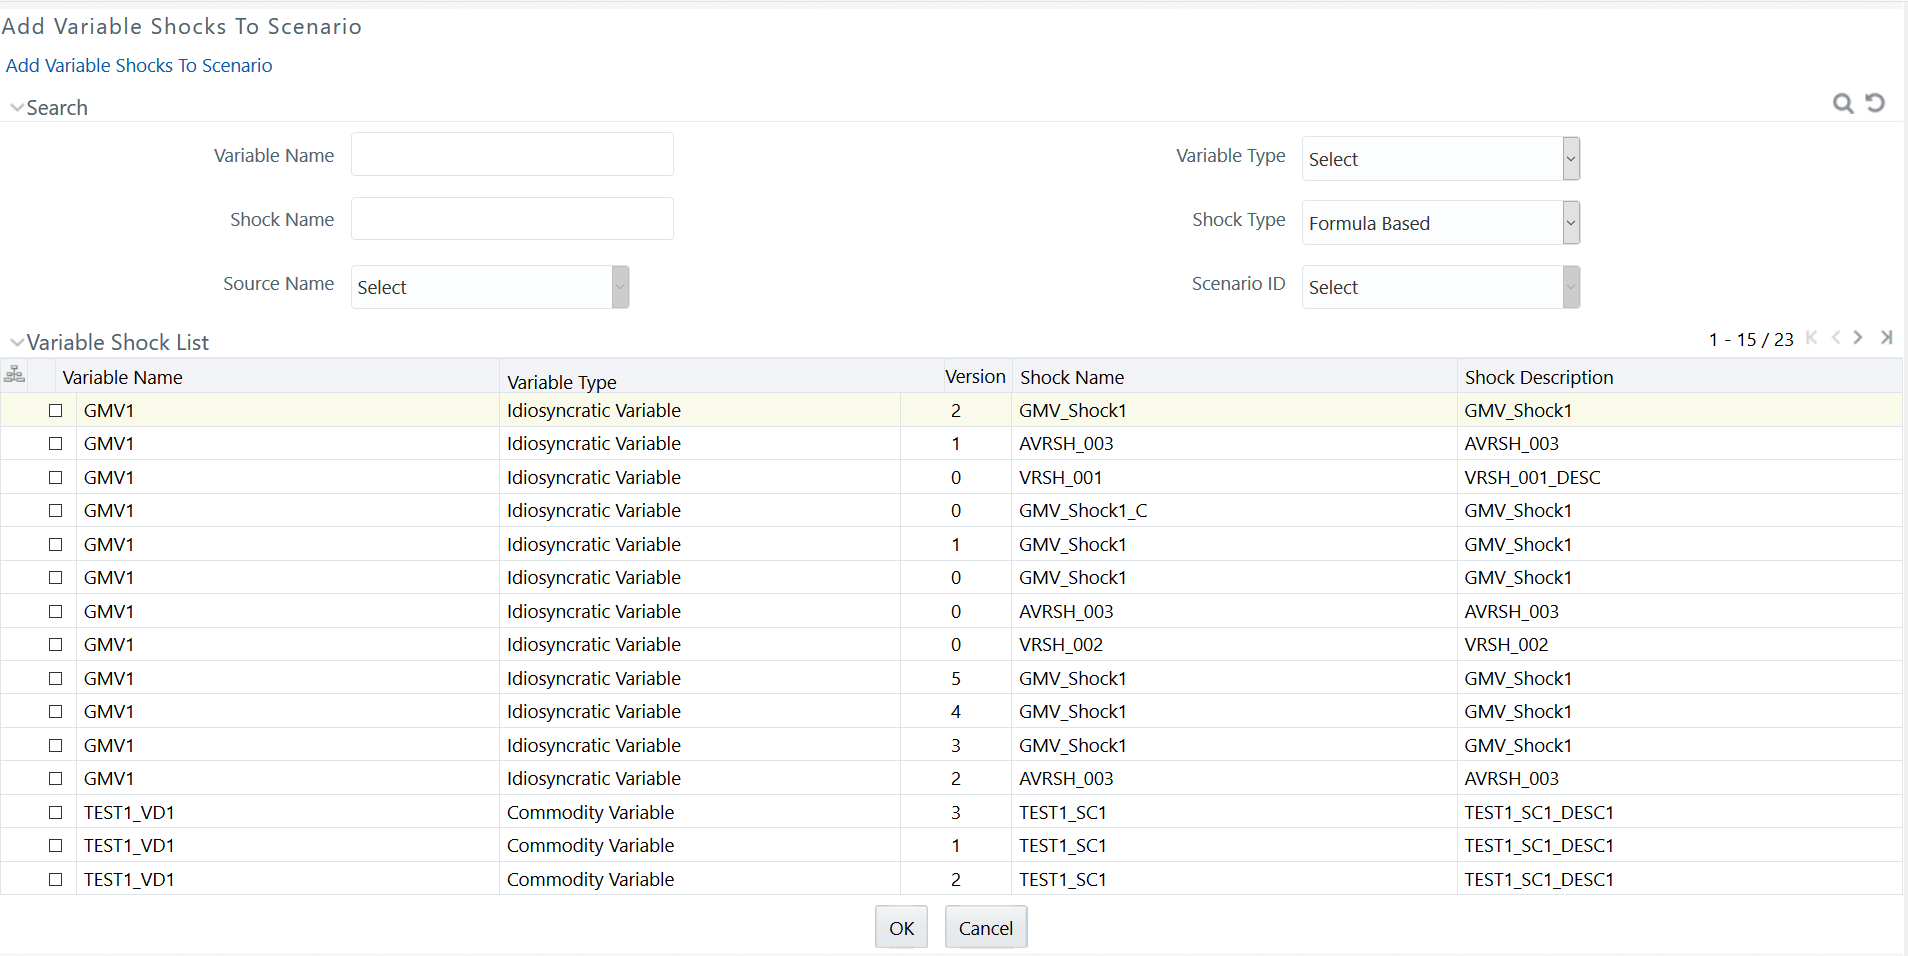
The Add button is disabled if you have selected any checkbox in the grid. The Add Variable Shocks to Scenario window is displayed.
Figure 10-8 Add Variable Shocks to Scenario window

- Select the required variable(s) by clicking on the adjacent checkbox in
the Variable Shock List grid.
You can also make use of the Search option to search for a variable by specifying Variable Name, Shock Name, or even by selecting the Variable Type, Shock Type, Source, and Scenario from the drop-down list.
- Click OK.
The selected variables are listed in the Variable Shock grid in the Scenario Definition window.
You can also remove a variable by selecting the adjacent checkbox and clicking the Delete icon.
- Click Save.
The scenario details are saved and displayed in the Scenario Management window.
- Select the Add icon from the Variable Shocks
toolbar.