A.22.4 How to Populate the Sandbox Workspace
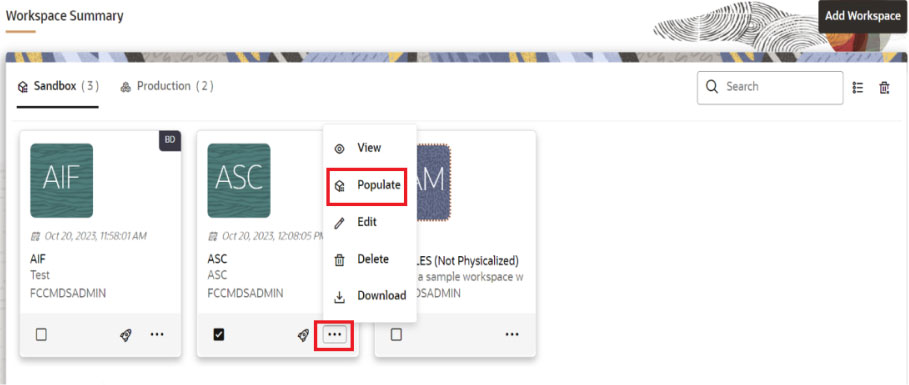
On the workspace summary screen, select the newly created sandbox
workspace.
To populate the workspace, follow these steps:
- Click the Action icon and select Populate. The Populate Workspace window is displayed.
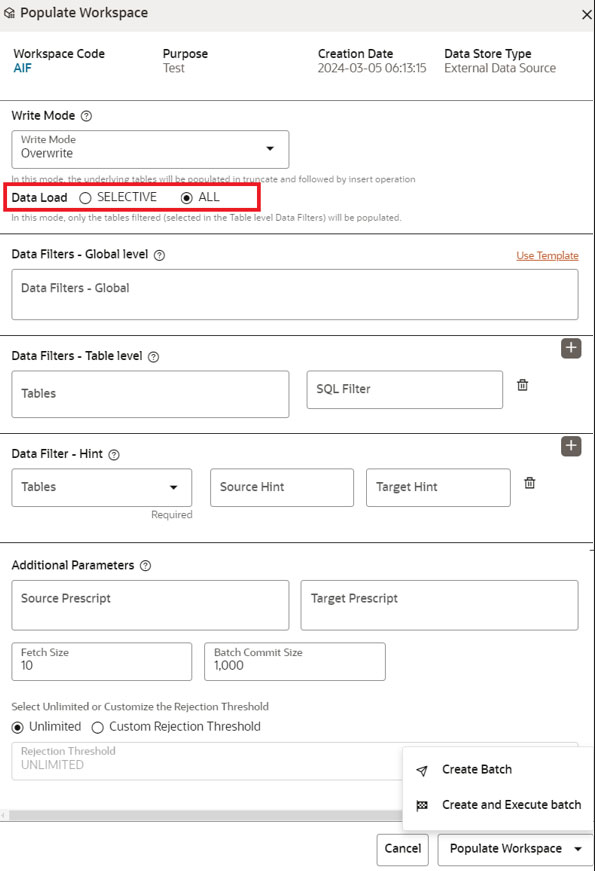
- Select options from the Write Mode drop-down list. The
available options are:
- Overwrite: In this mode, the underlying tables will be populated in truncate and followed by insert operation.
- Append:In this mode, the underlying tables will be
populated in append mode.
Note:
By default, Overwrite Mode is selected.
- Select the Data Load options. The available options are:
- All: In this type, all the underlying tables mapped to
the workspace will be populated along with the filters mentioned below
for specific tables.
Note:
By default, ALL is selected. - Selective: In this type, only the tables filtered
(selected in the Table level Data Filters) will be populated.
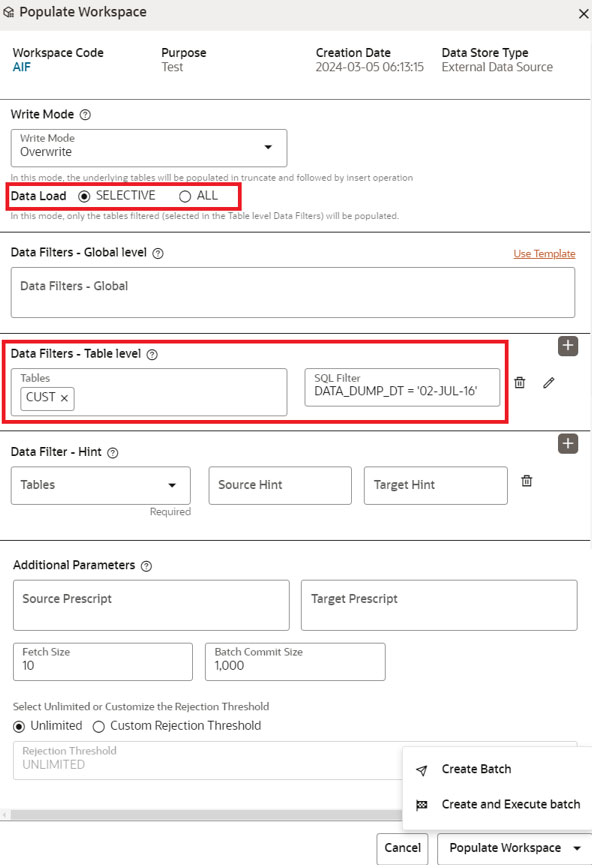
- If Data Load is selected as
Selective, then you need to select table and provide the
column name with value in the Data Filters - Table level
field as shown below.
Figure A-23 Populate Workspace for Selective Type
- If Data Load is selected as
Selective, then you need to select table and provide the
column name with value in the Data Filters - Table level
field as shown below.
- All: In this type, all the underlying tables mapped to
the workspace will be populated along with the filters mentioned below
for specific tables.
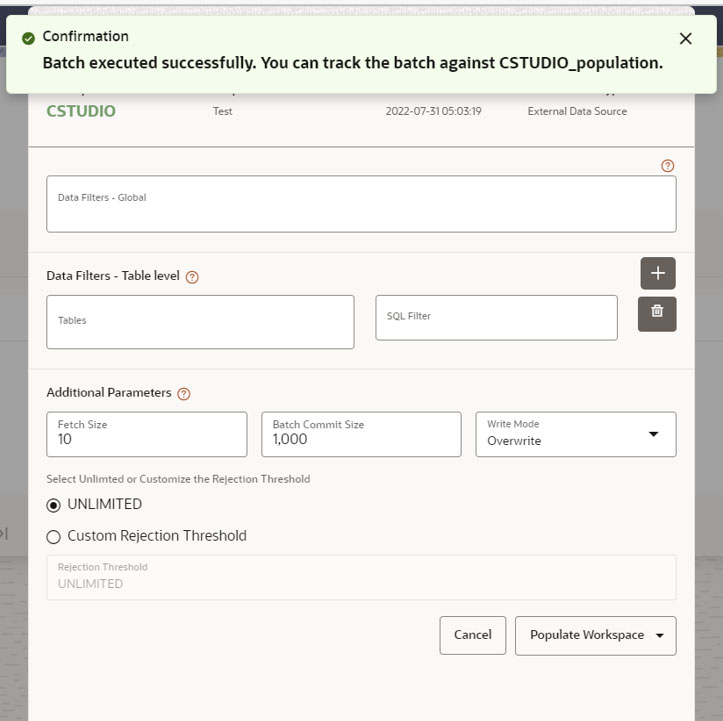
- Select Create and Execute batch option. It Shows a successful message on successfully triggering the Workspace Data Population.


