3.1.2.1 Configure a jdbc Interpreter

Note:

This feature is not recommended approach because it can only be used to connect to a single schema, and all users will have access to that, rather than access being managed per user. In future releases this interpreter will not be enabled by default but instructions will be given to enable if required.
Limitation
  • Data source configuration is not dynamic; instead, it is static from the Interpreter Configuration screen.
  • There is no restriction or secure access of data provided with this interpreter.

Recommendation

Users are recommended to use a python interpreter to get dynamic data source configuration; even data access permission features can also be used with this interpreter.

To configure a jdbc interpreter, follow these steps:
  1. Navigate to <COMPLIANCE_STUDIO_INSTALLATION_PATH>/deployed/mmg-home/mmgstudio/ bin directory.
  2. Open startup.sh file, navigate to line 29 and update jdbc value as 7011.
    For example: . ./"$DIR"/datastudio --port 7008 --markdown 7009 --spark 7014 --python 7012 - -jdbc 7011 --shell -1 --pgx 7022 --external
  3. Navigate to <COMPLIANCE_STUDIO_INSTALLATION_PATH>/deployed/mmg-home/mmgstudio/ bin directory.
  4. Open the config.sh file and update DATASTUDIO_JDBC_INTERPRETER_PORT as 7011.
  5. Navigate to <COMPLIANCE_STUDIO_INSTALLATION_PATH>/deployed/mmg-home/bin directory.
  6. Open the config.sh file and update DATASTUDIO_JDBC_INTERPRETER_PORT as 7011.
  7. Navigate to <COMPLIANCE_STUDIO_INSTALLATION_PATH>/deployed/mmg-home/mmgstudio/ server/builtin/interpreters/jdbc.json directory.
  8. Navigate to line 154 and update port value as 7011.
  9. Restart Compliance Studio.
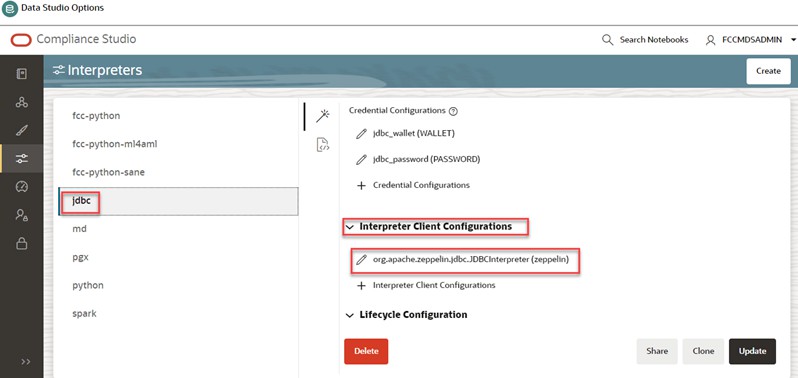
  10. On the Interpreter page LHS menu, select jdbc. The jdbc interpreter pane is displayed.
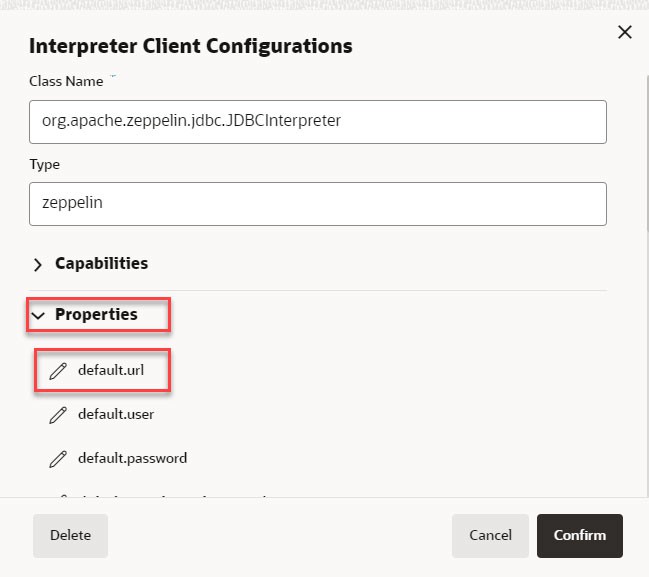
  11. On Interpreter Settings page, expand Interpreter Client Configurations and click the Edit icon on the <Class Name> (zeppelin). The Interpreter Client Configurations Window is displayed.

    Figure 3-23 Interpreter Client Configurations


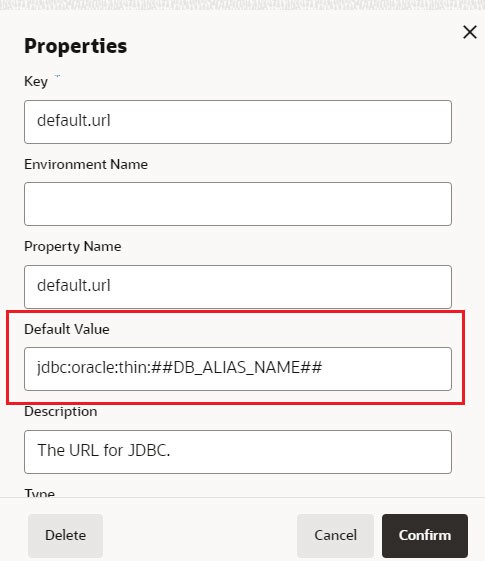
  12. Click default.url under the Properties. The Properties page is displayed.
  13. Enter the alias name in the Default Value field.
    The alias name is available in the <COMPLIANCE_STUDIO_INSTALLATION_PATH>/wallet/ tnsnames.ora directory.
    For example, jdbc:oracle:thin:##DB_ALIAS_NAME##
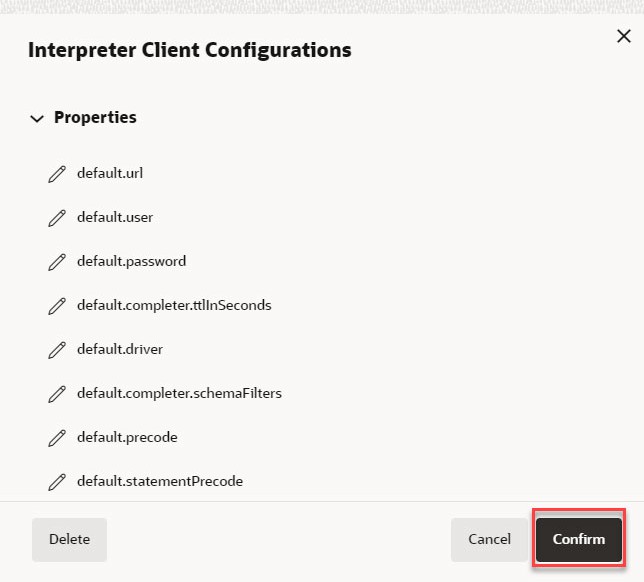
  14. Click Confirm. The Interpreter Client Configurations page is displayed.

    Figure 3-25 Interpreter Client Configurations


  15. Click default.user property and it should be null in the Default Value field.
  16. Click default.password property and it should be null in the Default Value field.

    Note:

    Retain the default settings for the remaining properties in the Interpreter Client Configurations.
  17. Click Update. The modified values are updated in the Interpreter.