How to Create Sandbox Workspace
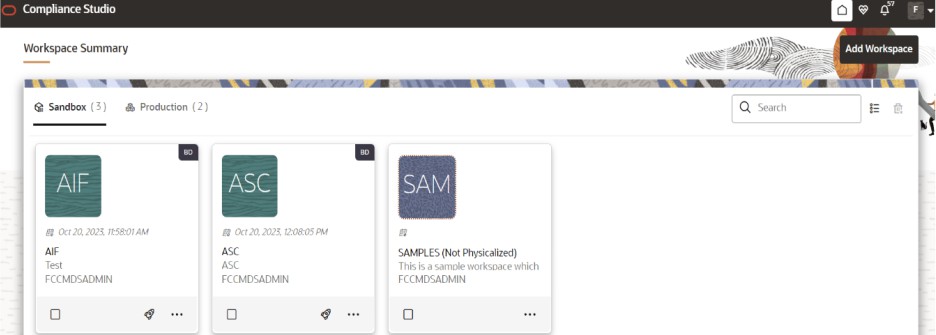
On the Workspace Summary page, click Add Workspace.
The Workspace Creation window is displayed with the following process:
- Basic Details
- Workspace Schema
- Data Sourcing
- Metadata Sourcing
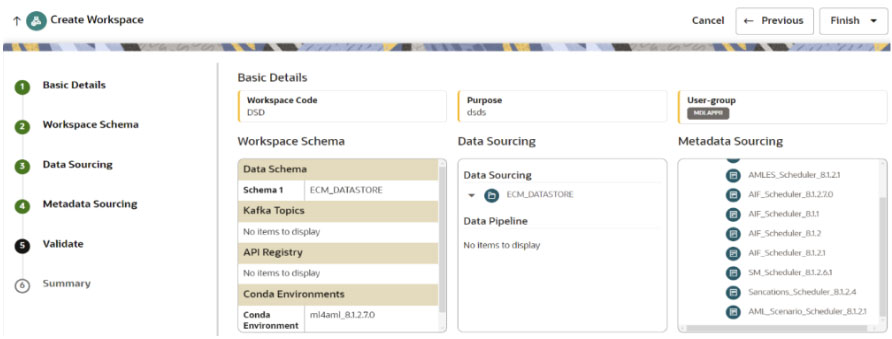
- Validate
- Summary
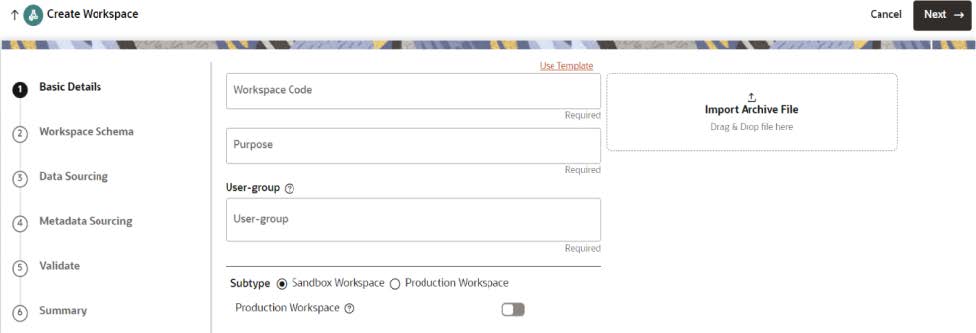
Basic Details
To create a basic details of the workspace, follow these steps:
- Provide the requested details for Workspace Code and Purpose.
- Select the User-group from the drop-down list.
- Select the subtype as Sandbox Workspace.
- Enable the Production Workspace button.
- Choose the production workspace created as workspace from the Production workspace drop-down list.
- Click Next.
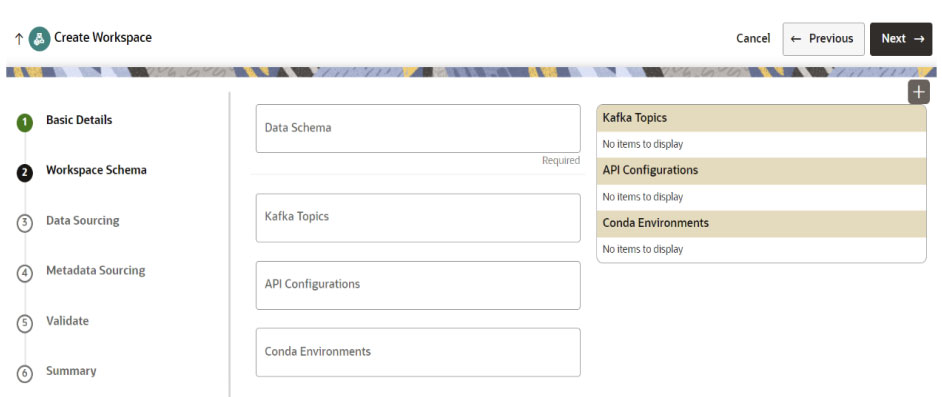
Workspace Schema
To create the workspace schema, follow these steps:
- Select the newly created data store as Data Schema.
Note:
The Kafka Topics and API Configuration fields should be blank.For more information about creating Data Store, see How to Create Data Store.
- Select the following Conda Environments:
- default_<CS Version>
- ml4aml_<CS Version>
- Click Next.
Data Sourcing
To select Database objects from the data stores, follow these steps:
- From the Source Data Schema drop-down list, select the Data Store.
For more information about creating Data Store, see How to Create Data Store.
- From the Object Type drop-down list, select the Table.
Figure A-17 Data Sourcing
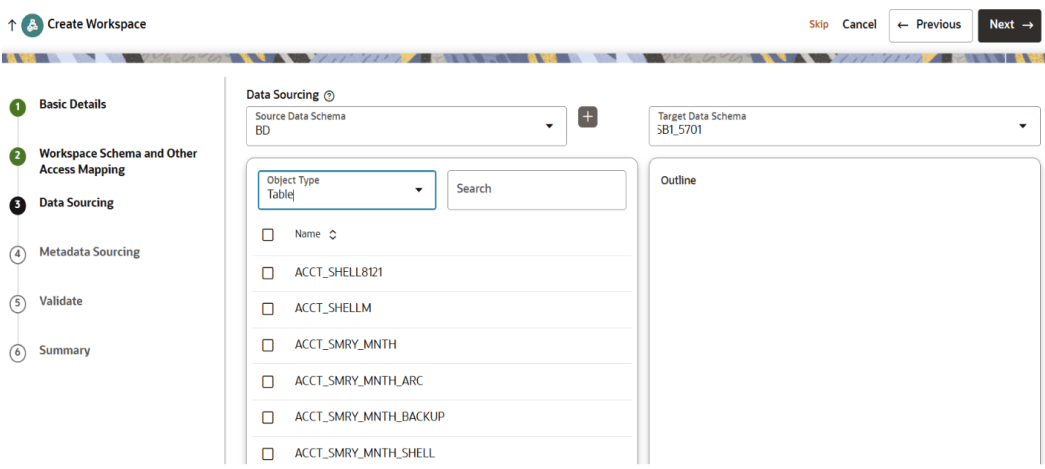
- Select the following tables from the production data store based on use cases, ensuring that they contain sufficient historical data.
For Behavioral Model Use Case:
- CUST
- CUST_ACCT
- CUST_SMRY_DAILY
- CUST_SMRY_MNTH
- ACCT
- ACCT_BAL_POSN_SMRY
- ACCT_SMRY_MNTH
- ACCT_POSN
- CASH_TRXN
- WIRE_TRXN
- MI_TRXN
- BACK_OFFICE_TRXN
- TRADE
- TRADE_EXECUTION_EVENT
- SCRTY_MKT_DAILY
- SCRTY
- ORDR
- EXECUTION
- NTCPTRY_PRFL
- DERIVED_ADDRESS
- WATCH_LIST
- WIRE_TRXN_INSTN_LEG
- KDD_SCNRO
- CUST_ACCT_ROLE
- EXTERNAL_ENTITY_ADDR
- ACCT_TRXN_SMRY_DAILY
- CUST_CUST
- CLIENT_BANK_SMRY_MNTH
For Custom Scenario Use Case:- EXTERNAL_ENTITY_ADDR
- KDD_SCNRO
- CUST_ACCT_ROLE
- DERIVED_ADDRESS
- WATCH_LIST
- WIRE_TRXN_INSTN_LEG
- ACCT_TRXN_SMRY_DAILY
- CUST_CUST
For AML Event Scoring Use Case:- FCC_EVENT_BINDING
- FCC_EVENT_DETAILS
- FCC_EVENT_ENTITY_MAP
- FCC_EVENT_INVESTIGATION_STATUS
- FCC_EVENT_STATUS_B
- FCC_EVENT_STATUS_TL
- FCC_EVENTS
- FCC_SCENARIO_MASTER
- KDD_JRSDCN
For Customer Segmentation and Anomaly Detection Use Case:- CUST
- CUST_ACCT
- CUST_SMRY_DAILY
- CUST_SMRY_MNTH
- ACCT
- ACCT_BAL_POSN_SMRY
- ACCT_SMRY_MNTH
- ACCT_POSN
- BACK_OFFICE_TRXN
- TRADE
- EXECUTION
- SCRTY_MKT_DAILY
- SCRTY
- ORDR
- CASH_TRXN
- WIRE_TRXN
- MI_TRXN
- BACK_OFFICE_TRXN
- TRADE_EXECUTION_EVENT
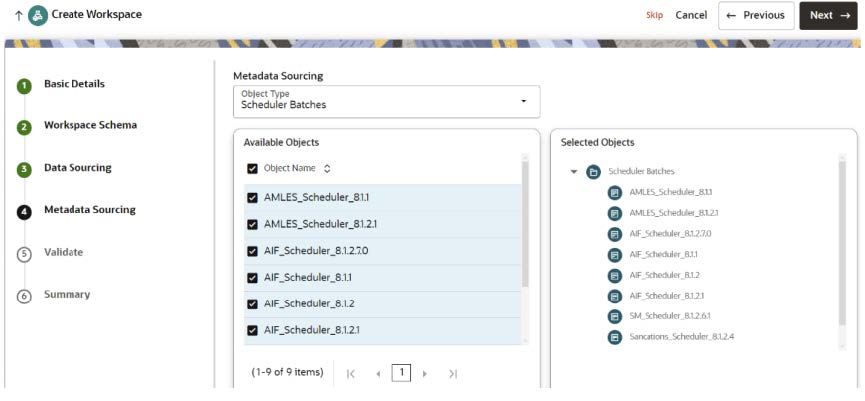
Metadata Sourcing
- From the Object Type drop-down list, select Scheduler Batches.
- In the Available Objects, select the scheduler based on the
use case.
- For Behavioral Model Use Case
- SM_Scheduler_8.1.2.6.1
- For AML Event Scoring Use Case
- AMLES_Scheduler_8.1.1
- AMLES_Scheduler_8.1.2.1
- For Customer Risk Scoring and Customer Segmentation and Anomaly Detection Use Cases
- AIF_Scheduler_8.1.1
- AIF_Scheduler_8.1.2
- AIF_Scheduler_8.1.2.1
- AIF_Scheduler_8.1.2.7.0
- For Shell Account Detection Scenario for AML Use Case
- AML_Scenario_Scheduler_8.1.2.1
- For Customer Screening Use Case
- Sanctions_Scheduler_8.1.2.4
- For Custom Scenario Use Case
- Custom_Scenario_Scheduler_8.1.2.8.3
- For Behavioral Model Use Case
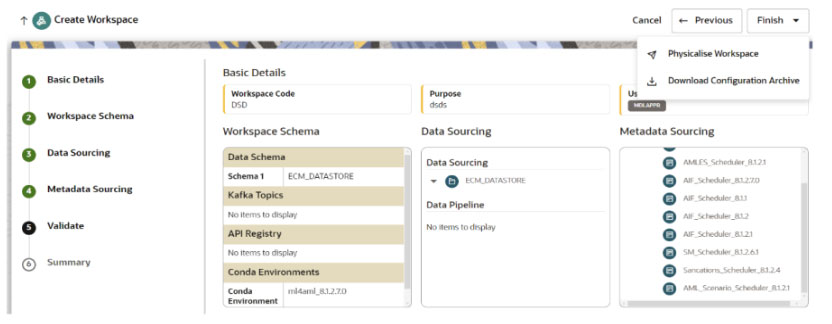
Validate Workspace
- Click Finish and then select Physicalise Workspace.
Summary
You can view summary of the created workspace.
