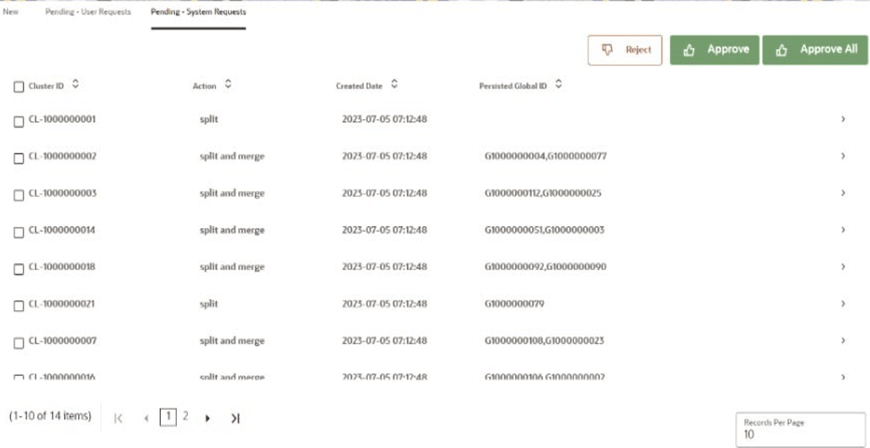
9.5.5 Pending - System Requests Tab
The Pending - System Requests tab displays Cluster ID details for which changes have been made by the system (Batch) and manual approval is required.
Note:
- The records will be displayed only if the GID Persistence and Manual Approval flags are set to true.
- If both the flags are set to false, the GIDs are not persisted and a new global party will be created.
- If GID persistence flag is set to true and manual approval flag
is set to false, then the GID is persisted but the requests are approved
automatically.
By default, the Global Party ID will be persisted that has most number of entities and if the number of entities are same between the groups, the global party with the lowest global party id will be persisted.
For more information about Global Party ID persistence, see the Persisting the Data section in the OFS Compliance Studio Administration and Configuration Guide.
For more information about the Cluster ID details, see the Cluster section.
- Select the record(s) and perform the following:
- Click on Approve to approve the selected
records.
Note:
Enable the Cluster ID check box and click Approve to approve all the records. All records will be approved only on the selected page. If you need to approve the remaining records, then navigate to the next page and perform the same action again to approve all records on the particular page. - Click on Approve All to approve all the
records that are updated by the batch action.
Note:
The records need not to be selected when using the Approve All button.
- If F_ER_DS_SUBSEQUENT_BATCH is set to False in the FCC_ER_CONFIG table in the ER Schema. After clicking Approve All, all the records will be approved only on the selected page. If you need to approve the remaining records, navigate to the next page and click Approve All again to approve all the records on the particular page.
- If F_ER_DS_SUBSEQUENT_BATCH is set to True, then
Approve All button approves
all the records across all the pages.
To configure F_ER_DS_SUBSEQUENT_BATCH and ER_DS_SYSTEM_PENDING_MAX_NO_REC, see the Create Index and Load the Data section in the OFS Compliance Studio Administration and Configuration Guide.
- Click on Reject to reject the selected records.
- Click on Approve to approve the selected
records.
- A pop-up window is displayed for Approve,
Approve All and Reject
actions. For example, if it is Approve action.
- You can provide free-form comments for the selected action using the Comments text box or select comment from the Select Standard Comments drop-down list.
- Click Save to approve the action or click Cancel to revert the changes.
