6.4 Adding a New Field in a Webservice
Currently, you can only search for the ready-to-use web service fields in the
Real-time screening user interface. If you want to add a custom field to an existing web
service, for example, full name, you must enter the field name in the applicable web
service node and add the field to the applicable process. To do this, follow these
steps:
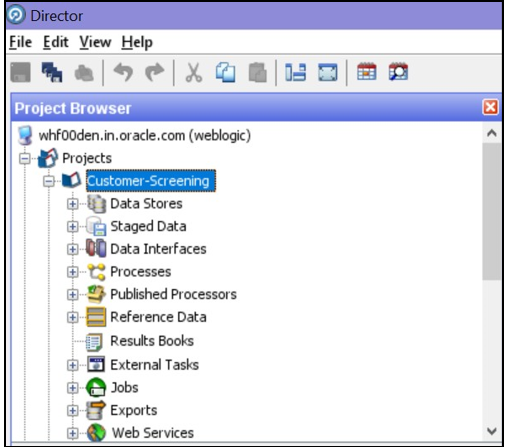
- In the Director Landing page, expand the
Customer-Screening project in the Project
Browser pane.
Figure 6-16 Project Browser pane
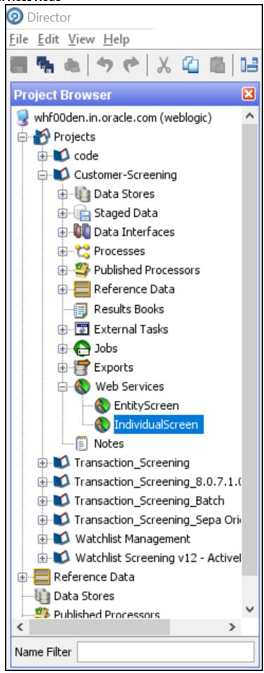
- Expand the Web Services node and double-click the
IndividualScreen web service.
Figure 6-17 Web Services Node
- Click the Plus icon in the Web Service
Inputs window.A new row is displayed in the table.
Figure 6-18 Edit Web Service window
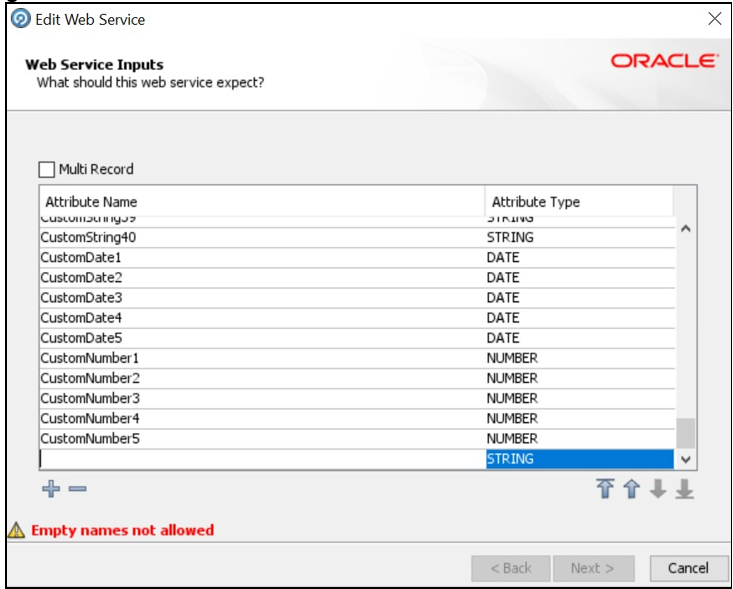
- Enter the name of the column, for example, FullName, and click anywhere inside the table to enable the Next button.
- Click Next until you view the Finish button, and click Finish.
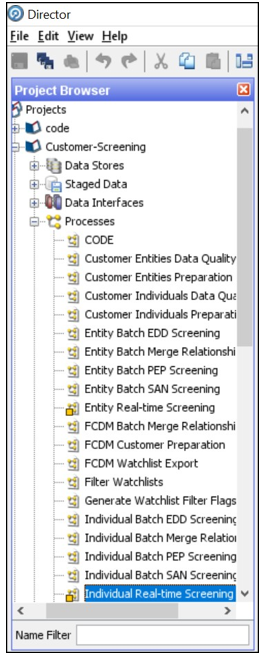
- In the Customer-Screening project, expand the
Processes node and double-click the
Individual Real time Screening process.
Figure 6-19 Processes Node
- Click the Individual Real-time Data process icon in the Individual Real-time Screening window.
- Search for FullName in the Reader
Configuration window.
Figure 6-20 Reader Configuration window
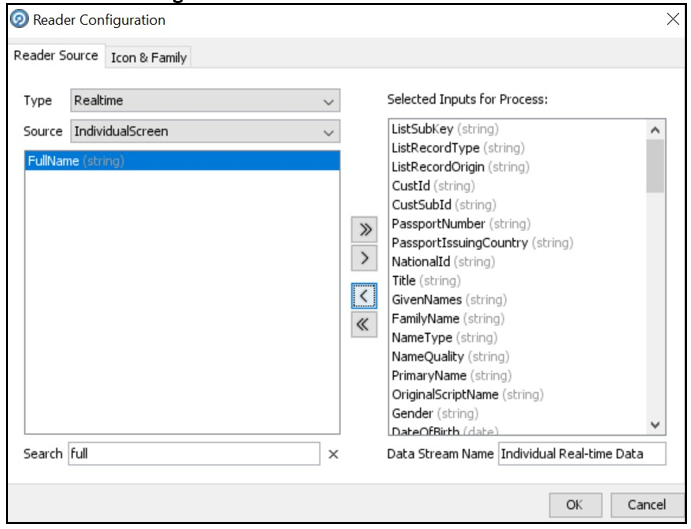
- Select FullName and select the Remove icon to move it to Selected Inputs for Process.
- Click OK.After you add the new field, you must integrate it with the Real-time screening user interface to display it in the user interface. To do this, follow these steps:
- Open the RTScreening.html file from the
<Installed Sanctions Path>/js/viewsdirectory. For example, ECM808SAN.war path }/realTimeScreening/js/views. For example,ECM808SAN.war path }/realTimeScreening/js/views. - Add a new Entry similar to externalID and Change the
external ID placeholders to FullName:
<oj-label for =”text-input”>fullName</oj-label><oj-input-text id=”fullName” value=”{{FullName}}”></oj-input-text> - Copy the code with the new value.
- Open the RTScreening.js file from the
<Installed
                                Sanctions Path>/js/viewModels
directory. For example,ECM808SAN.war path }/realTimeScreening/js/viewModels. - Update the placeholder within
‘’with the copied code with the same syntax as given in the id in the html file in theself.Clearfunction:Document.getElementById(“FullName”).value = ‘’; - Update the placeholder within ‘’ with the copied code with
the same syntax as given in the id in the html file in the
self.Clearfunction:Document.getElementById(“FullName”).value = ‘’; - Update the placeholder within “” with the copied code with the same
syntax as given in the id in the html file in the
self. IndividualScreenObjectarrayFullName:”” - In ViewModel(), Add a new entry similar to externalID and update
externalId placeholder with the FullName. For example, self. fullname =
ko.observable(CSRTMessageConstants.CS_RT_FULL_NAME);) - In self.clearAll, Add a new entry similar to externalId and update the
externalID placeholder with the FullName. For example,
document. getElementById("fullName").value = '' - In individualidtolabelmap, Add a new entry similar to externalId and
updated externalId placeholder with the FullName. For example
"FullName": { "label" : self.fullName() }, - Add an entry for the fullName in the var
IndividualArrayCols. For example,[{ "headerText": self.fullname(), "field": "ListFullName", "style": "width:11%", "headerClassName": "oj-sm-only-hide tableHeader", "className": "oj-sm-only-hide" }, - Open
CSRTMessageConstants.jspfile from the/js/viewsdirectory. For example,ECM808SAN.war path }/realTimeScreening.Add an entry similar to externalId and update. For example,
CSRTMessageConstants.CS_RT_FULL_NAME="<%=MessageFramework.getMessageFrom LocaleSpeficCache("RENDERER.CS_RT_FULL_NAME", currentMsgLocale.toString())%>"; - Add an entry in MESSAGES_EN_US table for the selected field name as
below. For example,
Figure 6-21 MESSAGES_EN_U

- Open the RTScreening.html file from the