4.1 Due Date and Time Configuration
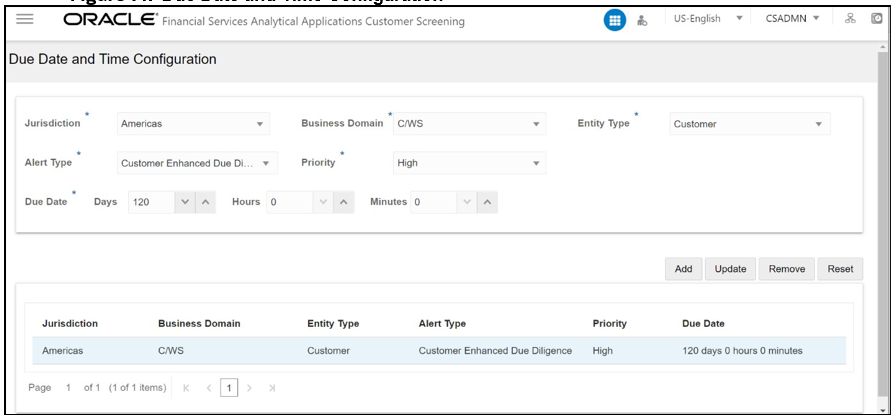
Users with the Customer Screening Administrator role can use the Due Date and Time
Configuration section to set the alerts' due date and time. The alerts will be
prioritized based on these configuration values.
Note:
The Due Date and Time Configuration is applicable only for Alert Management in the L1 investigation.To access Due Date and Time Configuration section,
follow these steps:
- Click the hamburger icon to view the Application Navigation List.
- From the Application Navigation List, select
Due Date and Time Configuration. The Due
Date and Time Configuration page appears.
Figure 4-1 Due Date and Time Configuration

- Provide details in the following mandatory fields in the following
table:
Table 4-1 Conventions Used
Fields Description Jurisdiction Select the jurisdiction value from the drop-down list. Business Domain Select the business domain to which the individual or entity belongs to. Entity Type Select the Entity Type as Customer, External Entity or Real-Time from the drop- down list. Alert Type Select the Alert Type value from the drop-down list. The values appear based on the selected entity type. Priority Select the alert priority value from the drop-down list. Due Date Select the due date values for the alert. - Click Add. The Due Date Configuration is
added to the list.
- Click Reset if you want to clear all the fields and enter new values.
Figure 4-2 Due Date and Time Configuration

- You can perform the following actions on the existing
configurations:
- Update: Select the configuration from the list, change any field values, and then click Update.
- Remove: Select the configuration from the list and then click Remove.
- Reset: Select the configuration from
the list and then click Reset to reset the given
field values.
Note:
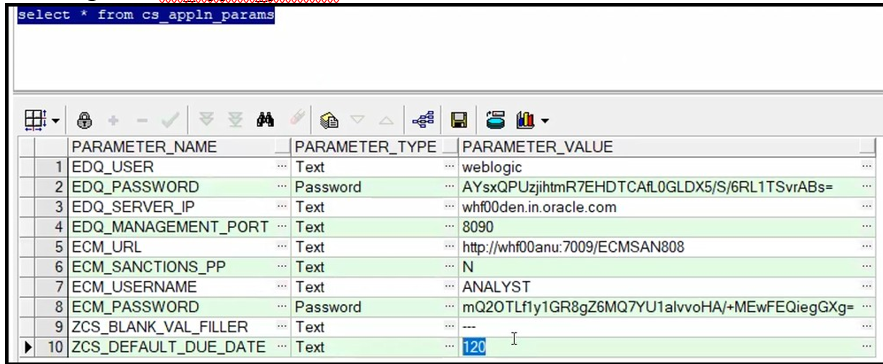
If the Due Date is not configured, the alerts will be prioritized based on the default configuration with Due Date as 120 days. You can reset the default Due Date with theCS_appln_paramstable.
- To change the Default Due Date configuration, you have to access
the Atomic Schema and access the
CS_appln_paramstable and change theZCS_DEFUALT_DUE_DATEparameter value.
Figure 4-3 CS_appln_params table
