3.1.1 Creating a Case or Alert for Individual and Entity
This topic describes how to create a case or alerts for Individual and Entity search type.
To screen watch list records and to create an Alert or Case, follow these
steps:
- Login to the Customer Screening application.
Note:
The user who has permission to do the RT screening OOB. - Click Real-Time Screening. The Real-Time Screening page is displayed.
- In the Real-Time Screening page, select the search type as
Individual or Entity.
Note:
- When L1 Investigation is CSAM, the
fcc_zcs_security_attr_grp_maptable must be populated to populate the business domain and jurisdiction. - When L1 Investigation is ECM, the ECM security mapper batch must be executed to populate the business domain and jurisdiction.
- When L1 Investigation is CSAM, the
- Enter/Select values for the following fields.
- Individual:
- Given Name
- Family Name
- Original Script Name
- Date of Birth
- Jurisdiction (Mandatory)
- Business Domain (Mandatory)
- City
- Passport Number
- Address Country
- Residency Country
- Nationalities
- Passport Issuing Country
- Country of Birth
- External ID Type
- External ID
- Identification Numbers
- Source Request ID
Note:
- The combination of Given Name and Family Name or Original Script Name or Passport Number along with Jurisdiction and Business Domain must be provided to Scan or Scan & Investigate.
- Address Country, Residency Country, Nationalities, Passport Issuing Country, and Country of Birth fields have the Multi-select option and Search using code functionality to select the country. You can choose the country from the drop-down or by typing the country code or name. For information on populating country codes, see the General Configuration section in the OFS Customer Screening Administrator Guide.
- The External ID Type and External ID are the additional details to identify the RT request. External ID Type and External ID are not used in EDQ for screening. Using the external ID, cases can be searched in the case list in ECM.
- Entity:
- Entity Name
- Original Script Name
- Identification Numbers
- Jurisdiction
- Business Domain
- Registration Country
- External Type
- External ID
- City
- Operating Countries
- Address Country
- Source Request ID
Note:
- The combination of Entity Name or Original Script Name along with Jurisdiction and Business Domain must be provided to Scan or Scan & Investigate.
- Registration Country, Operating Countries, and Address Country fields have the Multi-select option and Search using code functionality to select the country. You can choose the country from the drop-down or by typing the country code or name. For information on populating country codes, see the General Configuration section in the OFS Customer Screening Administrator Guide.
For field information, see the Field Descriptions for Individual and Entity Search Type. - Individual:
- Perform the following for Individual or
Entity:
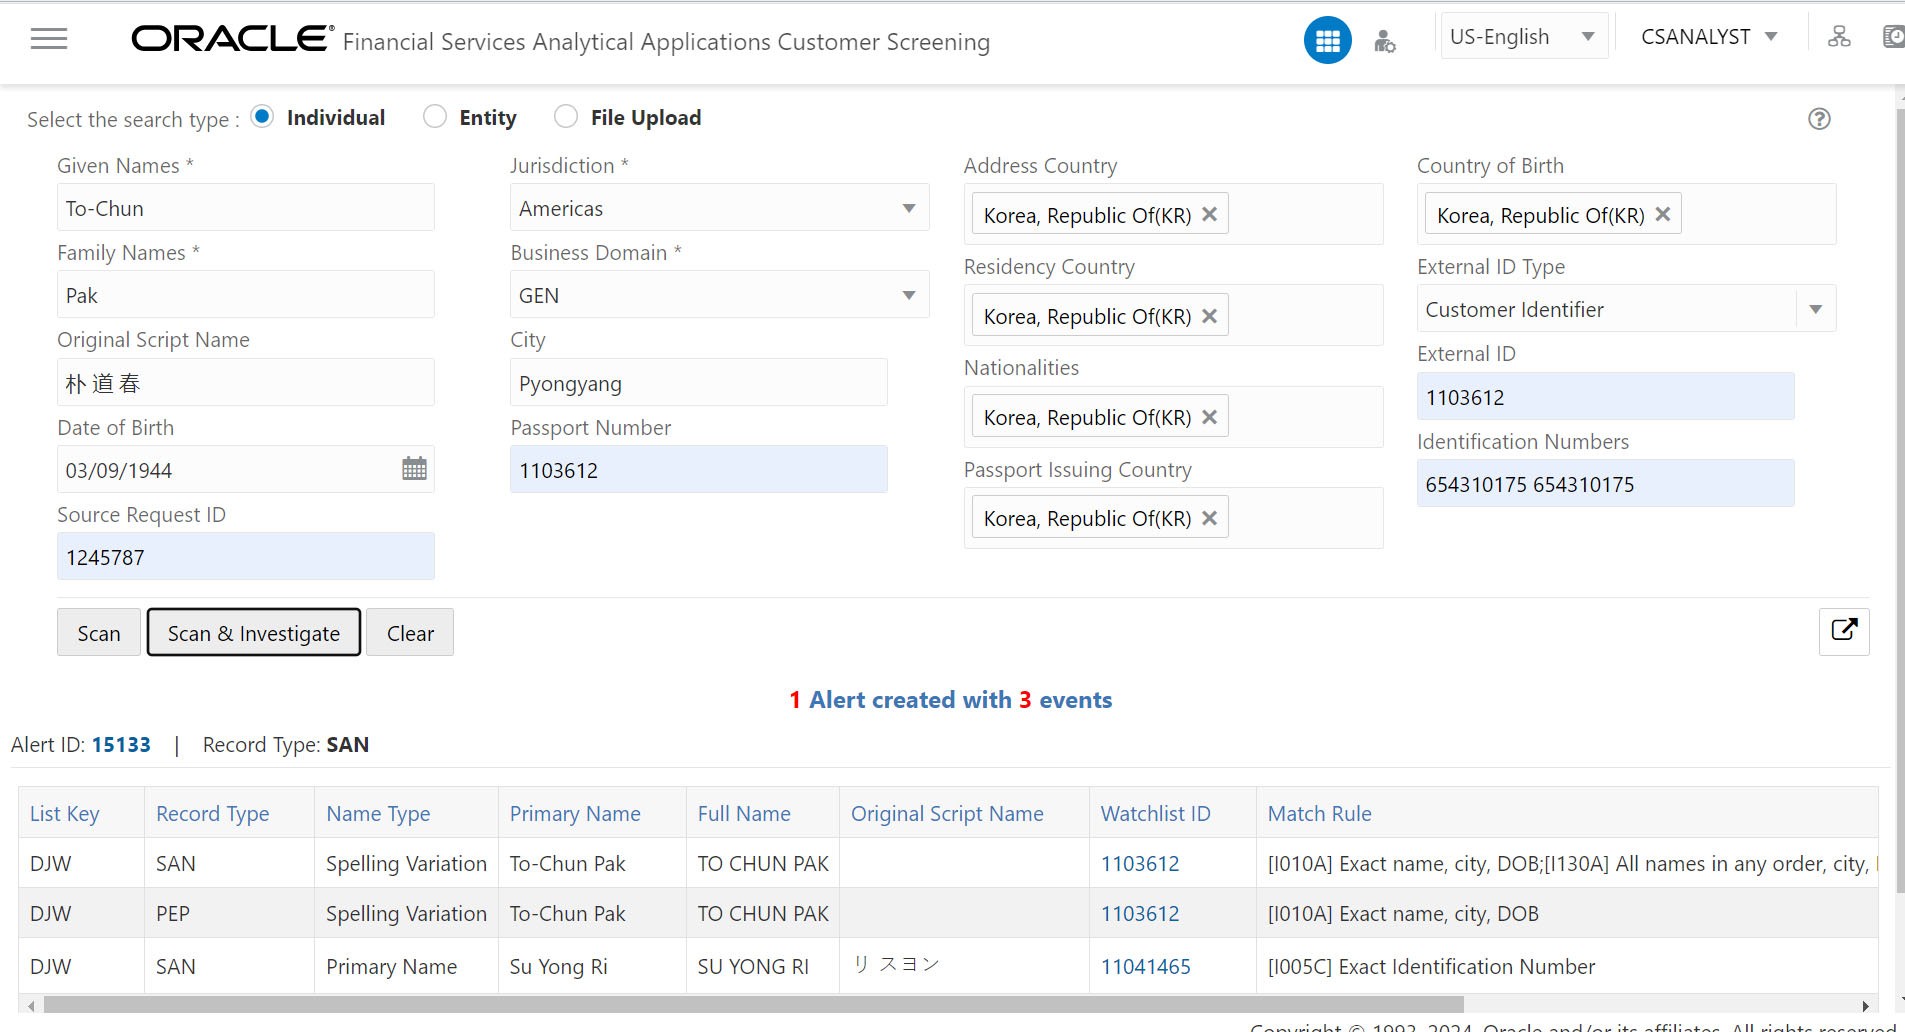
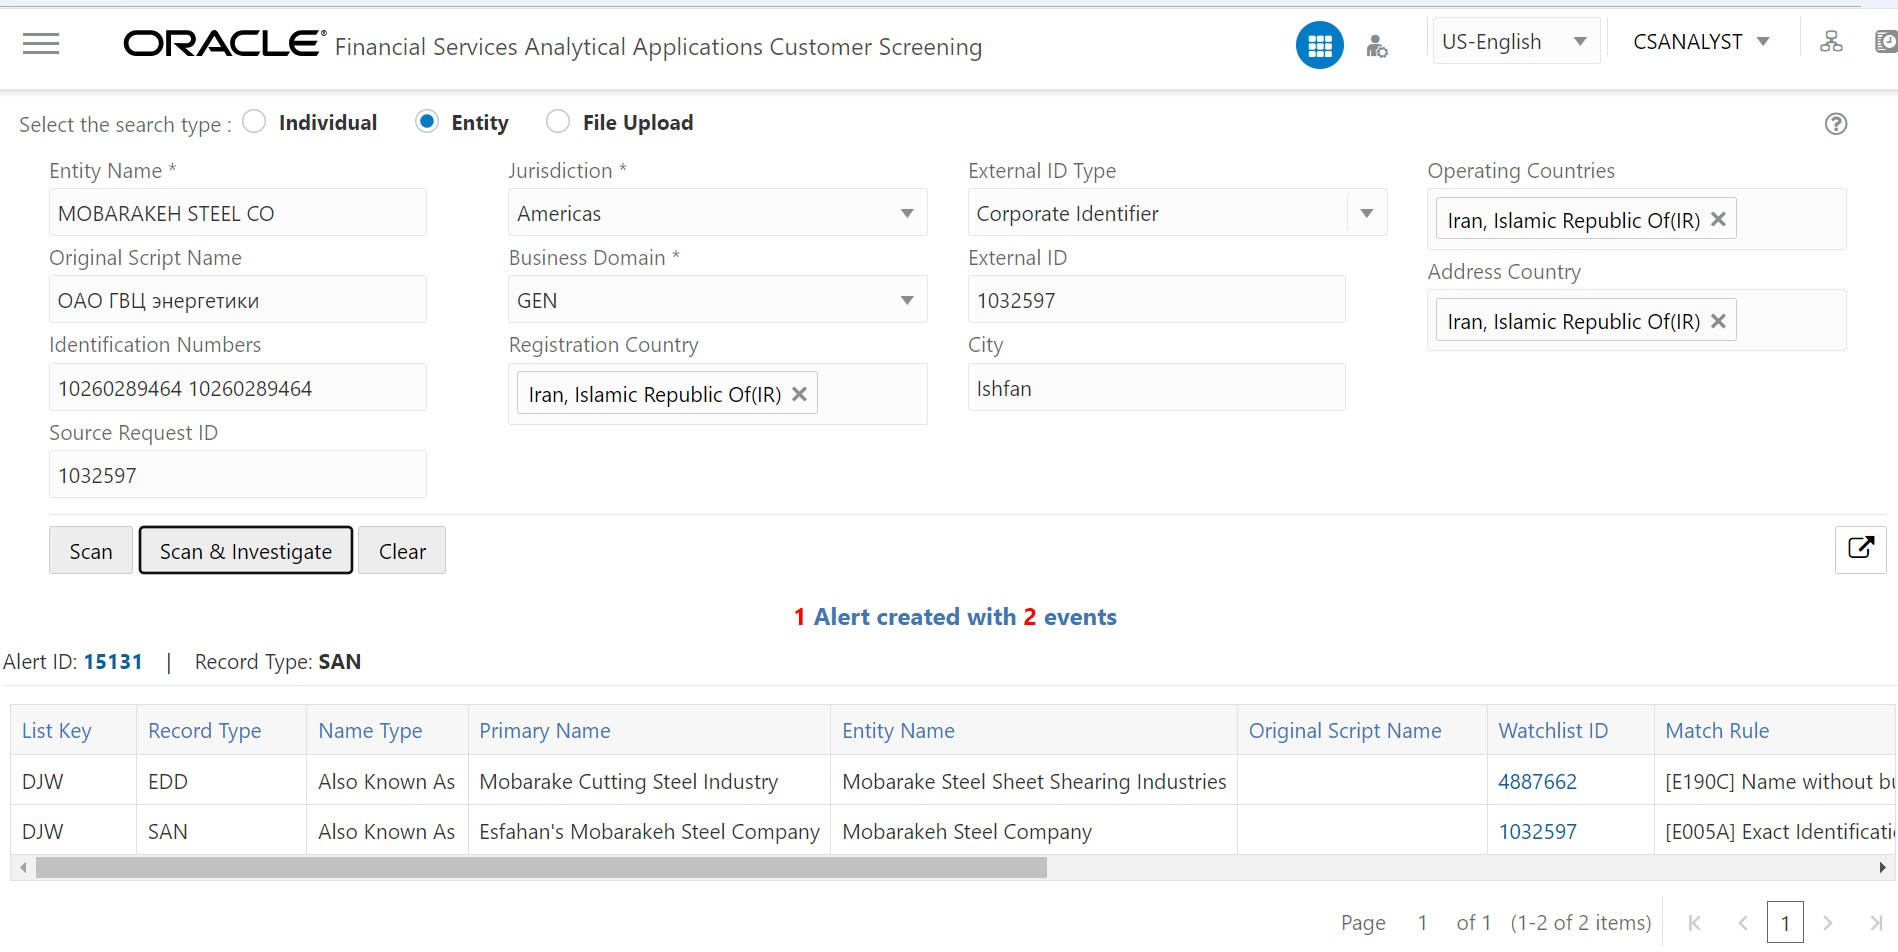
- Click Scan. It displays the screened watch list records.
- Click Scan & Investigate. It generates an alert or case based on the configurations. The alert ID or Case ID results are displayed.
For IndividualFigure 3-1 Real-Time Screening for Individual
For EntityYou can view generated alert ID or Case ID in the results and click Alert ID or Case ID to view the Alert Details or Case Details page, respectively. You can split the alerts by event type rather than group them in one alert. Based on the matches generated, separate alerts are created for SAN, PEP, EDD, and PRB. For more information on splitting the alerts based on event type, see the General Configuration section in the OFS Customer Screening Administrator Guide. - Click Clear to clear the field data and then re-enter.

