5.1.3 Steps for Integrating EDMCS with DFCS
This interface allows users to provide necessary credentials and connection details to integrate EDMCS (Enterprise Data Management Cloud Service) with the Data Foundation Cloud Service. It allows DFCS to fetch and utilize dimension metadata for applications.
Note:
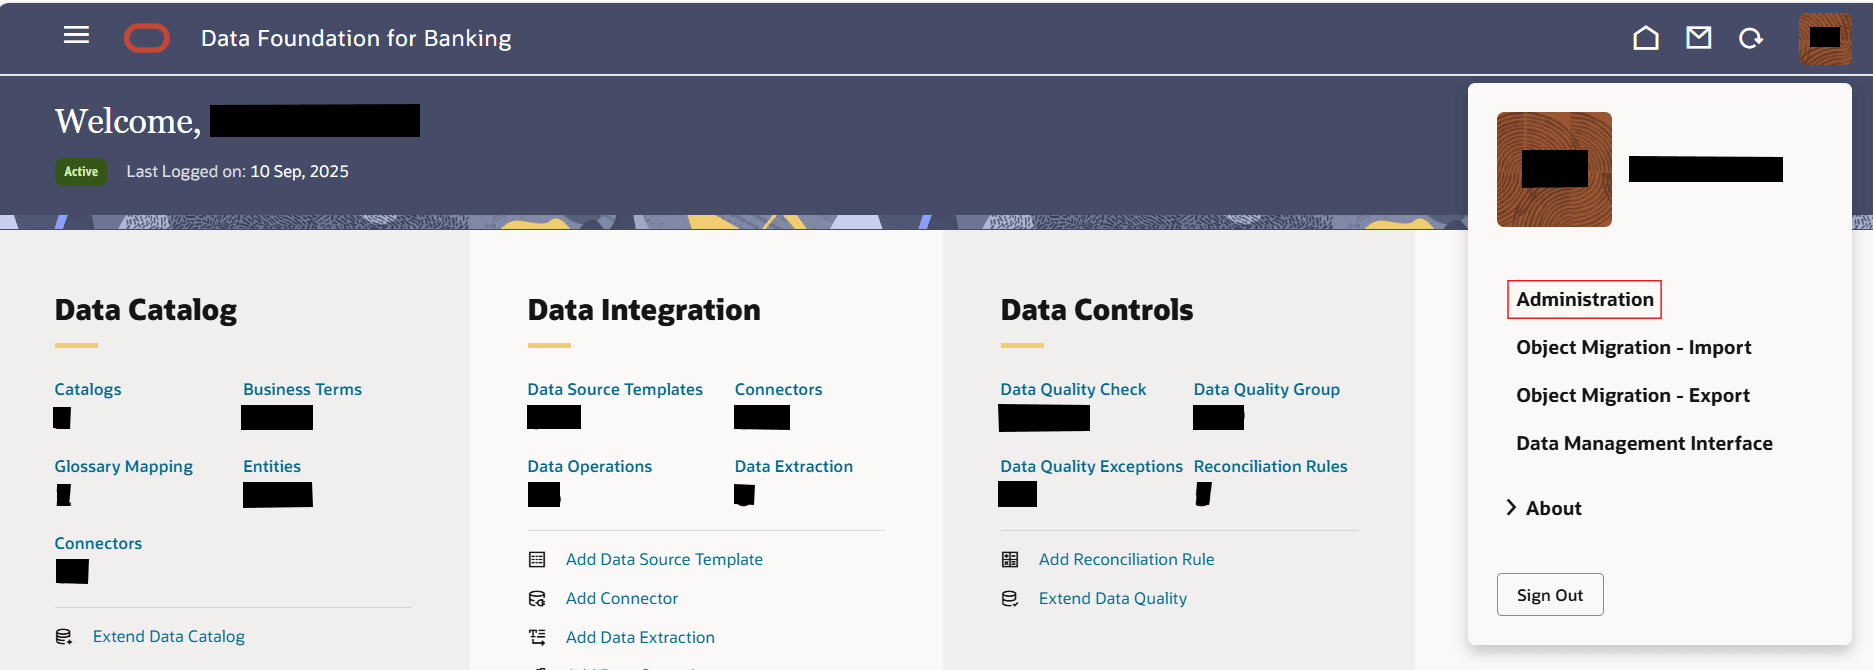
Before getting started user must submit a Service Request (SR) with My Oracle Support to have the EDMCS URL whitelisted.- Navigate to the DFCS Home Page > User Menu >
Administration > Integration with EDMCS.
The EDMCS for Data Foundation Cloud Service page appears.
Figure 5-1 EDMCS Navigation

- On the Administration page, click on the Integration with EDMCS tile.
- Enter the credentials to access the EDMCS.
Figure 5-2 EDMCS Configuration Details

Table 5-2 Share the credentials to access the EDMCS
Field Description URL to access EDMCS Enter the URL for your EDMCS instance in this field. This field is required. (e.g., https://<prod>.oraclecloud.com). Enter 500 or fewer characters. Version Enter the version of your EDMCS instance in this field. This field is required. (e.g., 24.04.30). Note:
Enter 20 or fewer characters. - Click Save.
- Once saved, the Mark As Done option will be enabled.
- Select Authenticate Using? dropdown. Select the preferred
authentication method.
- Two options are available:
- Password
- Access Token
- Two options are available:
- Option 1: Password Authentication
Once Password is selected:
- Provide the Username and Password for
EDMCS.
Table 5-3 Password Authentication
Field Description Username EDMCS service account username. Enter 100 or fewer characters. Password Corresponding user password. Enter 255 or fewer characters. Note:
Ensure the user has the necessary EDMCS API access privileges.
- Provide the Username and Password for
EDMCS.
- Option 2: Access Token Authentication
If Access Token is selected:
-
Provide the full access token in the field:
Specify the token
Note:
Token must be valid and scoped for EDMCS APIs. Ensure the token hasn’t expired.
-
- Click Save and Get Application to:
- Validate the connection
- Fetch available EDMCS applications and their dimension
structures
Note:
If connection or credentials are invalid, appropriate error prompts will guide the user.
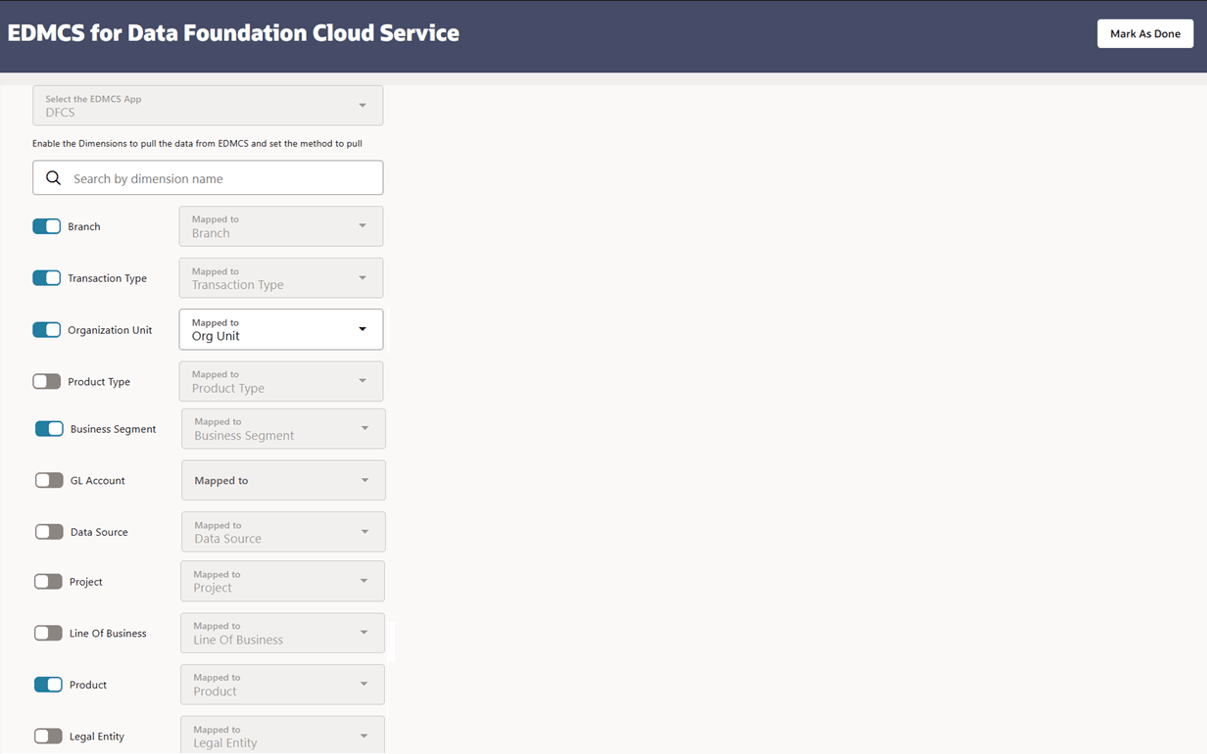
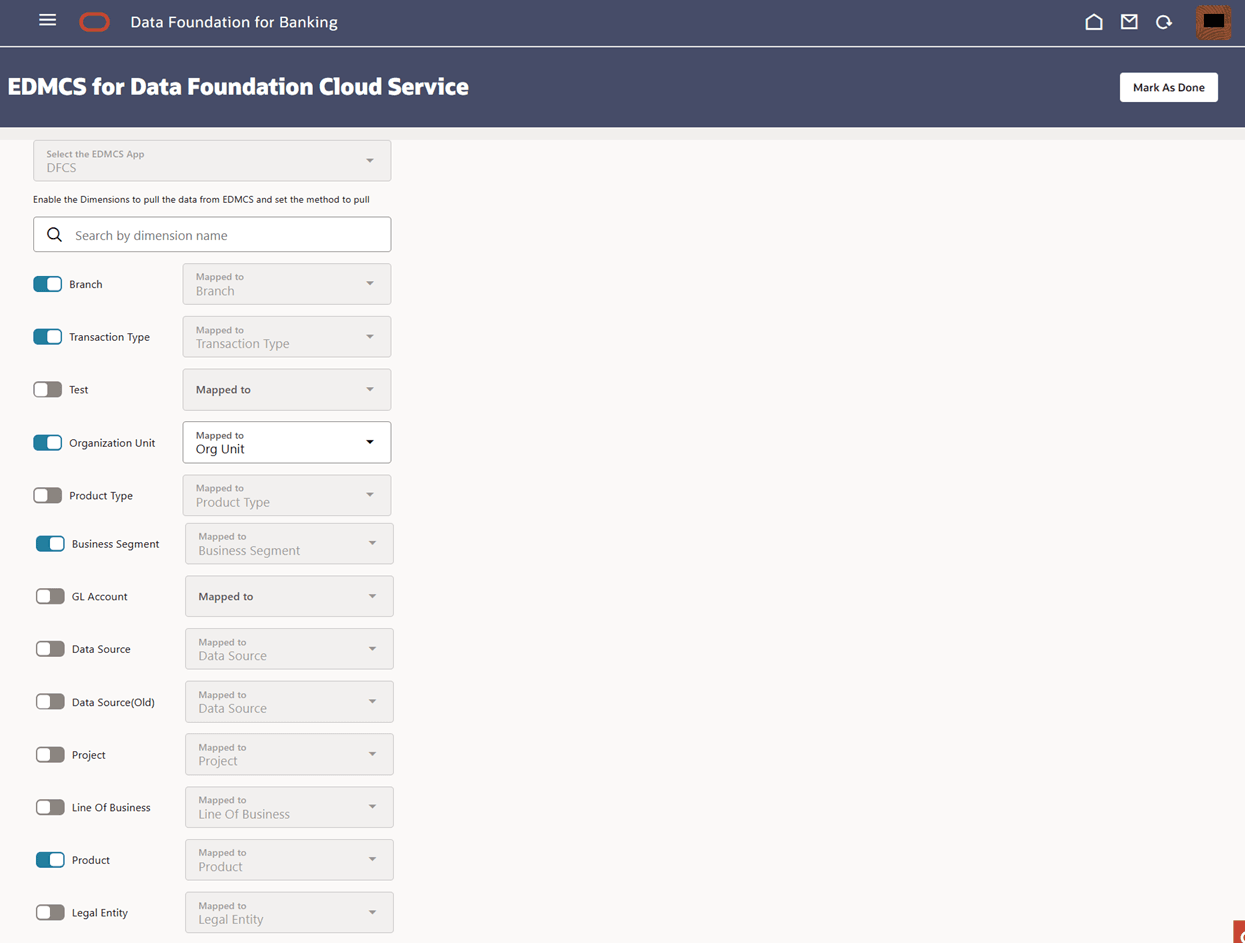
- Select the required Dimension.
- Click Mark As Done located at the top right to complete the
integration setup.
Figure 5-3 Dimension Mapping

- After saving successfully, the PMF will be created.
Checking PMF Executions
- Navigate to the Home page → Data Integration → Data Operations.
- On the Search bar, locate and click on
EDM_DIM_EXPORT_LOAD.
All selected dimensions will appear.
- Click Execute.
Figure 5-4 EDMCS Pipeline

- Select the Execution Type and enter the Object ID.
- Click Execute again to run the process.
- Go to the Process Monitor page.
- Check the status for EDM:
- Completed → Process ran successfully.
- Failed → Double-click the failed record to view Execution Logs for troubleshooting.
- Click Execution Logs to view the logs.
Validate Data Sourced from EDMCS
- From the left menu click Data Visualization → Source Data Visualisation.
- Click the Search box near the top.
- From the Source Data Visualisation window, select Others or type the dataset name or keyword (e.g. branch) in the search bar and press Enter. The dataset page opens showing the data grid.
- On the dataset page, you can filter the results datasets (e.g., As Of Date, Data Source Code).
- Click the three-dots to perform the following actions:
- Sort By — sort the dataset by a chosen column.
- Drill to Attribute/Hierarchy — navigate to related attributes or hierarchies for the selected dimension value.
- Edit — edit dataset metadata or definitions.
- Export — export the data.
- Click Go back to return to Oracle Analytics window and choose another dimension.
- Create New Dataset: In the next screen, click on Create, then select Dataset.
- Choose Connection: In the dataset creation screen, choose
the connection DFDATAVIS_CONN.
Figure 5-5 Connections

- Expand Schema and Select Table: Expand the Schemas section, then expand DFREP, and select the STAGE_PRODUCT_MASTER table.
- View Sourced Data: The sourced data will now be visible for
your selected dimension.
Note:
Always ensure that configuration details are accurate before executing any process to avoid failures.Note:
For detailed instructions on Accelerator Applications, refer to Working with Accelerator Applications in the Oracle Cloud Enterprise Data Management guide.