E.1 Configuration for What-If Analysis
To configure What-If Analysis, follow these steps:
- Configure the connection to the What-If Variation application page in OFSAAI in the
Create Scenario Analysis.
OFSAAI is Oracle Financial Services proprietary tool, which uses Java to enable users to apply variations on the projected data.
For example: Assume that the OFSAA hostname is bank_host and the OBIEE analytics port is 8080, then the OBIEE analytics access URL would be: http://bank_host:8080/PFT81.
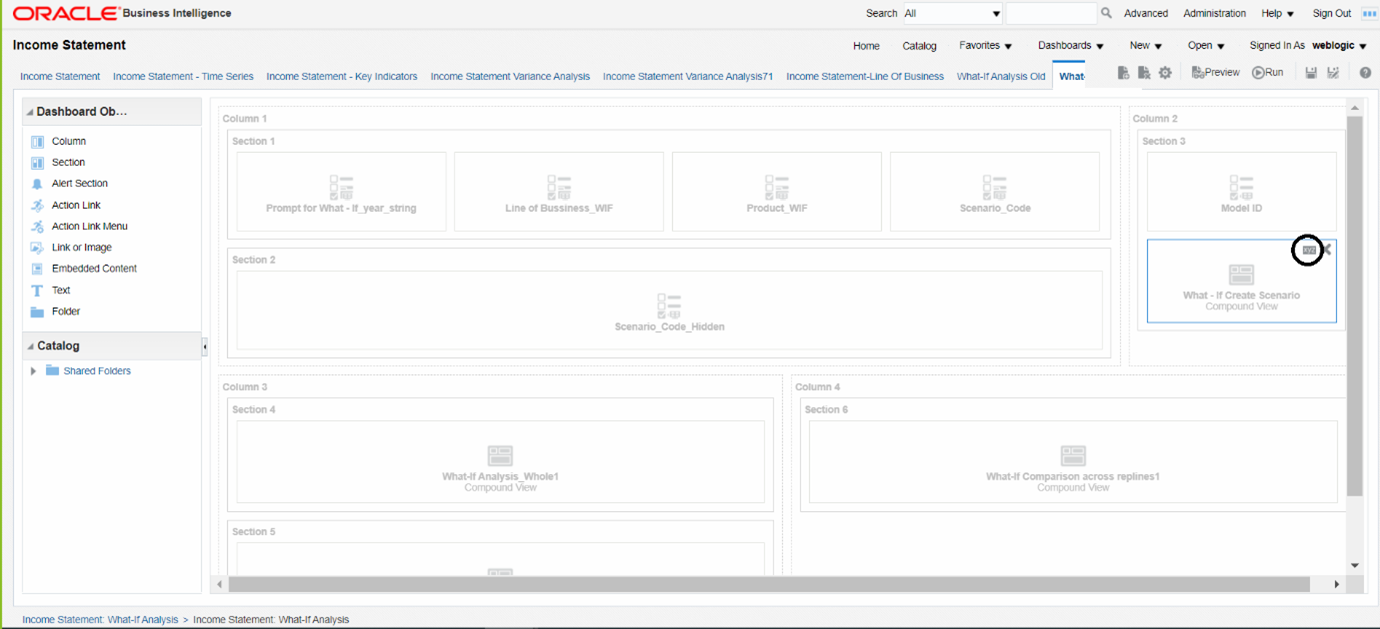
To configure the What-If analysis framework, follow these steps:- Navigate to What-If Analysis Dashboard Page in the Dashboard - Institutional Performance for OFSIPA, Retail Performance for OFSRPA, and Income Statement for EFPA.
- Edit the Dashboard Page.
- Edit the analysis Create Scenario.
The OBIEE users mapped to the role of BI Author or higher will be able to configure the What-If Analysis framework.
Figure E-2 Business Intelligence - What-If Tab
- Navigate to the Advanced XML section and edit the
contents of the Analysis XML.
Figure E-3 Create Scenario - Advanced Search
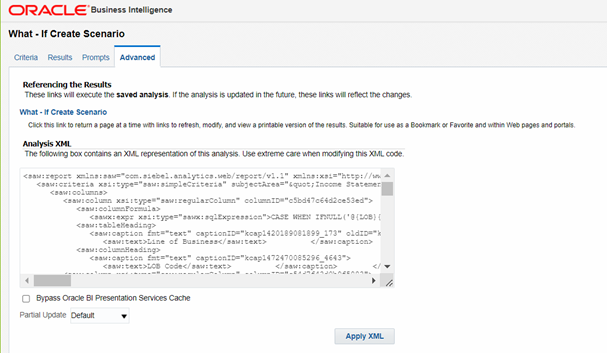
- Replace all occurrences as follows:
- ##ofsaa_hostname## with the OFSAAI user hostname (For example: bank_host)
- ##ofsaa_port## with the OFSAAI servlet port (For example: 8080)
- ##ofsaa_context## with the context of the OFSAAI instance (For example: PFT81).
- Click Apply XML. Save the analysis after the occurrences of placeholders have been replaced and the XML contents have been pasted.
- Configure the OBIEE URL in the What-If Model
Definition setup tables to navigate between the OFSAAI and OBIEE
screens.
Example:
Assume that the user hostname is bank_host and the OBIEE analytics port is 7001, then the OBIEE analytics access URL would be http://bank_host:7001/analytics.
To configure the details on the What-If analysis framework, the user needs to execute the following update on the atomic schema:
update fsi_m_wif_model_defn set output_page =
replace(replace(output_page,'##hostname##', 'bank_host' ), '##port##','7001')
/
Commit
/
Where the hostname and port replaced would be the user's corresponding hostname and port instead of the examples mentioned.
- Configure the What-If Admin Role in RPD to configure security roles to restrict
Scenario Creation.
If a user is not mapped to the role of a What-If Analysis administrator, the user will only have access to Display Results. The results of this operation will not be persisted beyond one session per user.
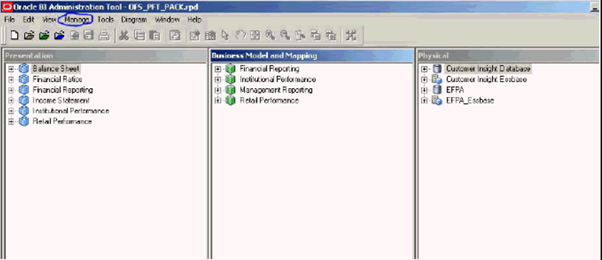
- Open the OFS_PFT_PACK RPD and navigate to the
Variable Definition Screen.
Figure E-4 Oracle BI Administration Tool
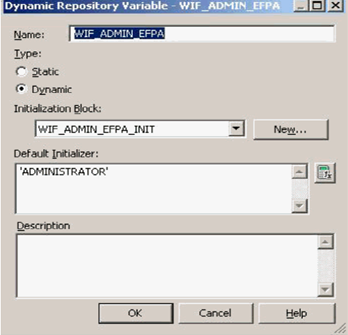
- Modify the WIF_ADMIN_CI Repository Dynamic Variable.
Figure E-5 Variable Manager
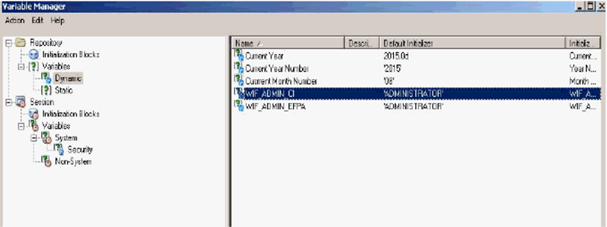
- Edit the default initializer to enter the desired What-If Administrator
role.
Note:
The user mapped to the role of Administrator has the privilege to create and save a scenario. Users who are not mapped to the role of Administrator will only be able to create a scenario, but not save it.Figure E-6 Dynamic Repository Variable
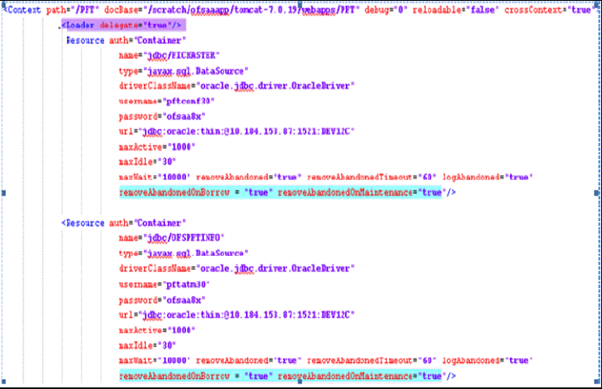
 If the webserver is Tomcat of version >= 8.0.18, the following additional configuration needs to be done to avoid performance issues while performing What-If Analysis.
- Add the following tags in the server.xml file under
tomcat_folder/conf/:
Insert the following tag in the Context tag as the first nested tag:
<Loader delegate="true"/> - Insert the following attributes for all the Resource tags in
the Context tag:
removeAbandonedOnBorrow =
                                                "true"
removeAbandonedOnMaintenance = "true"Example:Figure E-7 server.xml File
- Add the following tags in the server.xml file under
tomcat_folder/conf/:
- Open the OFS_PFT_PACK RPD and navigate to the
Variable Definition Screen.