4.4 Deploying D3 on OBIEE Server
This section provides detailed steps to install and configure D3, a visualization framework, which is used in a few reports of the OFS RPA application.
To deploy the D3 in the OBIEE server, follow these steps:
- Download version D3 v.5.4.0 from the D3 website:
- Unzip the contents of d3.zip.
- Copy the
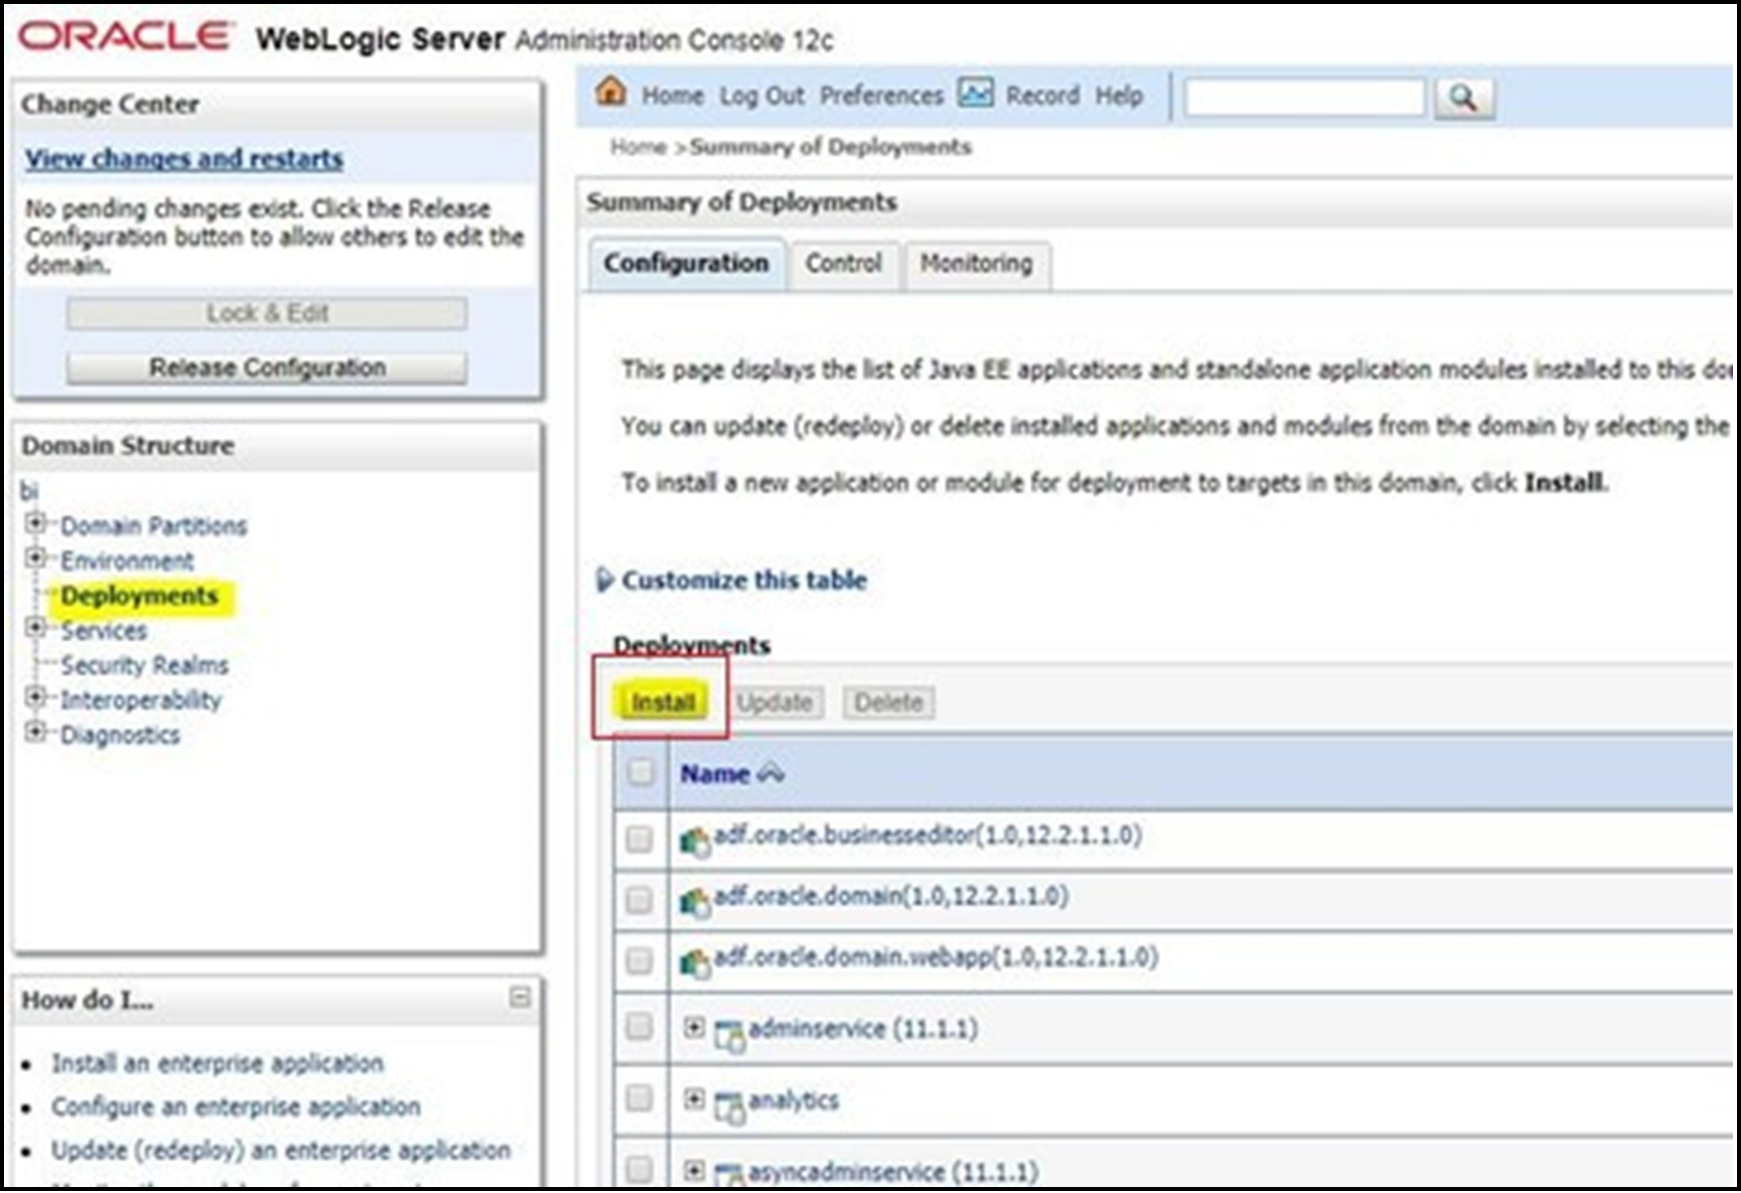
d3.min.jsfile and place it underanalyticsRes/d3from$FIC_HOME/OFS_RPA_DASHBOARDSdirectory and paste theanalyticsResfolder to OBIEE Server at the following location:$ORACLE_HOME/user_projects/domains/ - Log in to the WebLogic server, navigate to Deployments in
your Domain Structure, and then click Install.
Figure 4-10 WebLogic Administration Console
- Paste the full path of the D3 directory, select D3 (open directory), and click
Next.
Figure 4-11 Locale Deployment

- Select Install this deployment as an application and click
Next.
Figure 4-12 Installation Type Selection

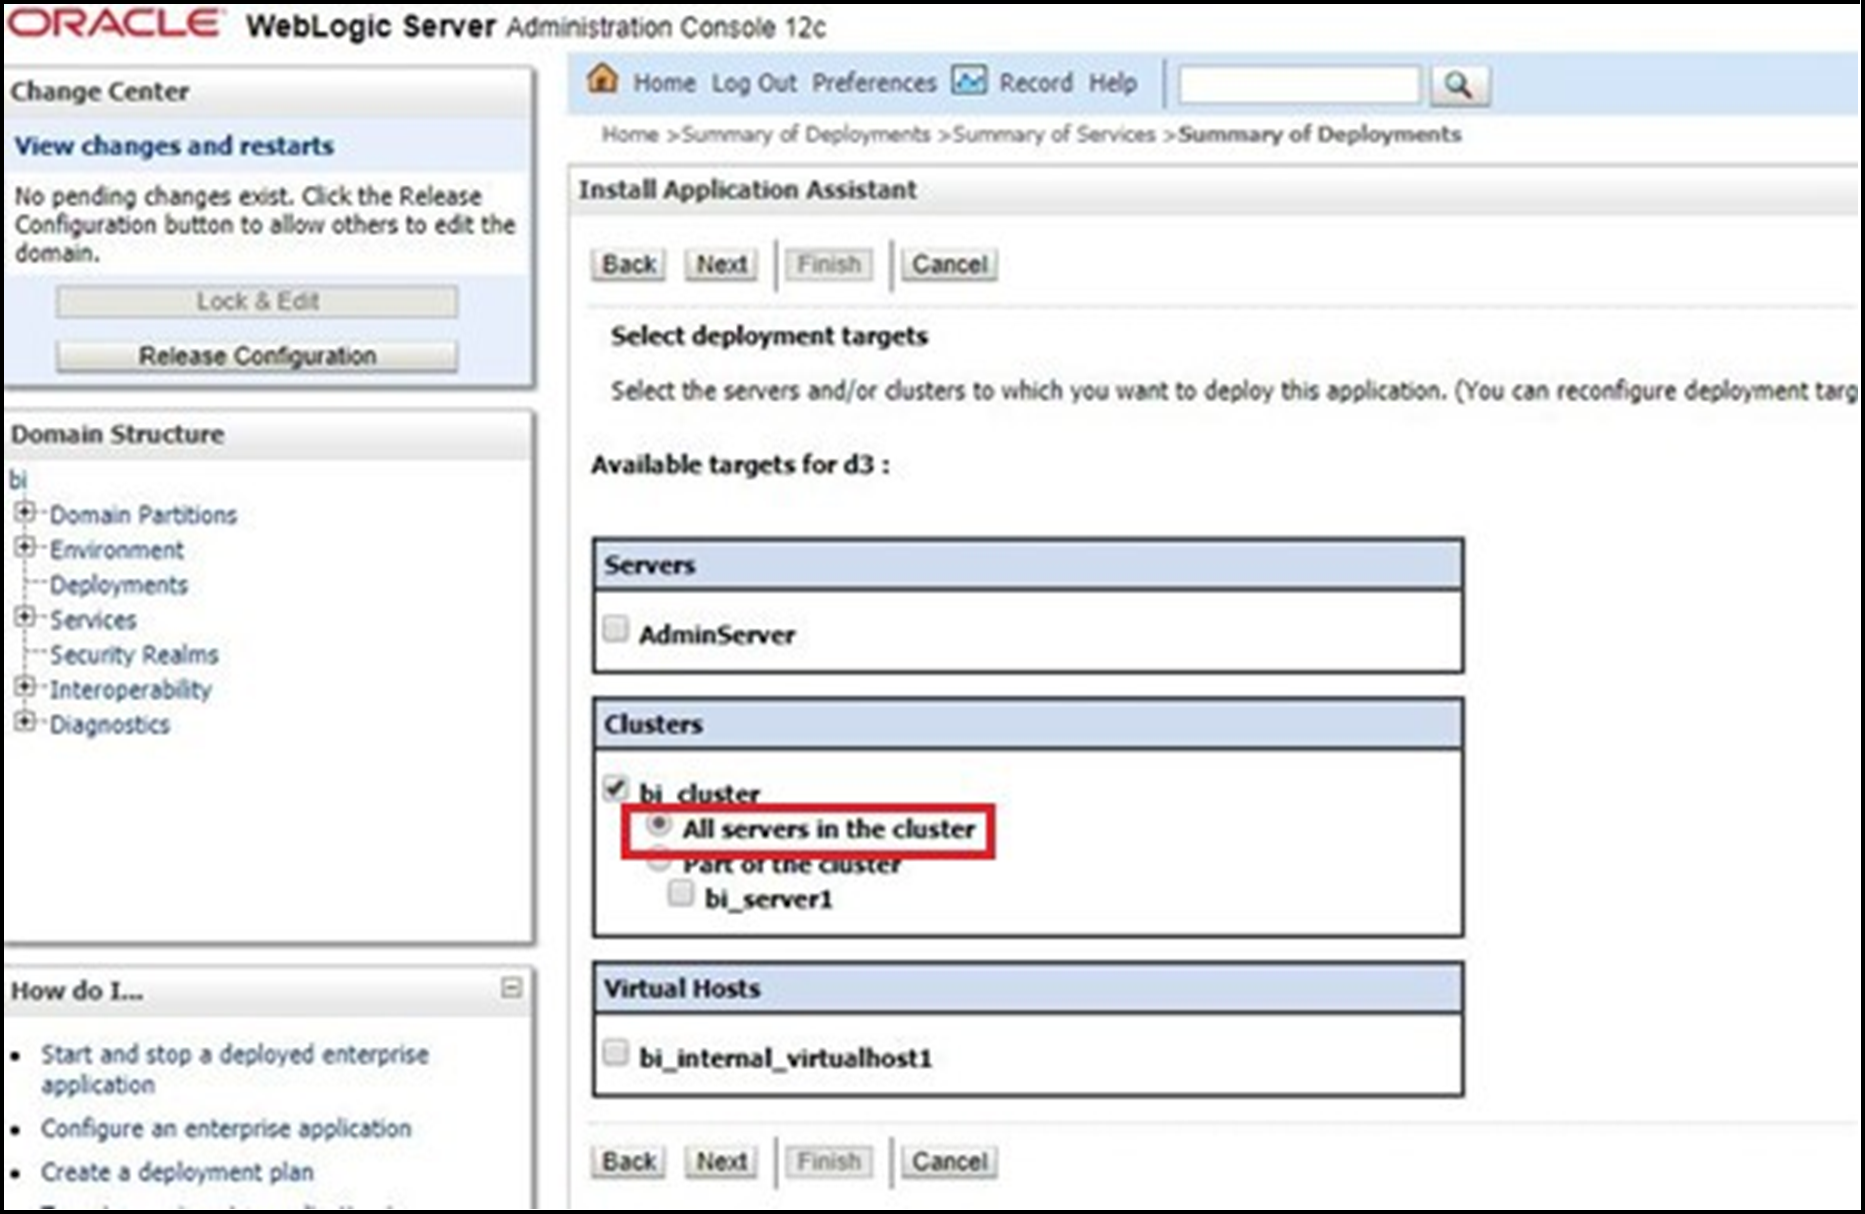
- Select bi_cluster, and then select All servers in
the cluster.
Figure 4-13 Deployment Targets
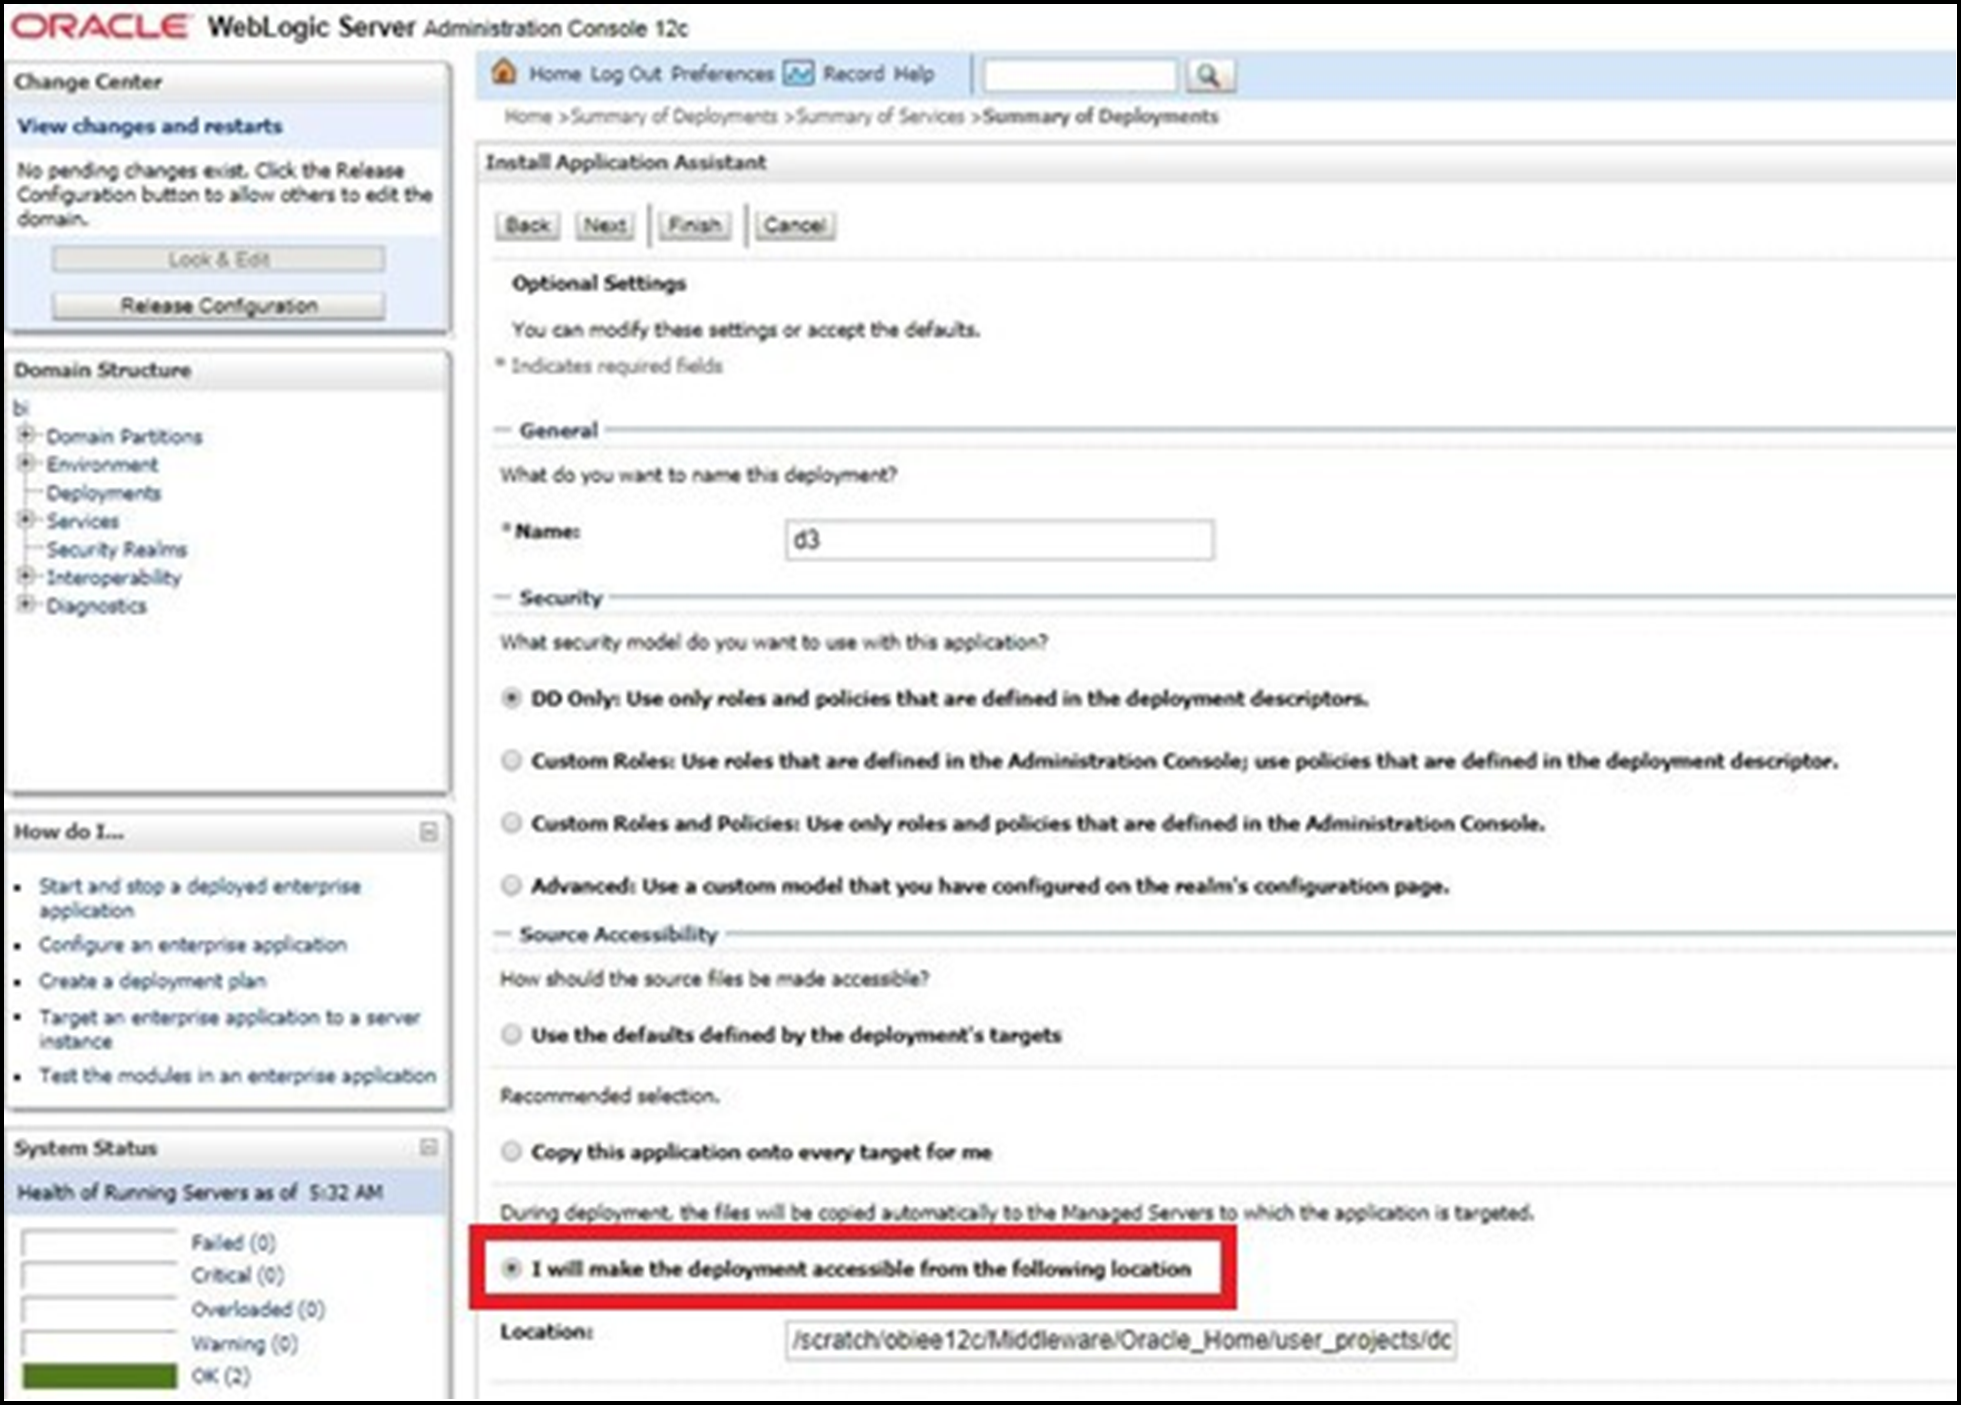
- Select I will make the deployment accessible from the following
location (as highlighted in the following screenshot) and click
Finish.
Figure 4-14 Optional Settings
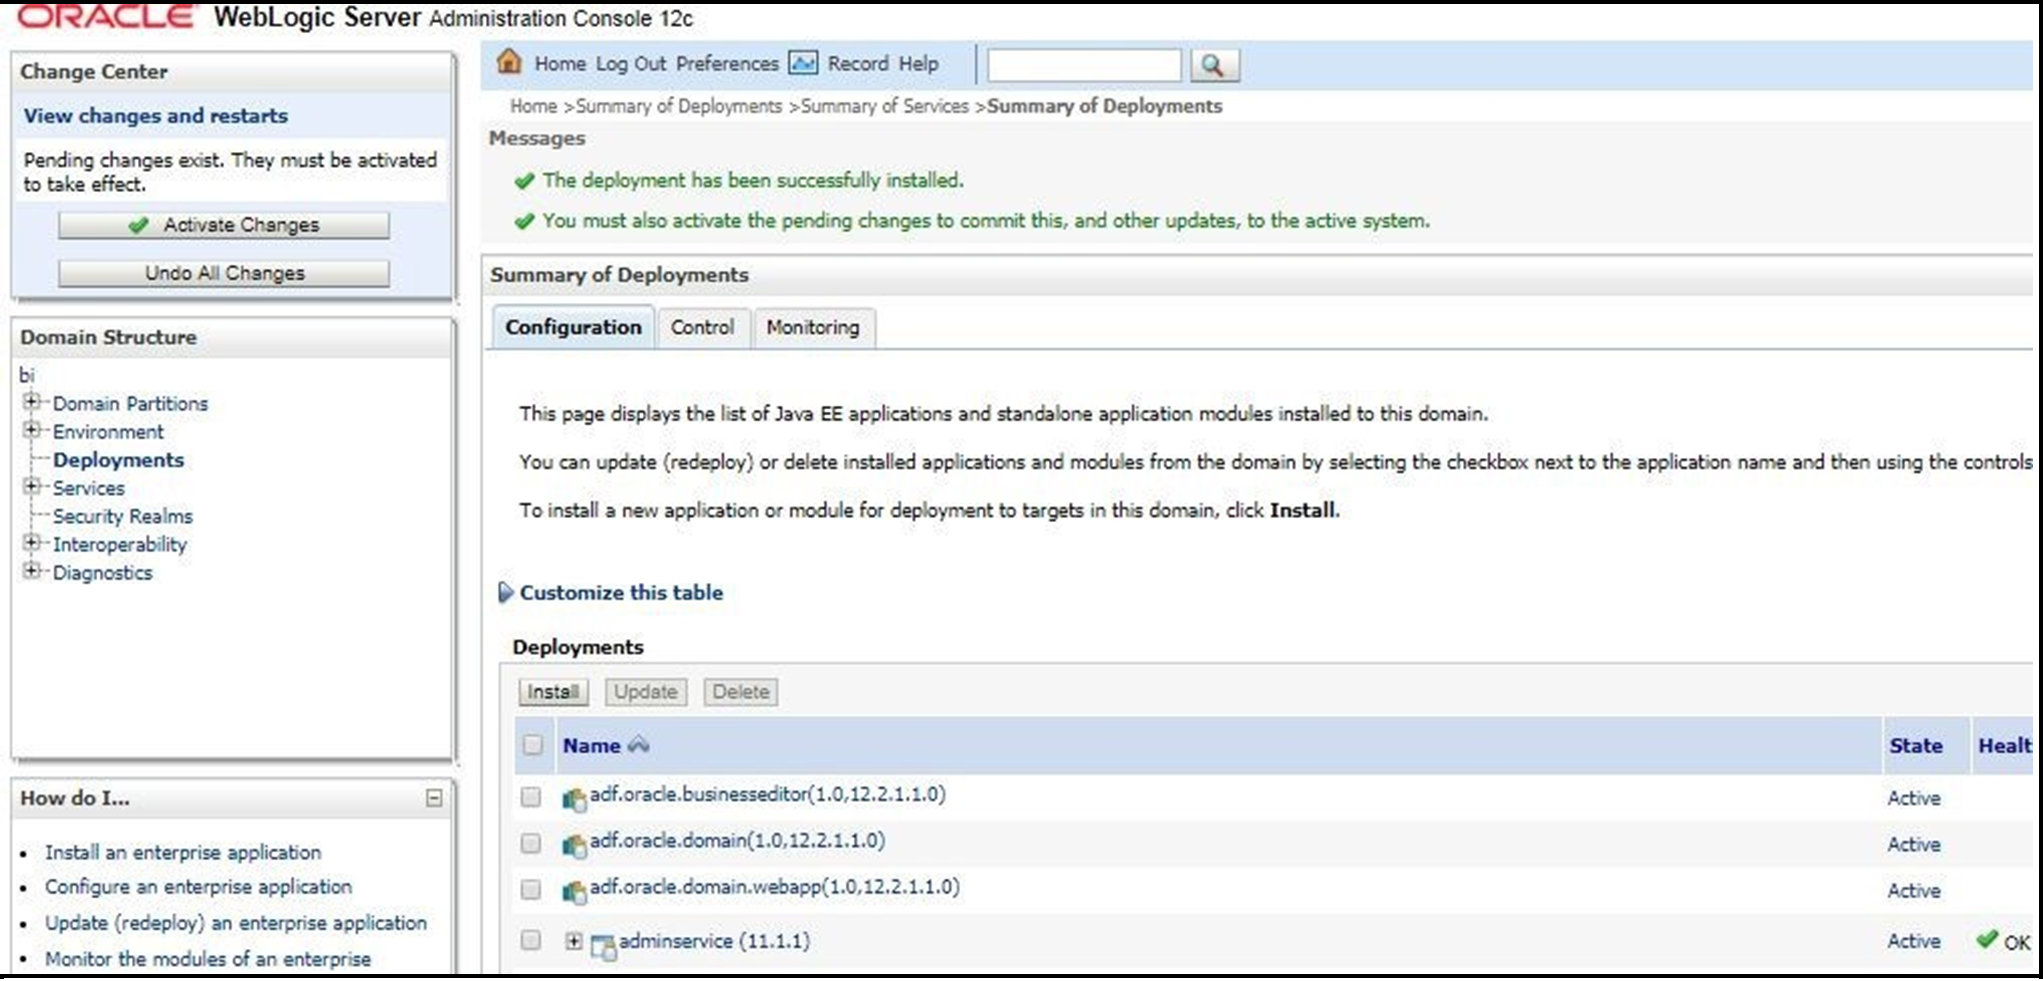
- Click Activate Changes.
Figure 4-15 Summary of Deployments
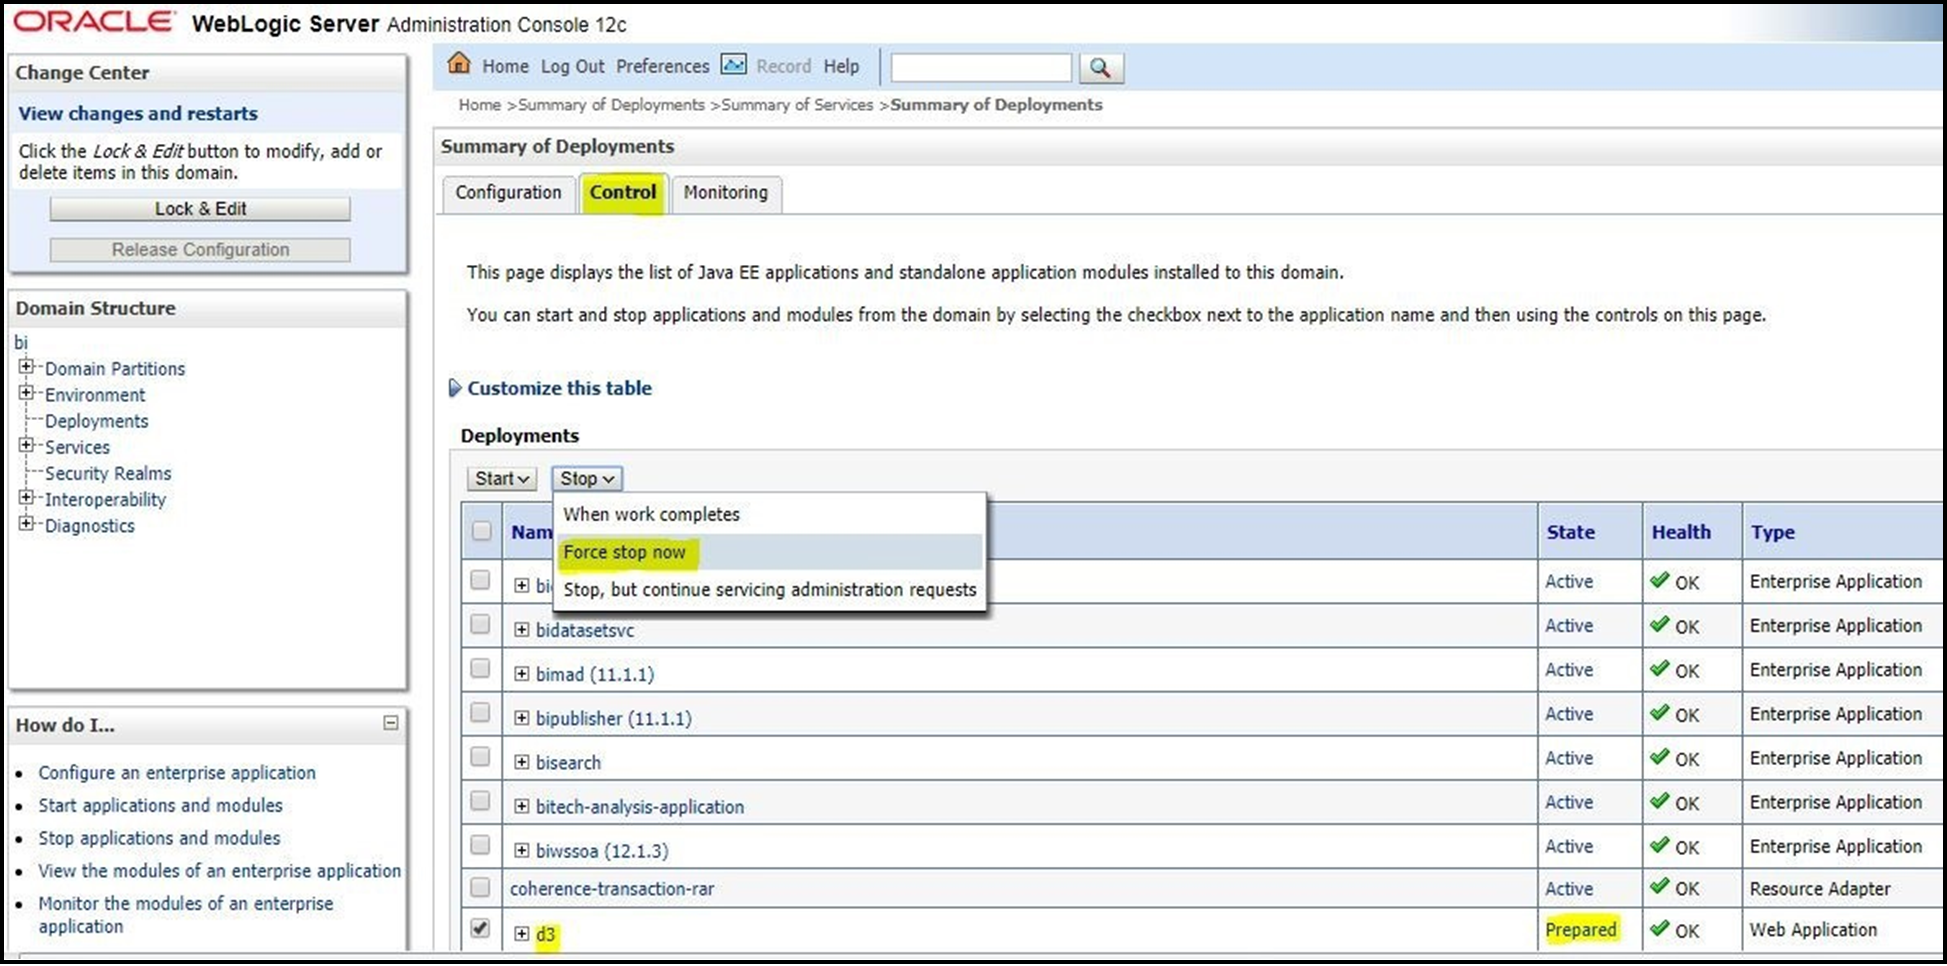
- After activating the changes, the application is in a
Prepared state. Select the Control
tab. All the installed applications are displayed. Select the application from the
Deployments table, click Stop, and
then select Force stop now from the drop-down menu.
Figure 4-16 Customize the Deployed Applications
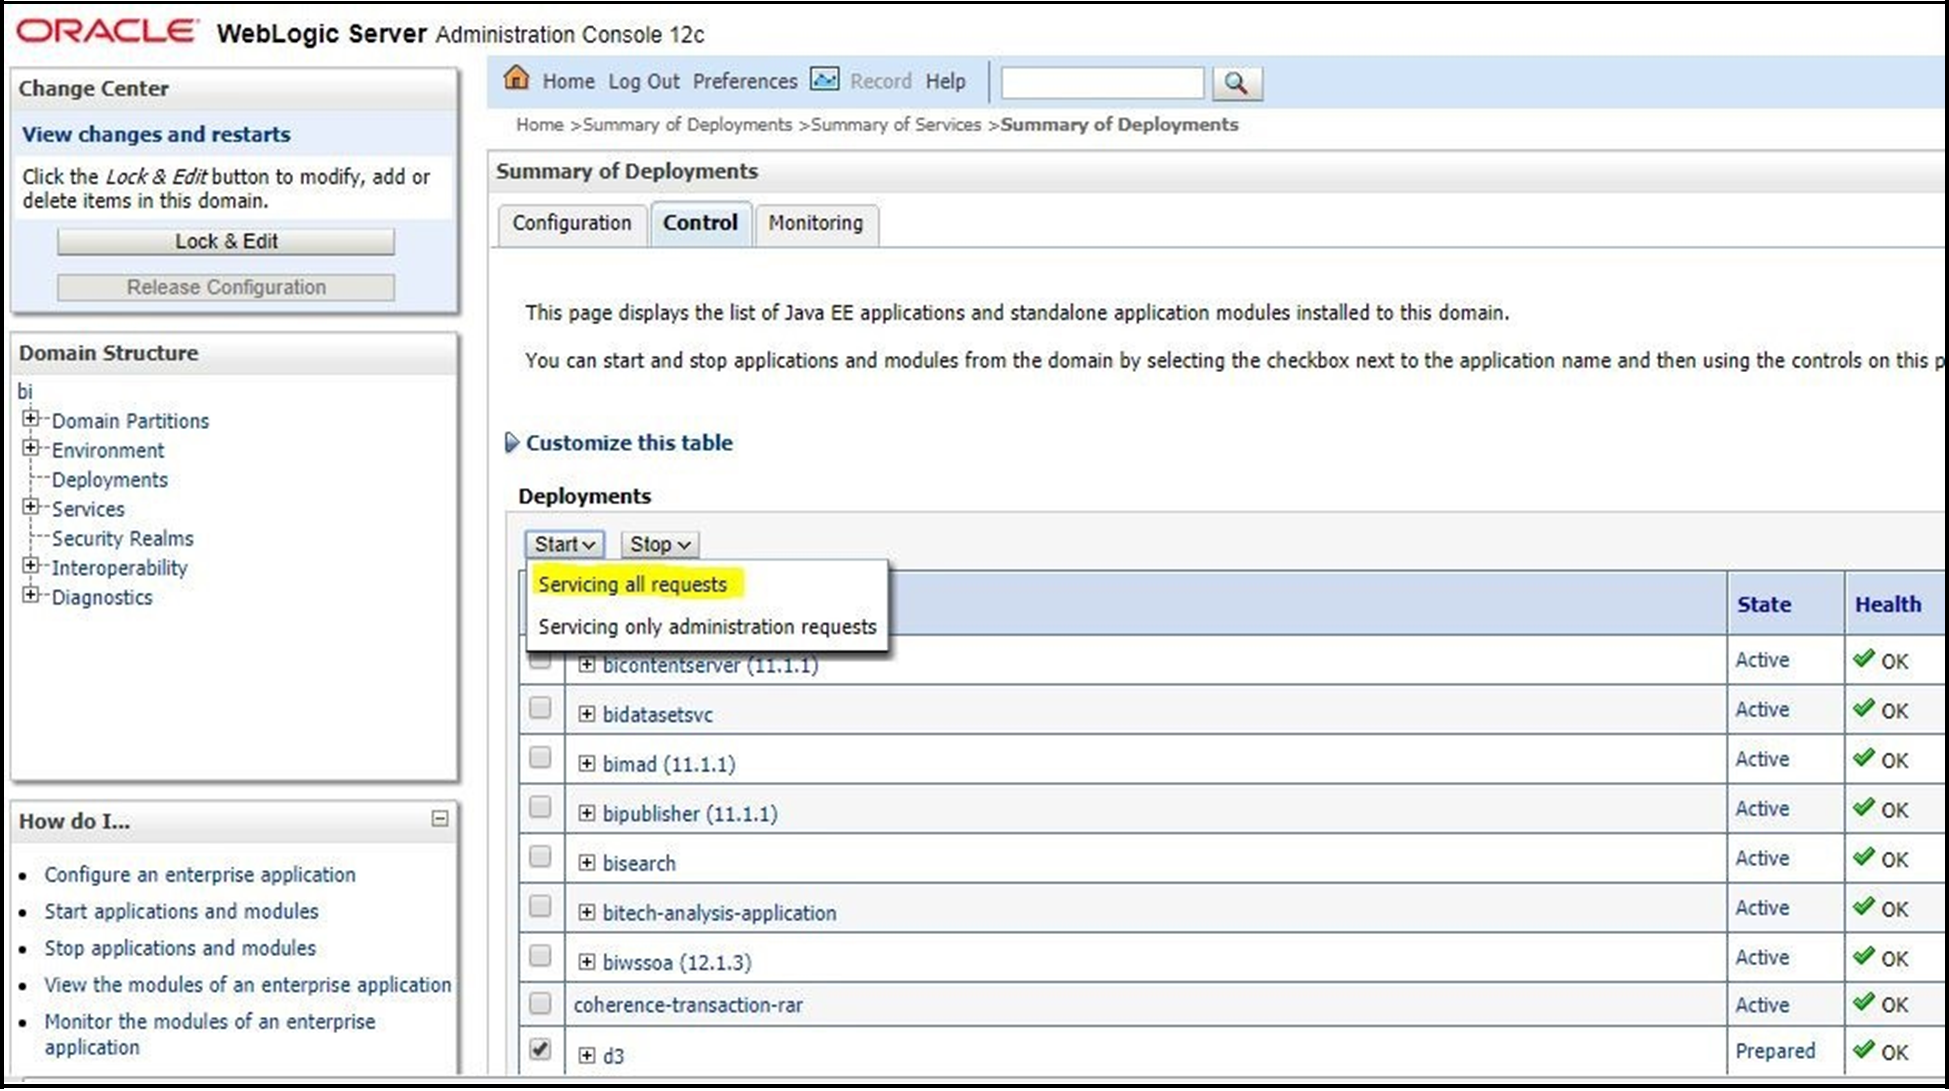
- Start the application by selecting the check box next to it and then select
Servicing all requests from the
Start drop-down menu in the
Deployments table in the WebLogic Server Administration
Console.
Figure 4-17 Customize the Deployed Applications
- The application changes to the Active state and is ready to use.