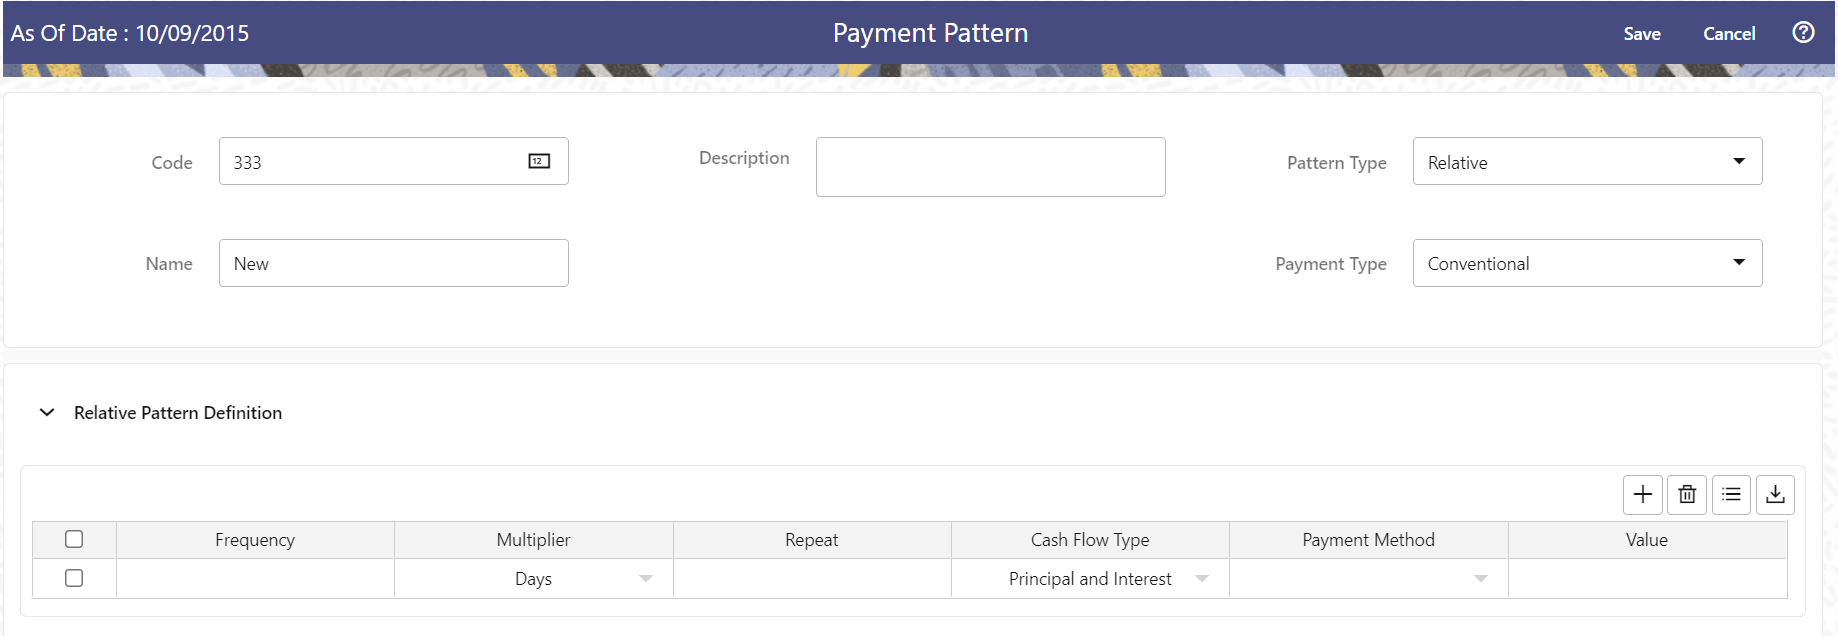
5.1.6.1.2 Define Relative Payment Patterns
You create Relative Payment patterns for instruments that have irregular scheduled payments.
Prerequisites
Selecting Relative as the pattern type.
Figure 5-15 Relative Payment Patterns

To define a relative payment pattern, follow these steps:
- In the Payment Patterns page, select Pattern Type as Relative.
- Select the Payment Type from the drop-down list: Conventional, Level
Principal, or Non-Amortizing. The Payment Type determines the type of
information required to successfully define the Payment Phase.
The payment type determines the available characteristics for defining the payment amount.
- Define the Payment Phase.
The payment type determines the type of information required to successfully define the payment phase. For more details, see: Relation between Payment Phase Attributes and Payment Types.
- Enter the Frequency for each payment phase.
- Select the appropriate Multiplier for each payment phase from the following
options:
- Days
- Months
- Years
- Enter the number of times each Payment Phase should be repeated in the Repeat column.
- Select the Cash Flow Type. The available types depend on the Payment
Type. This do not apply to the Non-Amortizing Payment Type.
Table: Relationship between cash Flow Type and Payment Types
Level Principal Non-Amortizing Conventional Principal and Interest Yes Yes Principal Only Yes Interest Only Yes Yes - Select the Payment Method.
The available payment methods depend on the payment type. For more details, see Relation between Payment Method and Payment Types. Payment Methods do not apply to the Non-Amortizing Payment Type.
- Type the Value for the Payment Method you selected in the previous step for applicable Payment Types.
- Click the Add icon to add additional Payment Phases to the Pattern. Click Delete icon corresponding to the rows you want to delete.
- Click Add Multiple Row icon to enter the number of rows you want to add and click Go.
- The Download Excel icon helps you to export payment information, modify and
paste back in the UI.
Note:
A Payment Pattern must have at least one valid Payment Phase to be successfully defined. The system raises a warning if you try to save a Payment Pattern with an incomplete Payment Phase. - Click Apply and Save.
The payment pattern is saved and the Payment Pattern home page is displayed.
Note:
It is not necessary to set up relative payment patterns for the complete term of an instrument. The payment pattern automatically repeats until the maturity date. Suppose a payment pattern is created to make monthly payments for the first year and quarterly payments for the next three years. If you apply this pattern to an instrument record with an original term of five years, the payment pattern wraps around and the fifth year is scheduled for monthly payments.
An easy way to set up payment patterns for instruments with varying original terms is to use the repeat value of 999 in the last row of the payment pattern. For example, a payment pattern that pays monthly for the first year and quarterly thereafter, can be set up with two rows. The first row shows 12 payments in one month. The second row shows 999 payments in three months. When this payment pattern is processed it repeats the three-month payment frequency until the maturity date is reached.
The following table describes the relationship between payment phase attributes and payment types.
Relationship between Payment Phases and Payment Types
| Payment Phase Attributes | Payment Types: Level Principal | Payment Types: Non-Amortizing | Payment Types: Conventional |
|---|---|---|---|
| Frequency | Yes | Yes | Yes |
| Multiplier | Yes | Yes | Yes |
| Repeat | Yes | Yes | Yes |
| Payment Method | Yes | Yes | |
| Value | Yes | Yes |