3.6.1.1 Create Drop Partition Policy
This section provides the details on dropping the partition data from selected tables based on user defined criteria.
To create Drop Partition Policy, follow these steps:
- Navigate to New Policy page.
- Follow the steps mentioned in below sections:
- Step 1: Policy Definition
- Step 2: Selection
- Step 2: Preview and Submit
Step 1: Policy Definition section
- From Policy Details tab, click Start.
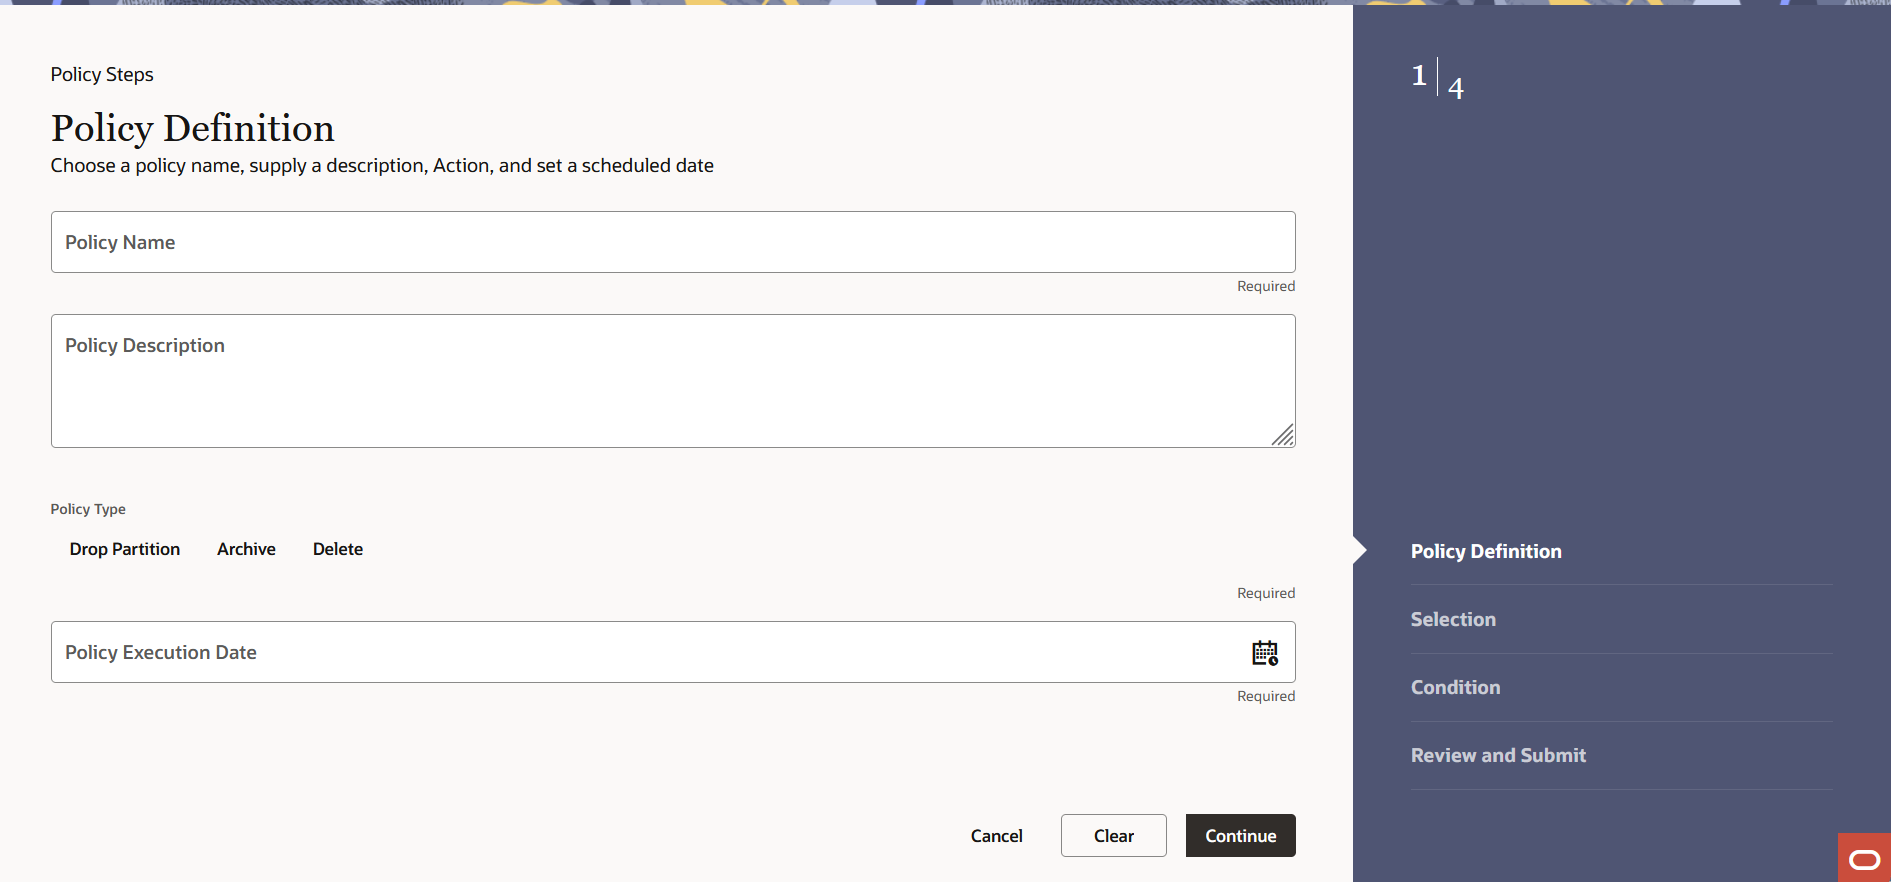
The Policy Definition page is displayed.
Figure 3-26 Policy Definition section

- Enter the following details:
- Name: Name of Policy
- Description: Description of Policy
- Table Group: If this option is selected as No, then you can select Policy Type as Drop Partition.
- Type: Type of Policy as Drop Partition
- Policy Execution Date: Select the execution date and time of policy using calendar
- Click Continue.
Step 2: Selection section
- Navigate to the Selection section. The Selection window is displayed to define the partitions.
- Select the Partition type as Drop
Partition or Truncate Subpartition.
- If Partition type is selected as
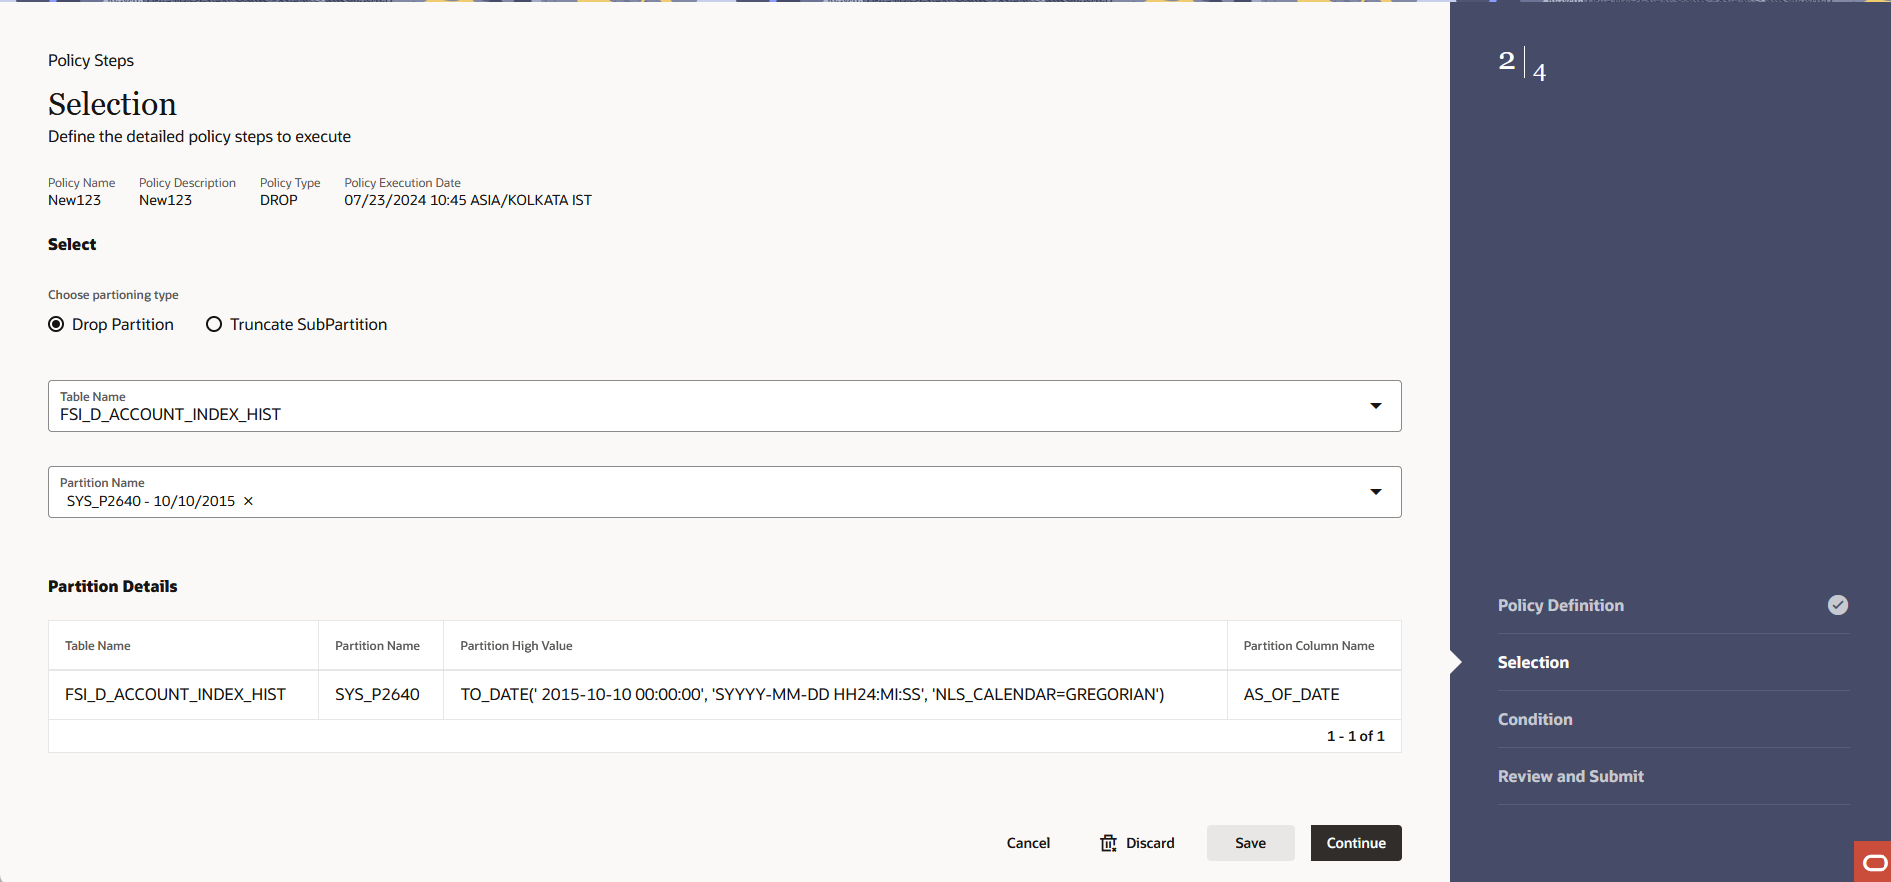
Drop Partition, then following window is
displayed:
Figure 3-27 Partition type as Drop Partition

- Select the table(s) for which you want to do the partitions. The list of available partitions is displayed that contain data.
- Select the Partition Name. Partition Name shows the
partition of the selected table from the database.
The Partition details will be displayed in Partition Details section. This shows the Table Name, Partition Name, column name and metdata on which partition is created. This doesn’t show empty partitions.
- Click Continue.
- If Partition type is selected as
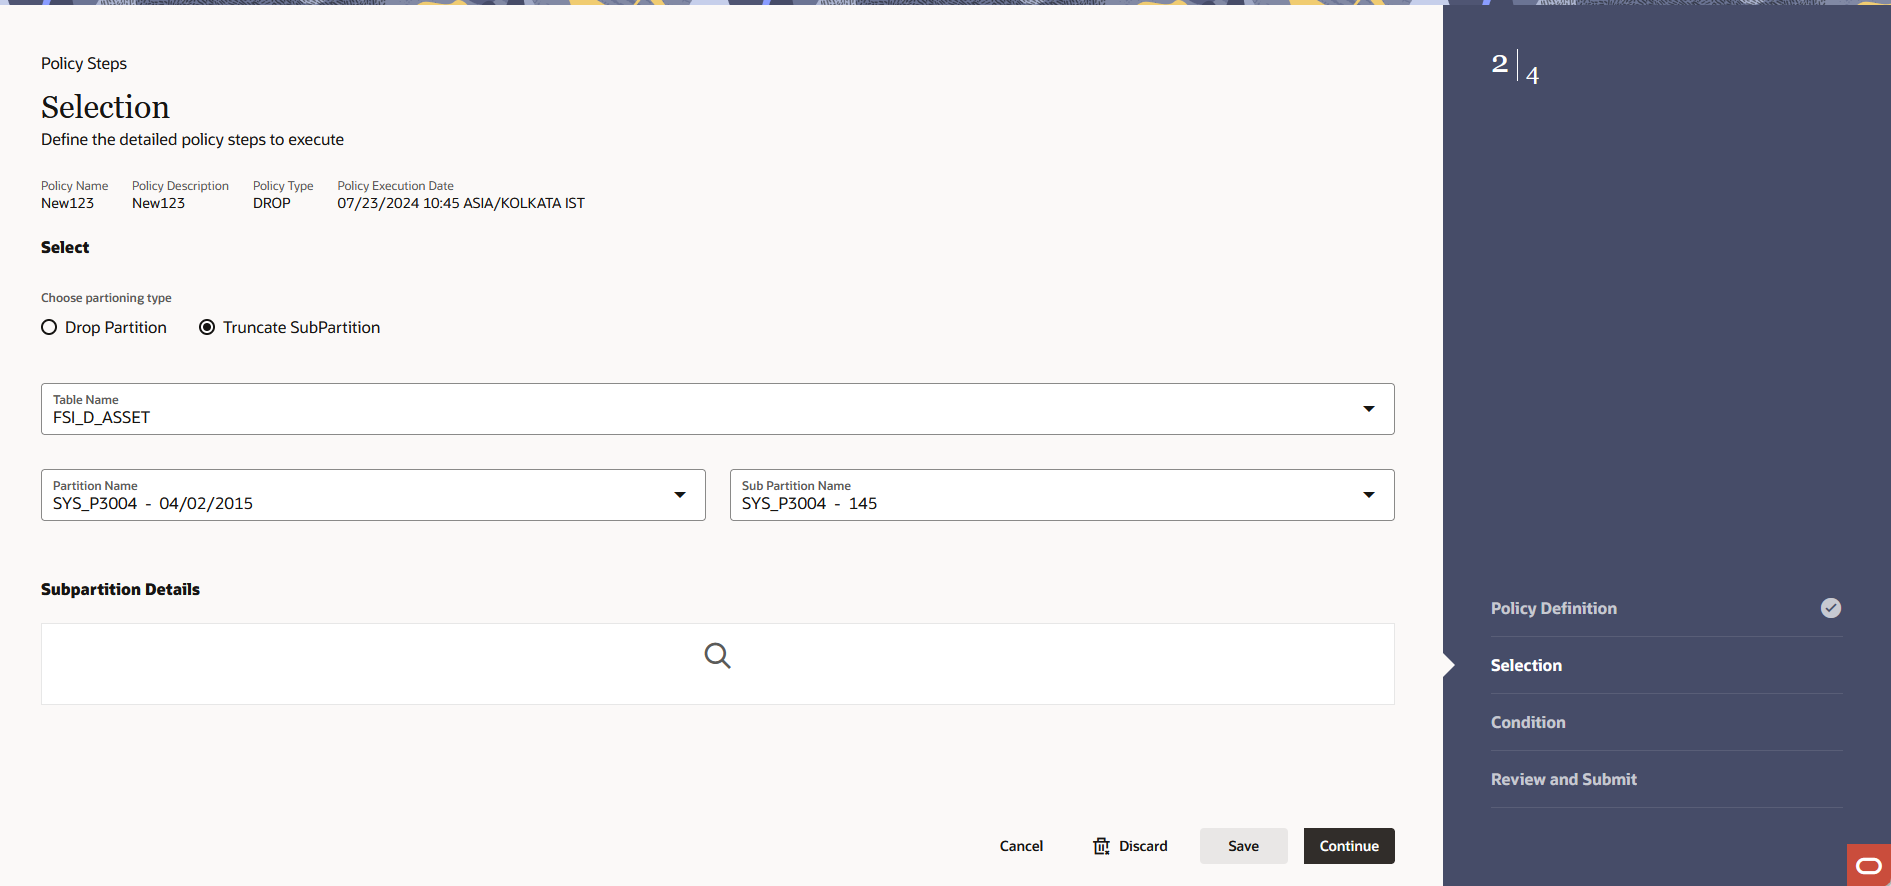
Truncate Subpartition, then following window
is displayed:
Figure 3-28 Partition type as Truncate Subpartition

- Select the table(s) for which you want to do the sub partitions. The list of available sub partitions is displayed that contain data.
- Select the Sub Partition Name. Sub Partition Name
shows the columns and metadata on which sub-partition has been
created.
The Sub Partition details will be displayed in Subpartition Details section. This shows the Table Name, Subpartition Name, column name and metdata on which partition is created. This doesn’t show empty partitions.
- Click Continue.
Note:
If only sub-partition is selected to remove then only data from it will deleted. Sub-partition is not dropped to enable customer re-load data in it, if needed. Sub-partitions in PBSM data model is created with a pre-defined list.
- If Partition type is selected as
Drop Partition, then following window is
displayed:
- Click Save.
- Click Continue.
Step 3: Preview and Submit section
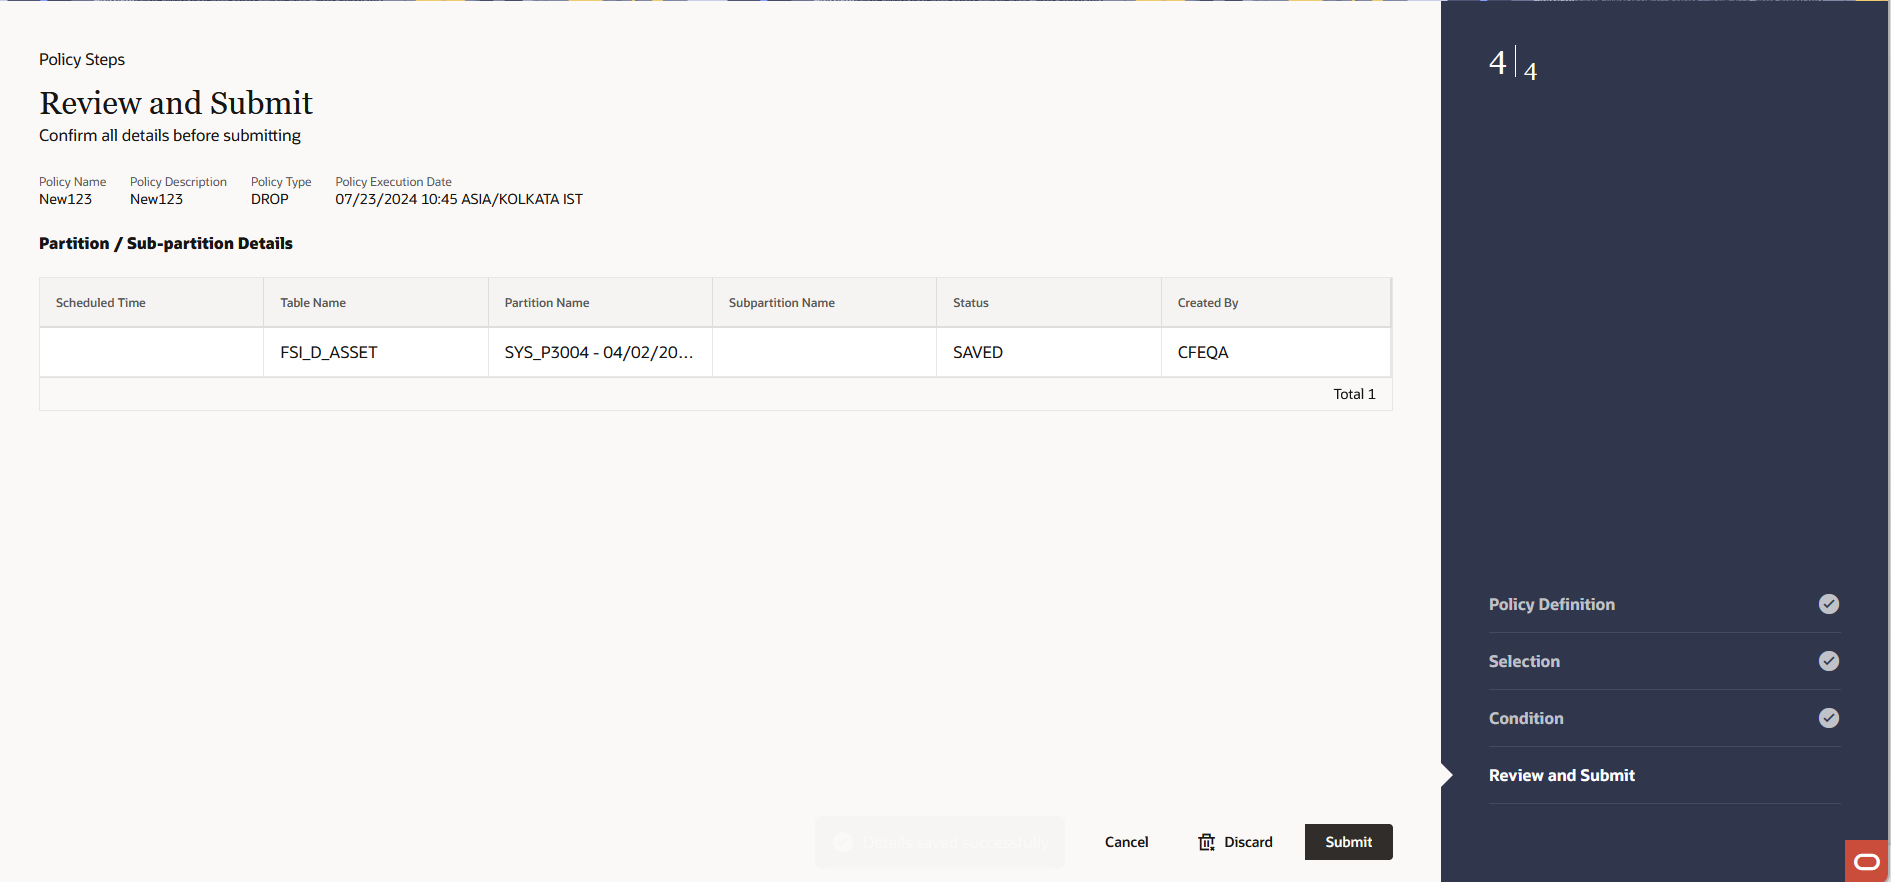
- Navigate to Preview and Submit section.
Review the policy details.
Figure 3-29 Preview and Submit section

- Click Submit to create the policy. The created policy will be displayed on Data Housekeeping Summary page.