3.9.1.1 Create Cash Flow Edits Rule
To add a new Cash Flow Edits Rule, follow these steps:
- Navigate to Cash Flow Edits Summary Page.
- Click the Add . The Rule Details window is displayed.
- Follow the steps mentioned in below sections:
- Step 1: Rule Details
- Step 2: Rule Condition
- Step 3: Assignment
- Step 4: Preview
Step 1: Rule Details
- Navigate to Rule Details page.
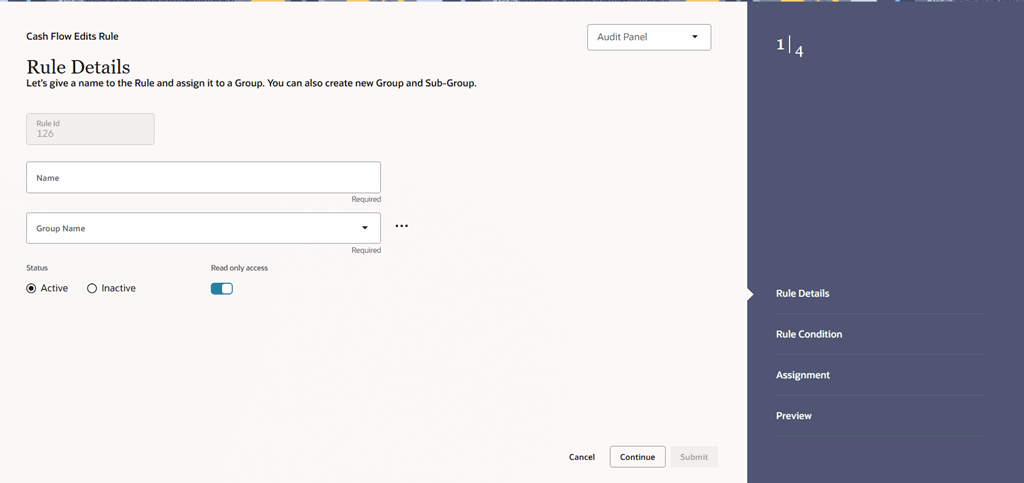
Figure 3-65 Rule Details
- Enter the following details:
Table 3-24 List of fields used for Creating Cash Flow Edits Process
Field Description Rule ID Shows the ID of the Cash Flow Edits Rule. This is an auto generated numeric field. You cannot modify this. Rule Name Enter the name of the Cash Flow Edits Rule. This is an alphanumeric field. The maximum length of this field is 1000 characters. Group Name Select the Group Name from Group Name drop-down list. For example, Cash Flow. You can add new a Group and Sub Group using Add icon.
Adding a Sub Group
To add a Sub Group, follow these steps:
- Click Add. The Add Group Window is displayed.
- Enter the following details:
- Group Name: Name of new Group
- Parent Group: Select Parent Group
- Group Id is auto populated.
To add a new Group select the ‘Praent Group’ switch and enter Group Name.
These added Group/Sub Group Names will be populated in Cash Flow Edits Details section of Cash Flow Edits Process window.
Status Set the status of the rule as Active or Inactive. Access Type Select the Access Type as Read-Only or Read/Write. - Click Continue.
Step 2: Rule Condition
- Navigate to Rule Condition page.
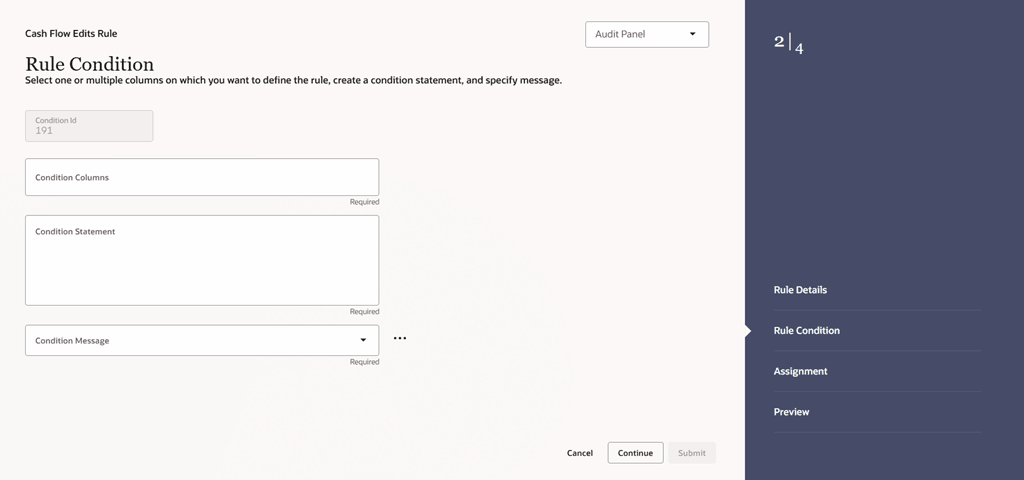
Figure 3-66 Rule Condition
- Enter the following details:
Table 3-25 List of fields used for Creating Cash Flow Edits Process
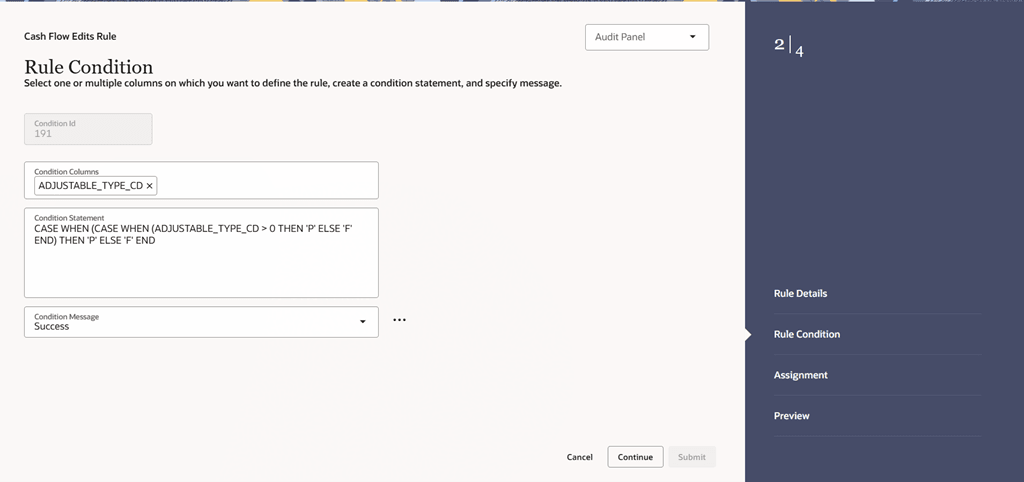
Field Description Condition ID This field shows the Condition ID. This is an auto generated numeric field. You cannot modify this. Condition Columns Select the Columns using which you want to define the error condition expression. Condition Statement This field allows you to define the expression of a rule. You can define condition expression for selected Condition Columns (using the Condition Columns field).
When you click the Condition Statement Field, the Expression Window is displayed. Define the condition and click Save.
Condition Message Select the Condition message. You can add a new condition message using Add icon. For more information on Cash Flow Edits messages, see the Cash Flow Edits Execution section.
To add a Condition Message, follow these steps:
- Click Action icon and select
Add icon. The Add Message window is
displayed. Enter the following details:
- Message Type: Select as Error, Warning, or Information
- Message Description: Enter the Message details.
- Message ID is auto populated.
- Click Save.
Below is an example:
Figure 3-67 Example
- Click Action icon and select
Add icon. The Add Message window is
displayed. Enter the following details:
- Click Continue.
Step 3: Assignment
- Navigate to Assignment page.
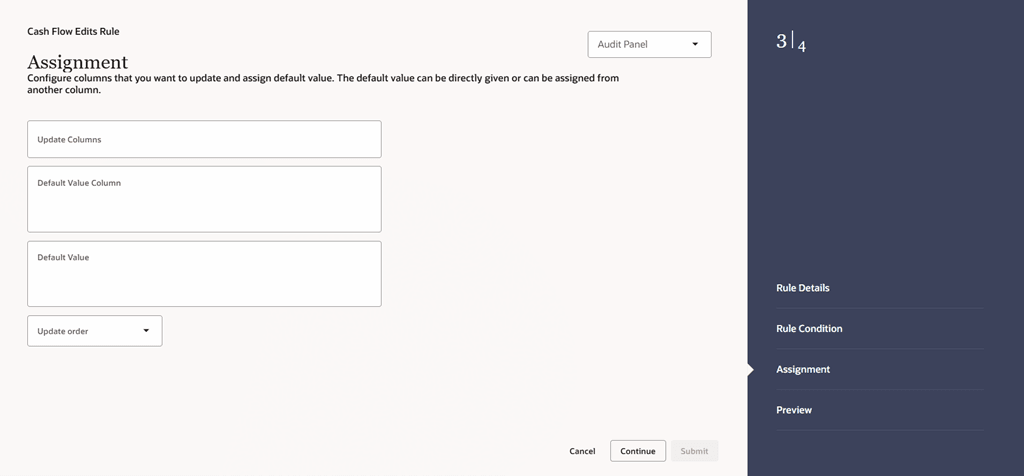
Figure 3-68 Assignment Details
- Enter the following details:
Table 3-26 List of fields used for Creating Cash Flow Edits Process
Field Description Update Columns Select the columns which you want to update if error condition is met. Default Value Column Select the columns from which you want to update columns selected in Update Columns. Default Value Enter the values that you want to update the columns selected in Update Columns. Update Order If the same column is getting updated by more than one rule then the order in which each rule applies must be selected here. - Click Continue.
Step 4: Preview
- Navigate to Preview page. Review the rule details.
Figure 3-69 Preview
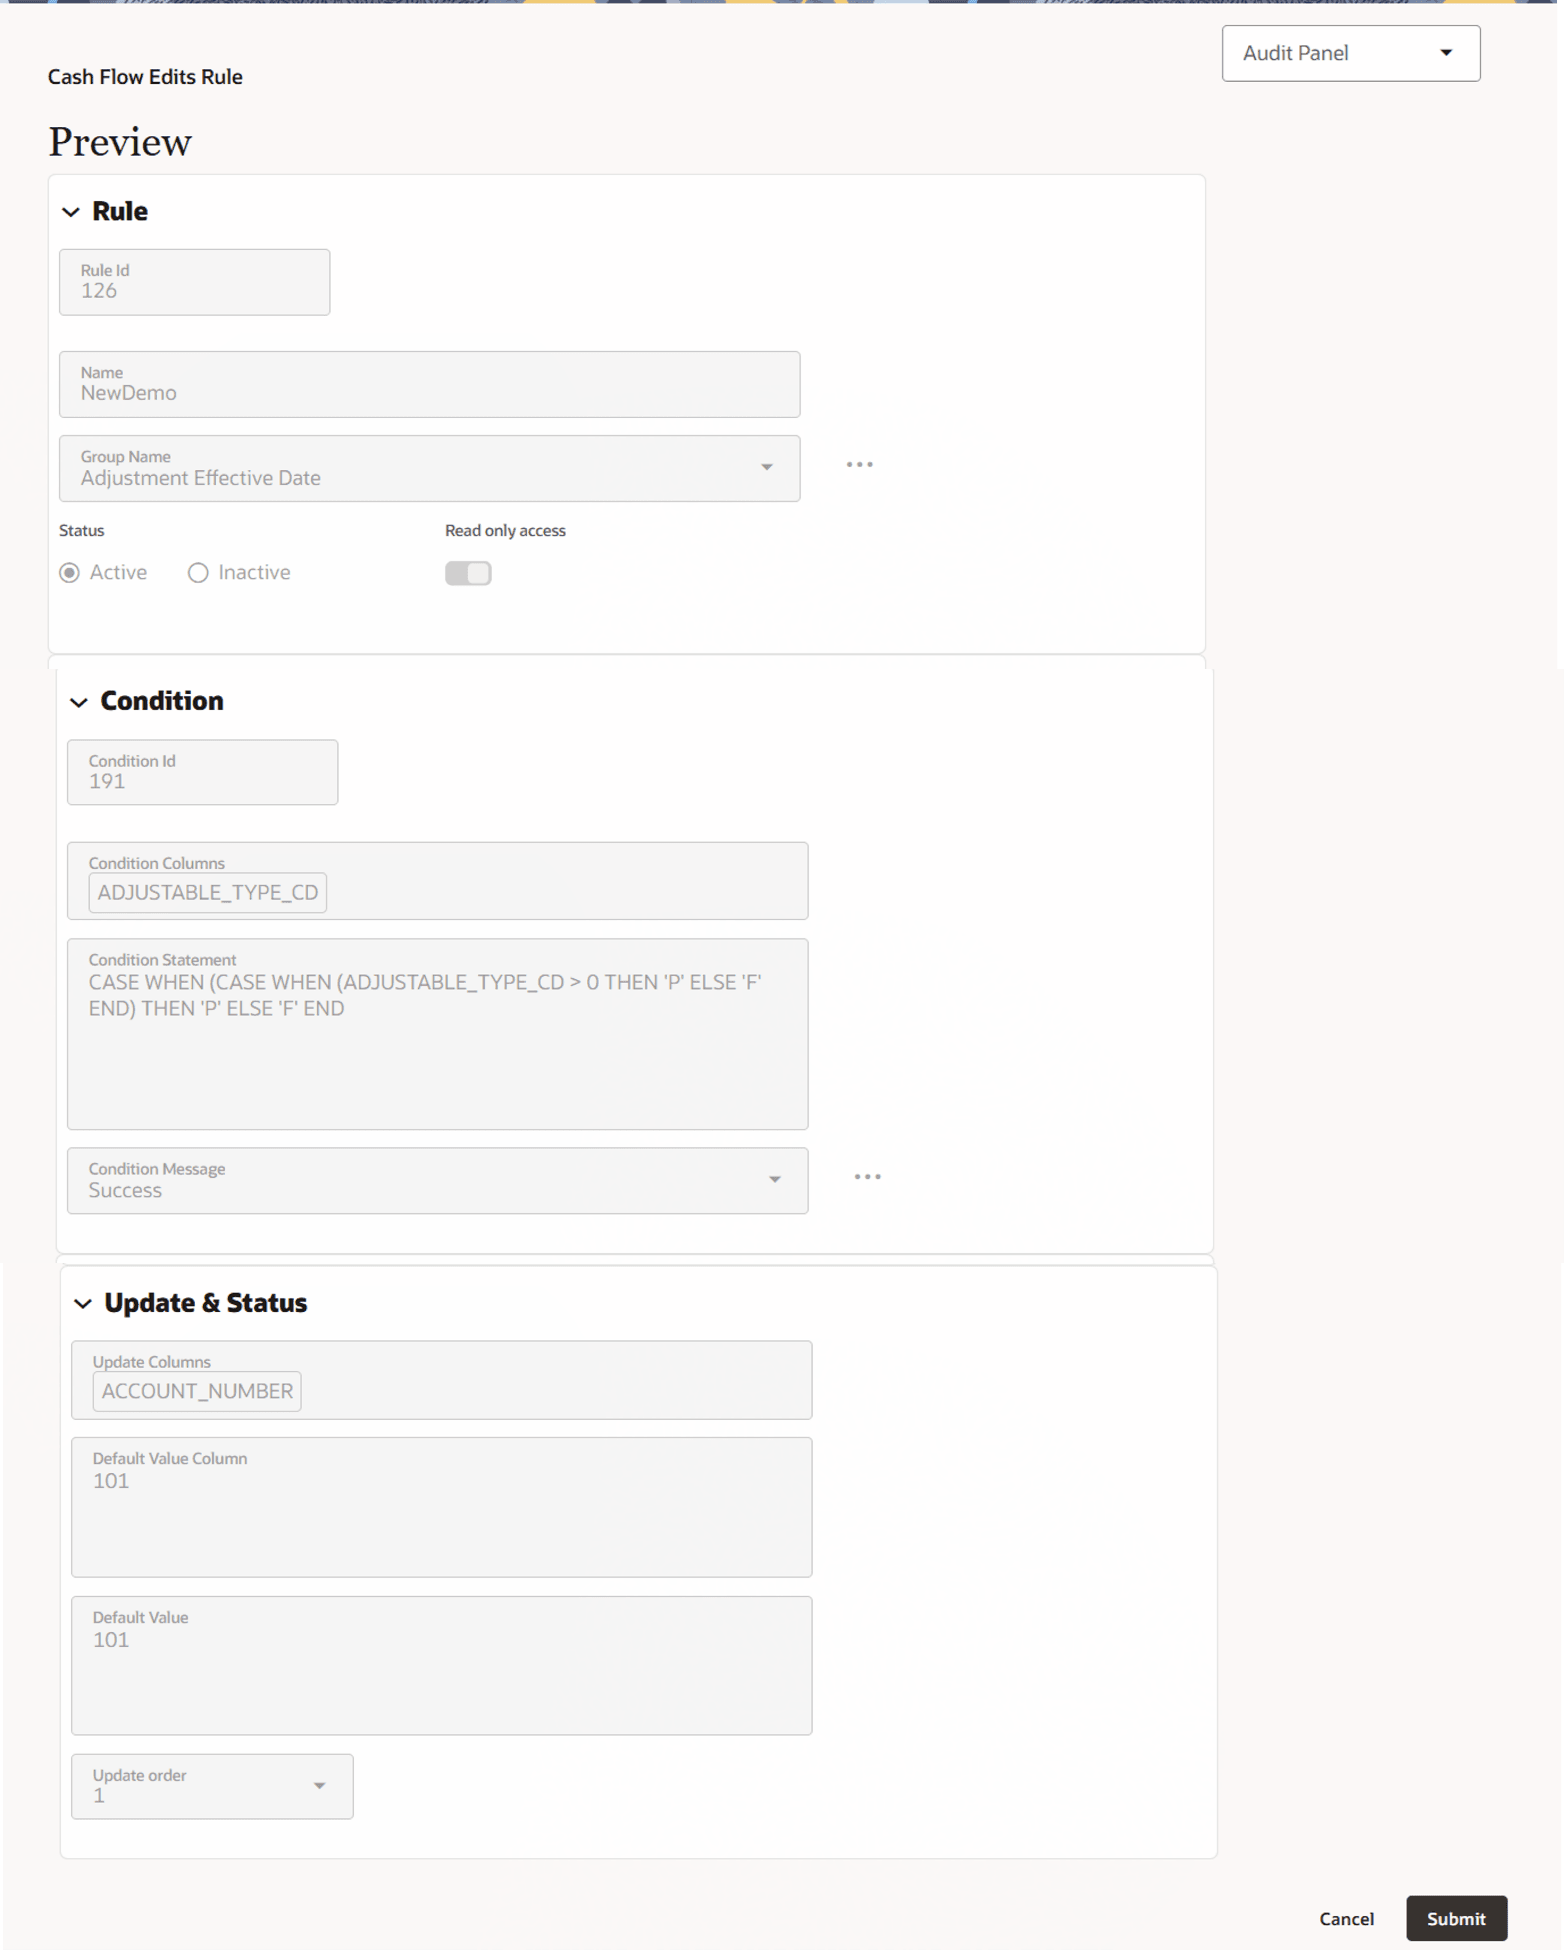
- Click Submit to create the rule. The created rule will be displayed on Cash Flow Edits Summary page.