4.4.1.2 Creating a Dataset
- Navigate to Datasets Summary page.
- Click the Add button. The Dataset window is displayed.
- Enter the following dataset details in the Basic Information
section:
Figure 4-43 Basic Information

- Name: Enter unique dataset name.
- Description: Enter brief description for data set.
- Enter the following table information in the Table Selection
section:
Figure 4-44 Table Selection
 To add Table(s), follow these steps:
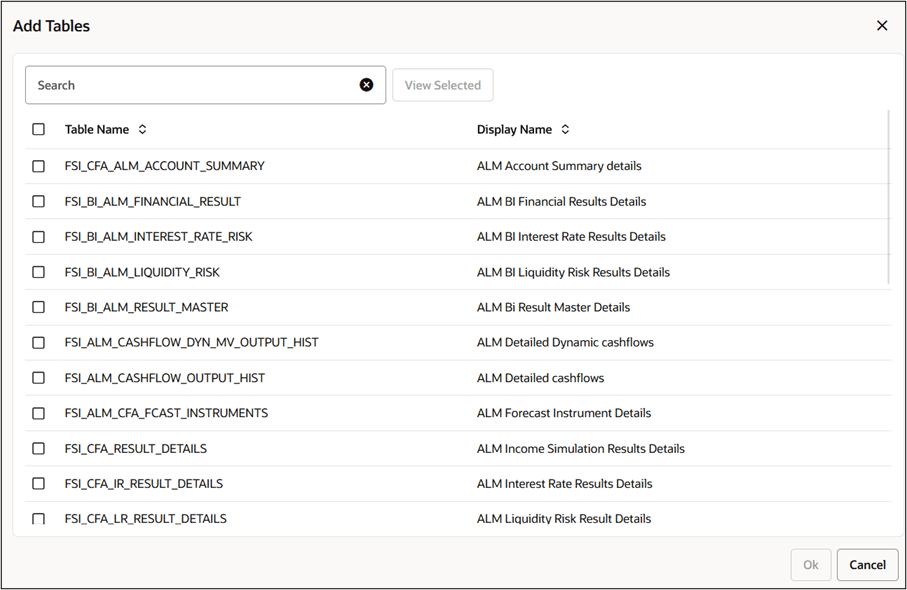
- Click Add button in Tables Selection section. The Add
Tables window is displayed.
Figure 4-45 Add Tables window

- Select the table(s). You can select multiple tables at a time. Click View Selected button to view the list of selected tables. Click Ok.
- Edit the Table Alias as required.
Figure 4-46 Table Alias

- You can add a table multiple times, but Table Alias should be unique,
as mentioned in below:
Figure 4-47 Table Alias

Note:
The maximum limit of Alias is 128 characters and alias must start with a letter or underscore, and contain only letters, digits, or underscores. If the table alias is same, then an error message is displayed after clicking Save button.
- Click Add button in Tables Selection section. The Add
Tables window is displayed.
- Enter the following Column details of selected tables in the Columns
Selection section:To add Column(s), follow these steps:
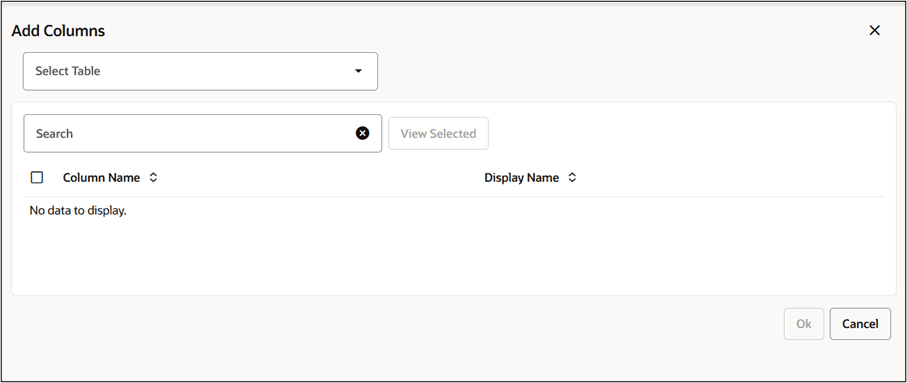
- Click Add button in Columns Selection section. The Add
Columns window is displayed. Here, the list of columns is
displayed based on the selected tables.
Figure 4-48 Add Columns window

- Select the Table. The list of columns is displayed based on selected tables from Tables Selection section.
- You can use Search feature to search the columns
- Select the Column(s). The Display Name can be logical name of the column.
- Click View Selected button to view the list of selected columns. Click Ok.
Note:
If you change the table alias in Tables Selection section, then it gets updated in Columns Selection section automatically.
- Click Add button in Columns Selection section. The Add
Columns window is displayed. Here, the list of columns is
displayed based on the selected tables.
- Update the Other Details section for required joins/conditions.
Note:
If more than one table is selected, then it is mandatory to update the conditions in Other Details section, else an error message is displayed while saving the dataset.
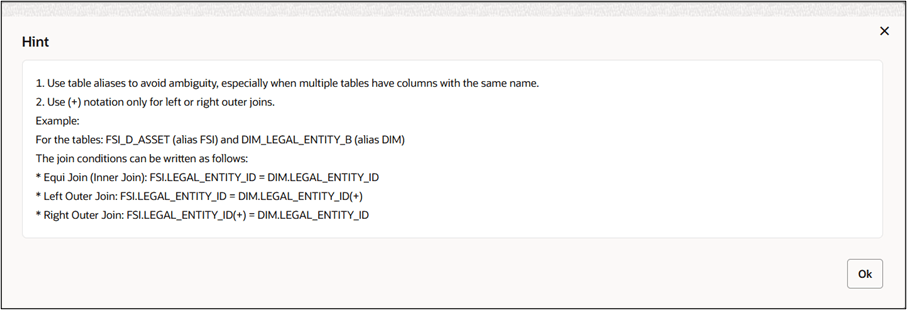
You can click Hint icon to view the hints before defining a condition. Below is a sample of Hint:
Figure 4-49 Sample of Hint

Use filters as required.
You can click Hint icon to view the hints before defining a filter. Below is a sample of Hint:
Figure 4-50 Sample of Hint

- Click Save.