Create Data Source
The following steps apply to both config and atomic data source creation. To
create the data source, follow these steps:
- Open the following URL in the browser window: http://<ipaddress>:<administrative console port>/ibm/console (https if SSL is enabled). The Login window is displayed.
- Log in with the user ID that has admin rights.
- Expand the Resources option in the LHS menu and click JDBC >
Data sources to display the Data sources window.
Figure 7-17 Data Sources
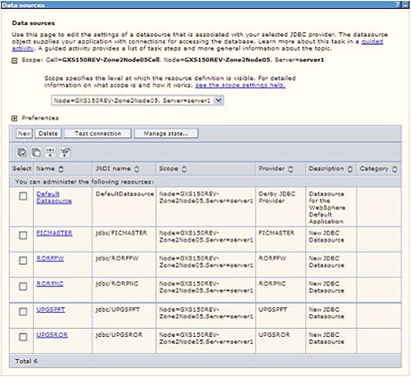
- Select the Scope from the drop-down list. The scope specifies the level at which the resource definition is visible.
- Click New to display the Create a Data Source
window.
Figure 7-18 Create Data Source
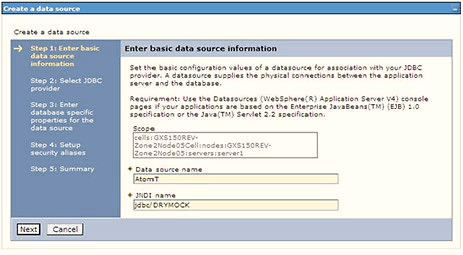
- Specify the Data source name and JNDI name for the new "Data Source".
- The JNDI name and Data source name are case sensitive and ensure that JNDI name is the same as the "Information Domain" name.
- Click Next to display the Select JDBC provider
window.
Figure 7-19 Select JDBC provider
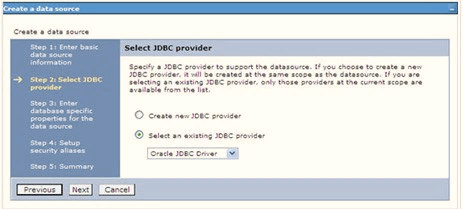
- Select the option Select an Existing JDBC Provider and
select the required JDBC provider from the drop-down list. Click
Next.
Figure 7-20 Enter database specific properties
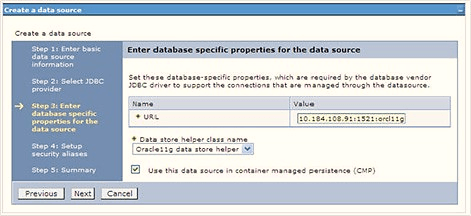
- Specify the database connection URL.For example:
jdbc:oracle:thin:@<DB_SEREVER_IP>:<DB_SERVER_PORT>:<SID> - Select Data Store Helper Class Name from the drop-down list and ensure
that the Use this data source in container managed persistence (CMP)
check box is selected.
Note:
For RAC configuration, provide the RAC URL specified during installation.Example:jdbc:oracle:thin:@(DESCRIPTION=(ADDRESS_ LIST=(ADDRESS=(PROTOCOL=TCP)(HOST=10.11.12.13)(port=1521))(ADDRESS=(PRO TOCOL=TCP)(HOST=10.11.12.14)(PORT=1521))(LOAD_ BALANCE=no)(FAILOVER=yes))(CONNECT_DATA=(SERVICE_NAME=pqadb))) - Click Next.
Figure 7-21 Enter Database specific properties
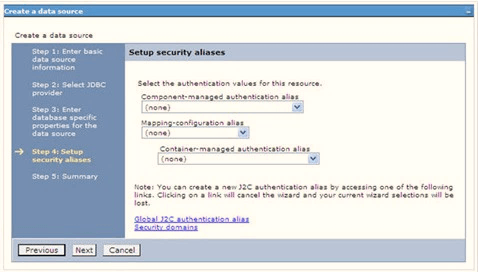
- Map the J2C authentication alias, if already created. If not, you can create a
new J2C authentication alias by accessing the link given (Global J2C
authentication alias) or you can continue with the data source creation
by clicking Next and then
Finish.
Figure 7-22 Summary
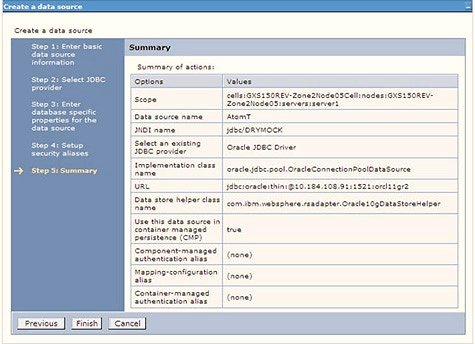 You can also create and map J2C authentication alias after creating the data source.
 - You must create another Data source by following the same procedure with jdbc/FICMASTER as JNDI name pointing to the "configuration schema" of Infrastructure.