Create Domain in WebLogic Server
To create a new domain using Configuration Wizard in WebLogic, follow these steps:
- Navigate to the directory
<WLS_HOME>/wlserver/common/binand execute the command:./config.shThe Welcome window of the Configuration Wizard is displayed.Figure 7-8 Configuration Type
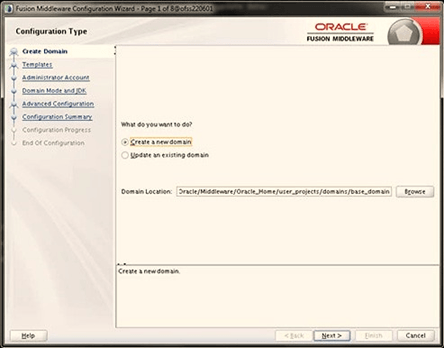
- Select Create a new domain option and click
Next to the Templates window.
Figure 7-9 Templates
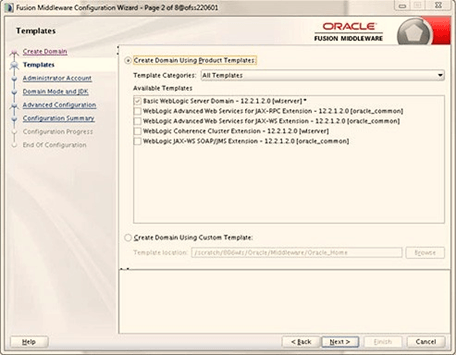
- Select the Create Domain Using Product Templates option
and click Next to display the Administrator
Account window.
Figure 7-10 Administrator Account
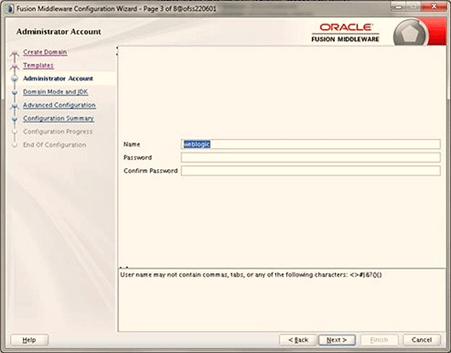
- Enter the user name to be assigned to the administrator, the password, and
confirm the password. Click Next to the Domain Mode and
JDK window.
Figure 7-11 Domain Mode and JDK
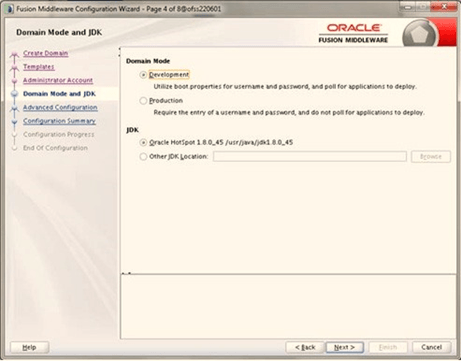
- Select from the following options:
- In the Domain Mode section, select the required mode (Development or Production).
- In the JDK section, select the required option. If you select Other JDK Location, click Browse, navigate to the JDK location, and select. Click Next to display the Advanced Configuration window.
Figure 7-12 Advanced Configuration
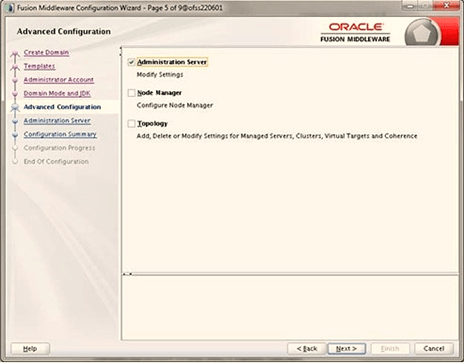
- Select the Administration Server. A WebLogic Server
domain must have an Administration Server. You can also select
Manages Servers, Clusters and Machines, and
RDBMS Security Store if required. Click
Next to display the Administration Server
window.
Figure 7-13 Administration Server
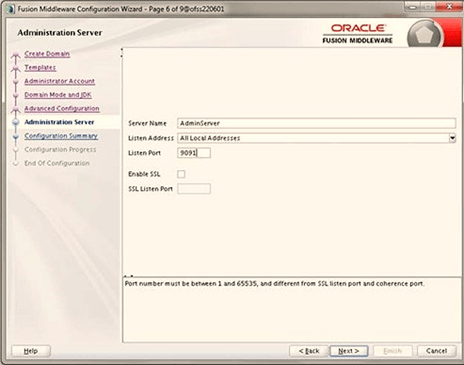
- Enter Administration Server details such as the Server Name, Listen
address, Listen Port, Enable SSL (for secure login using https,
select this check box), and SSL Listen Port. Click
Next to display the Configuration Summary
window.
Note:
Make a note of the Listen Port or SSL Listen Port value (for example: 7007) since the same has to be re-entered in the Servlet port field during Infrastructure installation.Figure 7-14 Configuration Summary
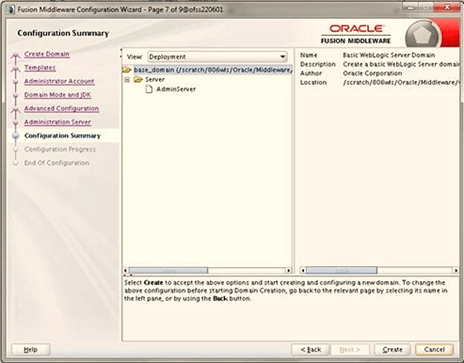
- Verify the configuration details of the WebLogic domain and click
Create to display the Configuration Progress
window with the status indication of the domain creation process.
Figure 7-15 Creating Domain
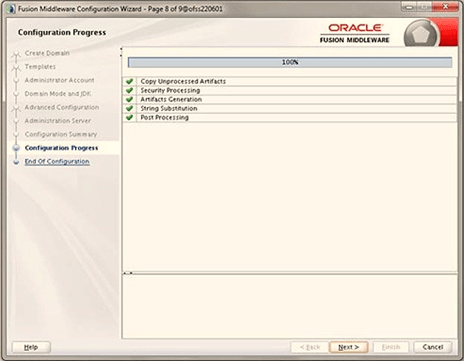
- Click Next when 100% of the activity is complete. The
End of Configuration window is displayed.
Figure 7-16 End of Configuration
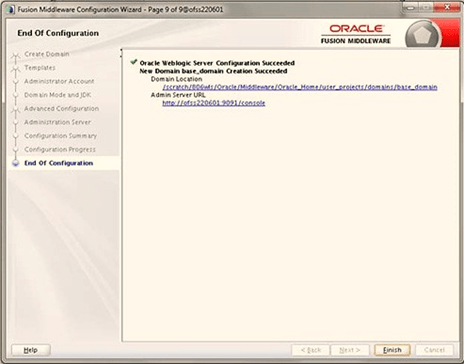
- Click Finish. The domain server is created enabling the
deployment of multiple Infrastructure applications on a single WebLogic.
Note:
- Record the HTTPS port specified during this process and use it as a servlet port or web server port during OFSAAI Installation.
- To enable https configuration on Infrastructure, assign value 1 to
"HTTPS_ENABLE" in
OFSAAI_InstallConfig.xmlfor silent mode OFSAAI installation.
- Add a java option entry
-DUseSunHttpHandler=truein theWLS_HOME/bin/ "setDomainEnv.sh"file (Required only if a self-signed certificate is used).