Add an Economic Indicator
To add an Economic Indicator, follow these steps:
- Navigate to the Economic Indicator Summary Page.
- Click Add.
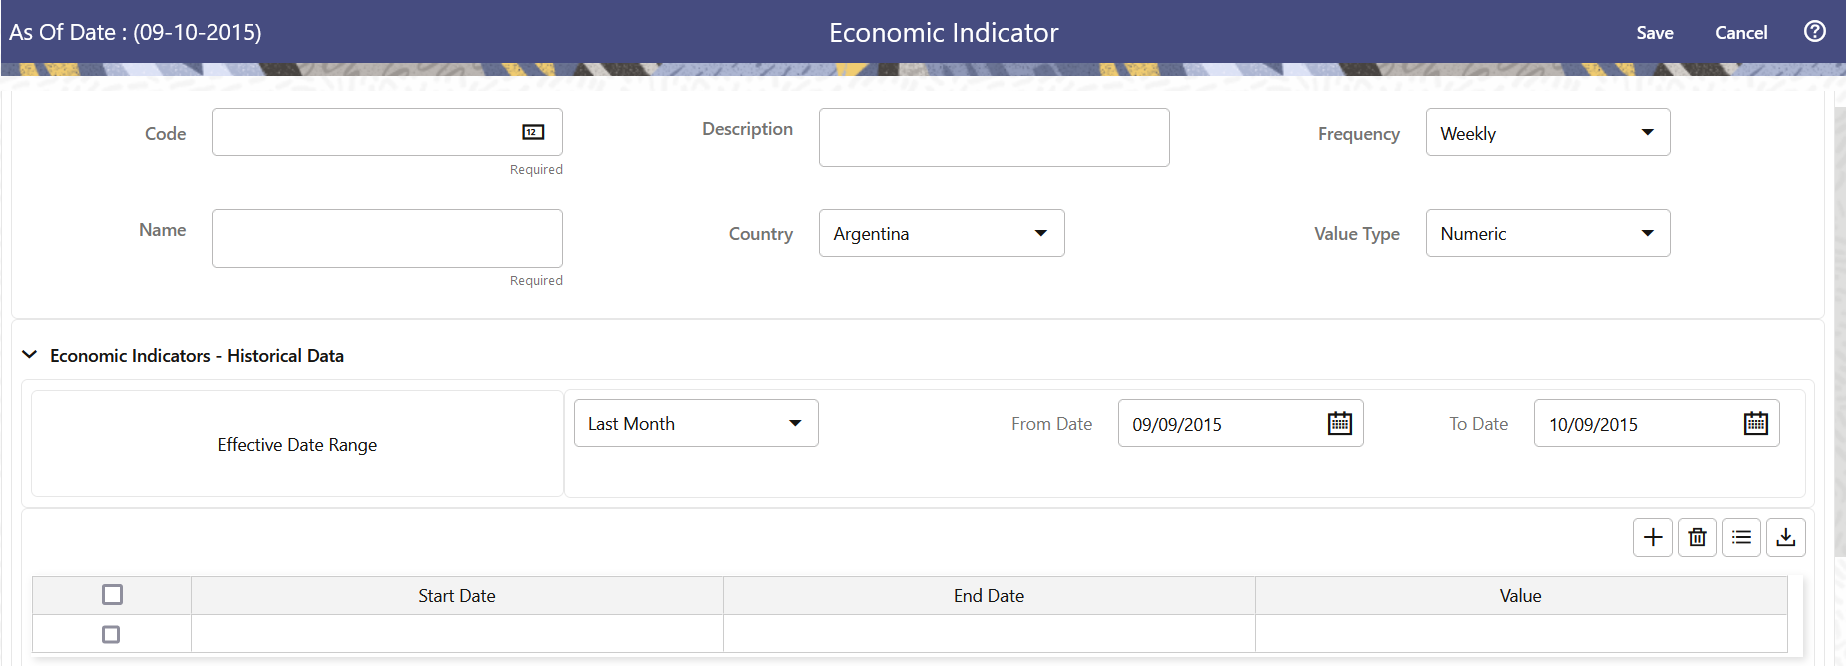
The Economic Indicator Page is displayed.
Figure 7-2 Economic Indicator Details Page

- Enter the following information in the Economic Indicator Details section as
tabulated.
Table 7-3 Economic Indicator Window – Fields and Descriptions
Fields Description Code Enter the Code of Economic Indicator. You can click Generate Code Option in Code field to generate the code automatically. Name The name to your Economic Indicator is how you will subsequently refer to your rule within other the PBSM Services. You cannot rename existing Economic Indicators during Edit. Description Enter the Description of Economic Indicator. This field allows maximum 300 characters. Do not enter special characters ~, ‘, &, +, @. Country Select a country to which your Economic Indicator applies from the Country drop-down list. The value set of Countries is drawn from the seeded Country dimension. PBSM is seeded with over 70 country values, and you can add user-defined countries. Frequency The frequency of your Economic Indicator must match the frequency which with the indicator's data is made public. Unemployment statistics, for example, are generally released on a monthly frequency. Select a frequency from the Frequency drop-down list. Available frequencies are Weekly, Monthly, Quarterly, Semi-Annually, and Annually. Value Type Select a Value Type from the Value Type drop-down list. Available Value Types are Numeric, Percentage, and Amount.
Numeric 0-999999
Percentage -100 to +100
Amount 0-999999
- To build out your Historical Data, enter data within the Economic Indicators – Historical Data Section. The Economic Indicators – Historical Data Section displays a single blank row followed by the most recent period's data (if data has previously been stored in the database).
- Enter the following information in the Economic Indicators – Historical Data
Section as tabulated:
Table 7-4 Economic Indicator window – Fields and Descriptions
Fields Description Start Date and End Date Select the Calendar icon immediately adjacent to the Start Date to choose a starting date for your Economic Indicator data point. The application will automatically populate the End Date based on the Economic Indicator's frequency. For example, if your Economic Indicator is an unemployment statistic that has a monthly frequency, select an start date that is the first day of the month that the unemployment rate describes. In this example, the application will automatically populate the End Date with the last day of the month you have selected. Value Enter the value for your Economic Indicator (such as the unemployment rate). Adding a Data Points Click Add to add a blank row into which you can enter additional Economic Indicator Data. Adding Multiple Data Points Click Add to add multiple blank rows into which you can enter additional Economic Indicator Data. Deleting Data Points Select one or more check boxes on the left-hand side of any row to enable the Delete icon. After clicking Delete, a confirmation message is displayed to delete the selected rows. Download Excel Excel export functionality is used to download the Economic Indicator information in xlsx format. Click Download Excel Option.
After downloading, you can modify the value and paste back in the displayed data grid.
Note: The date format in the Excel File should be same as provided in Global Preferences. For more information, see the Global Preference Section.