Create Roll Rate Rules
Perform the following steps to create Roll Rate Rules:
- On the Roll Rate Rule Summary page, click the Add icon to
open the Roll Rate Rule window.
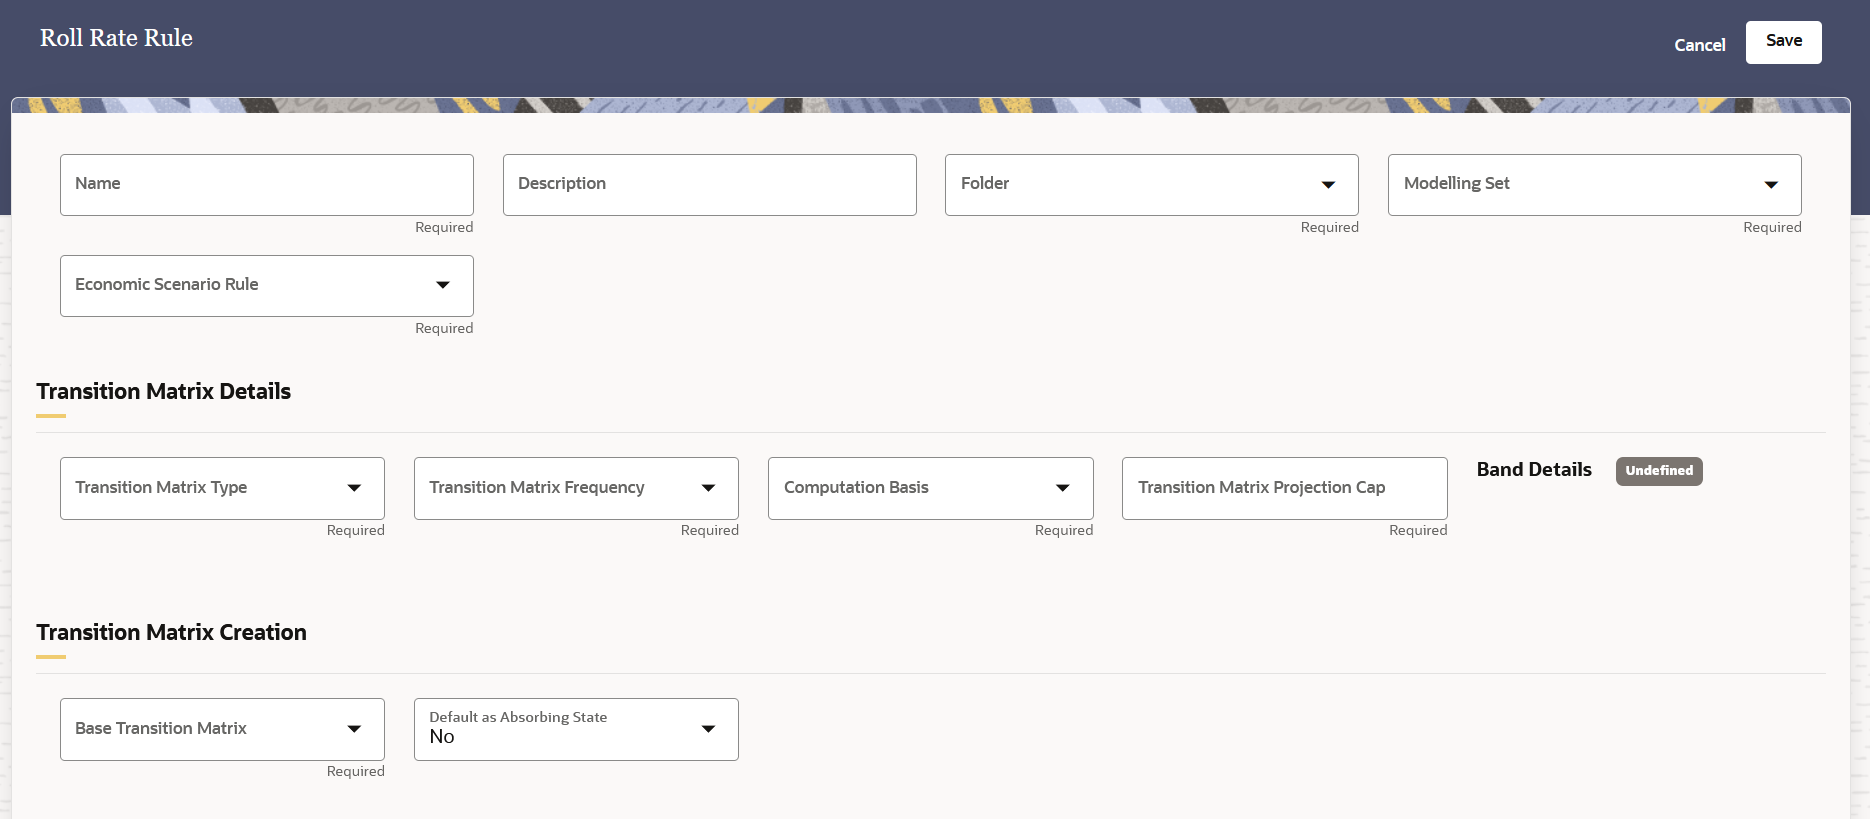
Figure 4-121 Create Roll Rate Rules

Figure 4-122 Create Roll Rate Rules Continued

- Populate the Roll Rate Rule form as tabulated:
Table 4-59 Roll Rate Rule
Field Description Name Enter a name. Description Enter a description for the rule. Folder Select a folder from the drop-down list Modelling Set Select a Modelling Set from the drop-down list Economic Scenario Rule Select an Economic Scenario Rule from the drop-down list. Transition Matrix Type (Transition Matrix Details) Select a transition matrix type from the drop-down list. The available options are: - Rating - If this option is selected, then the status of the Band Details will be Not Applicable.
- Days Past Dues - If this option is selected, then the status of the Band Details will be Predefined.
Transition Matrix Frequency (Transition Matrix Details) Select a transition matrix frequency from the drop-down list. The available options are: - Monthly
- Quarterly
- Half Yearly
- Annually
Computation Basis (Transition Matrix Details) Select a computation basis from the drop-down list. The available options are: - Count Movement
- Value Movement
Transition Matrix Projection Cap (Transition Matrix Details) Enter a natural numeric value in this field to define the cap of the transition matrix projection. Note:
Negative and decimal values are not supported in this field.Band Details (Transition Matrix Details) You can define the band details if the Transition Matrix Type is Days Past Dues.Select the arrow adjacent to the status to set the band details in the Transition Matrix Band Details window: - Click the Add button to add a row(s) to the table. The rows 1 and 2 are already present and populated by default.
- In the row under the Lower Limit column, set the lower limit for the band. Depending on the value that is set in the incremental rows, the upper limit of the previous row is auto populated with a lower value.
- Once the band details are configured, click
Apply.
The status of the Band Details changes to Defined.
Click the Reset button to reset this window to its' default state.
Base Transition Matrix (Transition Matrix Creation) Select a base transition matrix from the drop-down list. The available options are: - Historical Average Transition Matrix
Note:
If the Historical Average Transition Matrix is seleted then the Transition Matrix Historical Data Cap (Transition Matrix Creation) is a mandatory field. - Manual Input
If this value is selected from the drop-down list, then the Days Past Dues / <Transition Matrix Frequency> / Count Movement table appears. The name of this table changes based on the transition matrix frequency that was selected from the Transition Matrix Frequency field.
Default as Absorbing State (Transition Matrix Creation) Select the default state for the absorbing state from the drop-down list. The available options are: - Yes
- No
Transition Matrix Historical Data Cap (Transition Matrix Creation) Enter a natural numeric value in this field to define the cap of the transition matrix projection. Note:
Negative and decimal values are not supported in this field.Days Past Dues / Monthly / Count Movement This table only appears if you selected Manual Input in the Base Transition Matrix (Transition Matrix Creation) field. In the Days Past Dues / Monthly / Count Movement table, Click the arrow icon adjacent to the Undefined status. Configure the values in the Days Past Dues / Monthly / Count Movement window: - Select an Effective Date from the Effective
Date field by clicking the
Select Date icon.
The Effective Date field is automatically populated with the Effective Date that was selected in the Effective Date field. If multiple Effective Dates were previously applied, then those names will also appear in this drop-down list. If the Rating option was selected then, you can select the Long Term Rating or Short Term Rating tab and then select an Effective Date from this drop-down list to view the configurations that were previously set for the selected date.
- In the Transition Matrix DPD Band
field, configure the Bands in % format.
Note:
The sum of the % values for the transition probability sum in each row must be 100%. If the sum is not 100% then the application displays a message indicating in which band and for which effective date the sum is not 100%. - Click Apply.
- Additionally, click the Delete icon to delete the configured data and reset the page to the default values.
After defining the values, the status for the Baseline in the Days Past Dues / Monthly / Count Movement table changes to Defined.
Loss Rate Historical Frequency (Loss Rate Details) Select a frequency from the drop-down list. The available options are: - Monthly
- Quarterly
- Half Yearly
- Annually
Loss Rate Historical Cap (Loss Rate Details) Enter a numeric value in this field to define the cap of the loss rate historical. Note:
Negative and decimal values are not supported in this field. - Click Save to save the roll rate rule or click Cancel to exit this window.