Create a Stage Determination Rule
Perform the following steps to create a Stage Determination Rule:
- On the Stage Determination Rules Summary page, click the Add icon to open the Stage Determination Rule Window.
- On the Stage Determination Rules window, you must first define the
Rule Details, Bands Creation,
and then the Stage Determination Rules.

- Populate the Stage Determination Rule - Rule Details form as
tabulated:
Option Description Name Enter a name for the Stage Determination Rule definition. This is a mandatory field.
Description Enter a description for the Stage Determination Rule definition. Select Folder Select a folder from the drop-down list. This is a mandatory field.
Select Modelling Set Select a Modelling Set from the drop-down list. This is a mandatory field.
-
After the mandatory fields are populated, populate the Stage Determination Rule - Bands Creation - Rule Parameters (Quantitative) form as tabulated:
Note:
When creating a band for DPD, you must create a 0-0 band to track active accounts. The 0-0 band is mandatory. After this, any number of additional bands can be created.

Option Description Rating (Long Term) (Internal rating ranks will be used for band creation) Click the slider to enable or disable this band. Click the Configuration icon to define the Lower Limit and Upper Limit of this Band:- In the selected Band's configuration window, click the Add Button icon to add a Band to define it.
- Enter the lower and upper limit in the Lower Limit and Upper Limit fields respectively. Both these fields only support positive integers.
- Click Apply
- If you want to delete a band, select a Band and click the Delete Button icon to delete it.
The status of the Defined Staging Bands is updated to Defined.
To add and configure multiple Lower Limit and Upper Limits of this band, click the Configuration icon.
Rating (Short Term) (Internal rating ranks will be used for band creation) Click the slider to enable this band. Click the Configuration icon to define the Lower Limit and Upper Limit of this Band:- Enter the lower and upper limit in the Lower Limit and Upper Limit fields respectively. Both these fields only support positive integers.
- Click the Add Button icon to add additional Bands.
- Click Apply
- If you want to delete a band, select a Band and click the Delete Button icon to delete it.
The status of the Defined Staging Bands is updated to Defined.
To add and configure multiple Lower Limit and Upper Limits of this band, click the Configuration icon.
Delinquency Past Due Days Click the slider to enable this band. Click the Configuration icon to define the Lower Limit and Upper Limit of this Band:- Enter the lower and upper limit in the Lower Limit and Upper Limit fields respectively. Both these fields only support positive integers.
- Click the Add Button icon to add additional Bands.
- Click Apply
- If you want to delete a band, select a Band and click the Delete Button icon to delete it.
The status of the Defined Staging Bands is updated to Defined.
To add and configure multiple Lower Limit and Upper Limits of this band, click the Configuration icon.
FICO Score Click the slider to enable this band. Click the Configuration icon to define the Lower Limit and Upper Limit of this Band:- Enter the lower and upper limit in the Lower Limit and Upper Limit fields respectively. Both these fields only support positive integers.
- Click the Add Button icon to add additional Bands.
- Click Apply
- If you want to delete a band, select a Band and click the Delete Button icon to delete it.
The status of the Defined Staging Bands is updated to Defined.
To add and configure multiple Lower Limit and Upper Limits of this band, click the Configuration icon.
LTV Click the slider to enable this band. Click the Configuration icon to define the Lower Limit and Upper Limit of this Band:- Enter the lower and upper limit in the Lower Limit and Upper Limit fields respectively. Both these fields only support positive integers.
- Click the Add Button icon to add additional Bands.
- Click Apply
- If you want to delete a band, select a Band and click the Delete Button icon to delete it.
The status of the Defined Staging Bands is updated to Defined.
To add and configure multiple Lower Limit and Upper Limits of this band, click the Configuration icon.
12 Months PD Click the slider to enable or disable this band. Lifetime PD Click the slider to enable or disable this band. - Click the Qualitative tab to define the Stage Determination Rule -
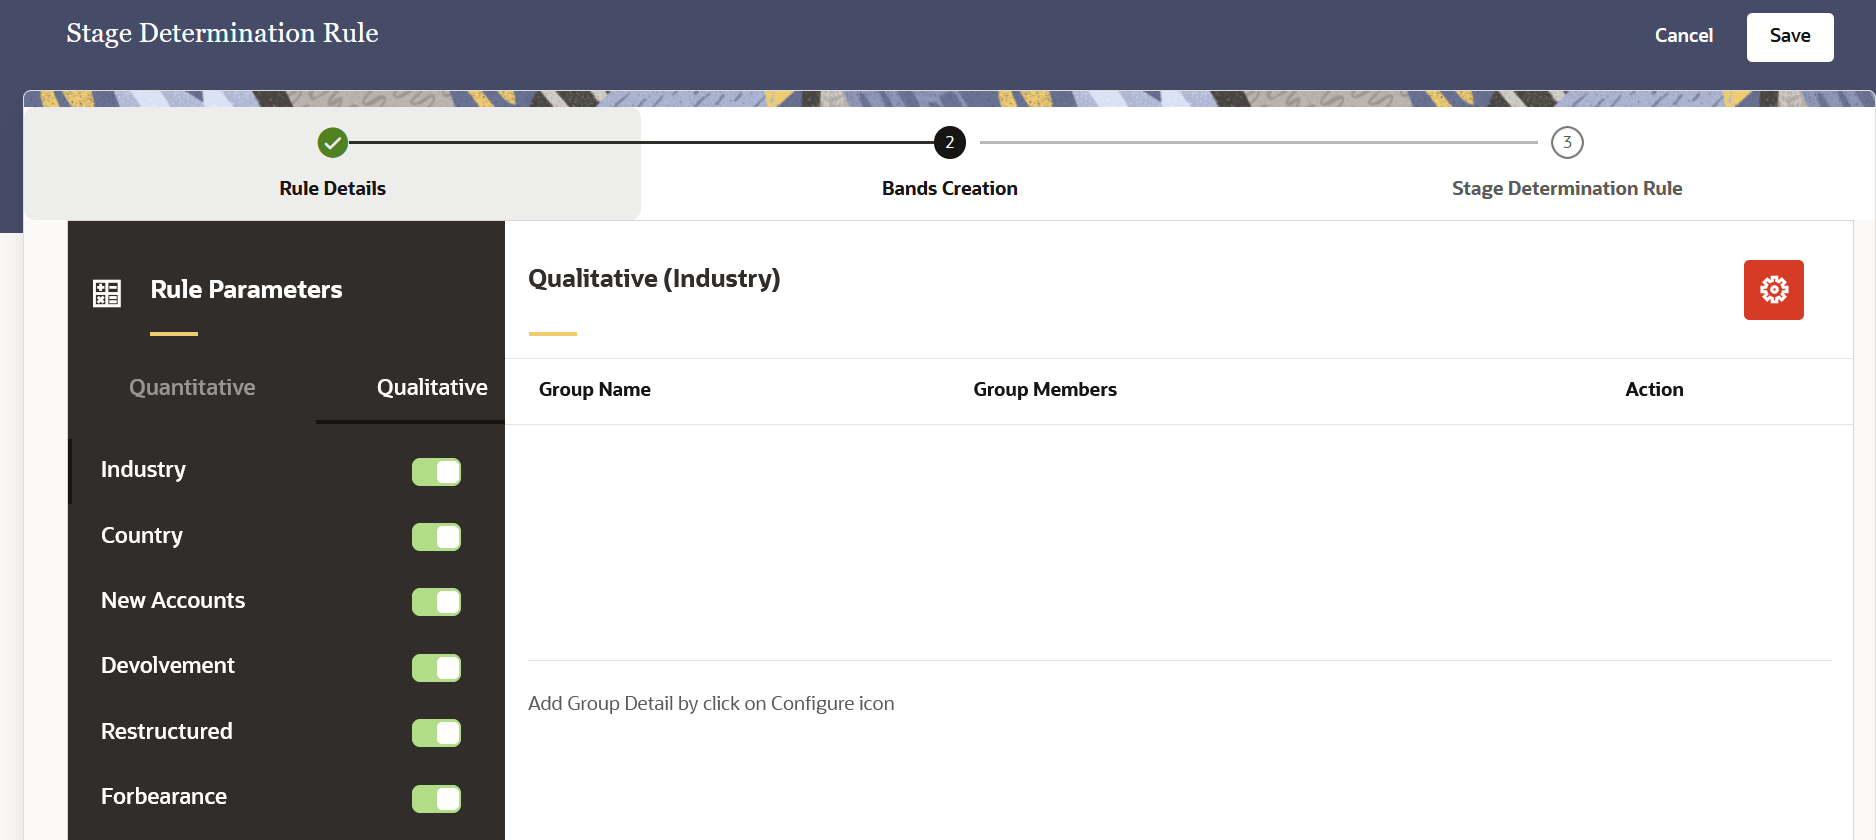
Bands Creation - Rule Parameters (Qualitative)form as tabulated:

- The available options can be enabled or disabled. Additionally, When the Industry or Country options are enabled, the Industry Configuration and Country Configuration buttons are enabled respectively.
- Click the Industry Configuration button to configure the Industry. In the Industry window, in the group name field, enter the name. In the hierarchy browser pane, move the desired groups to the Selected pane, and then click Add Group. The group is added to the pane. Additionally, select the Delete icon to delete a group.
- Click the Country Configuration button to configure the Country. In the Country window, in the group name field, enter the name. In the Country drop-down list, select the desired countries and then click Apply. The group is added to the pane. Additionally, select the Delete icon to delete a group.
- The rules that are enabled in the Bands Creation tab will be available in the Stage Determination Rules tab.
- Click the Next icon to open the Stage Determination Rules pane.
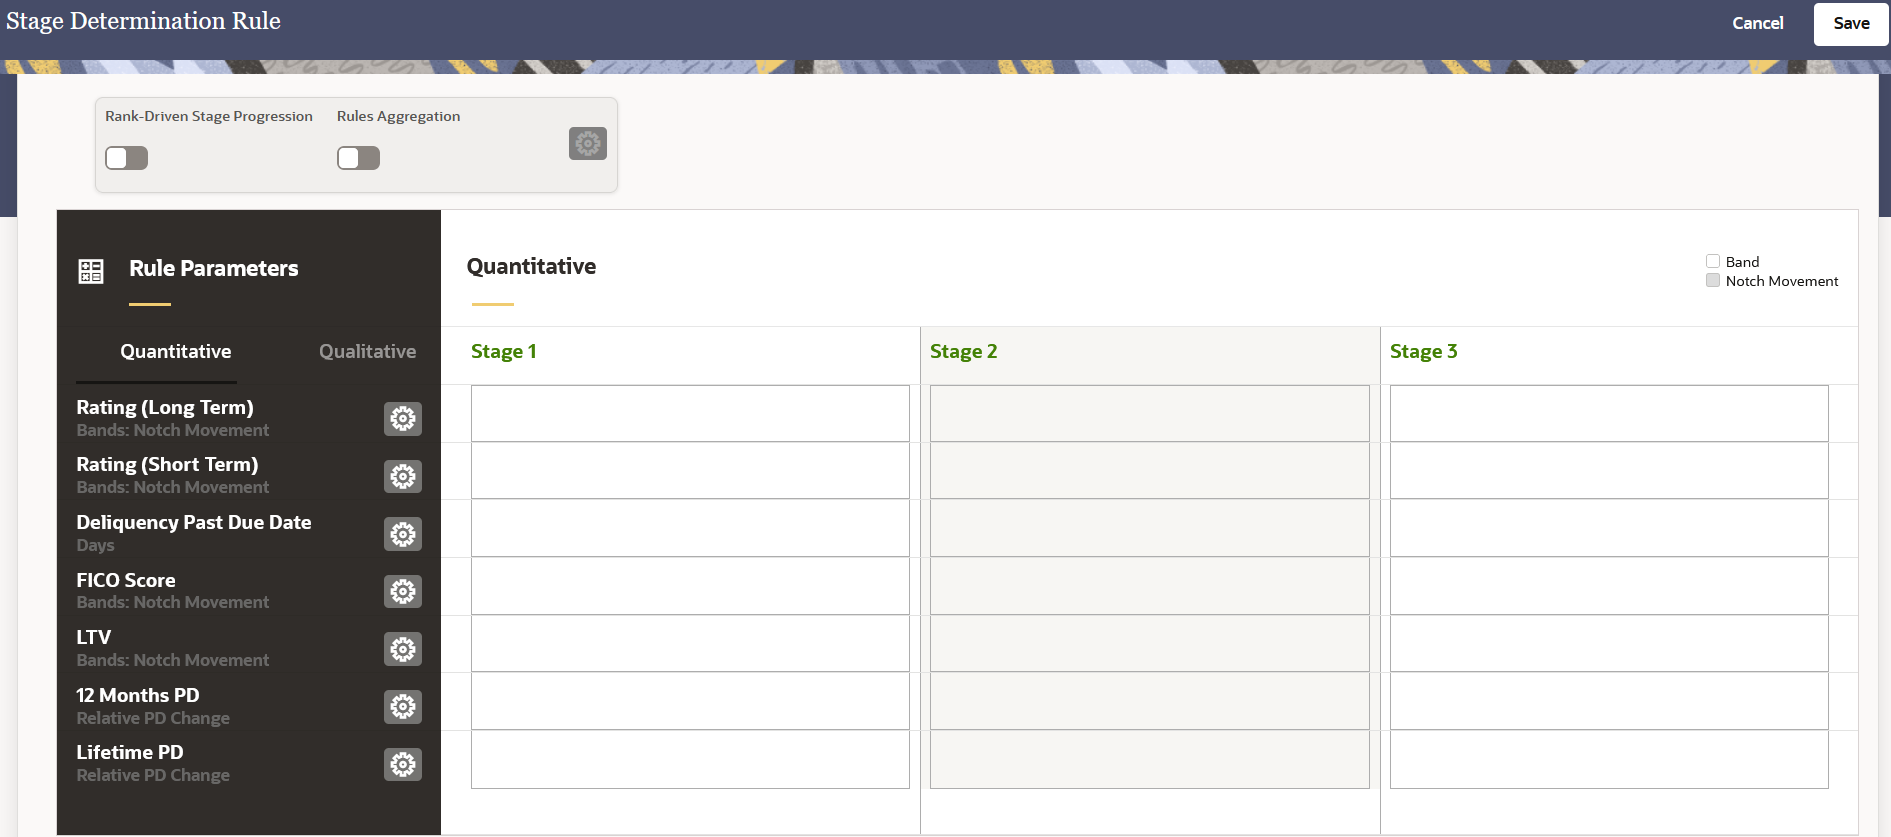
- Populate the Stage Determination Rule - Stage Determination Rules - Rule
Parameters (Quantitative)form as tabulated:

Option Description Rank-Driven Stage Progression Users can define the processing order of rules for stage assignment. For example, if 10 rules are added, the system will execute them in reverse order (from Rule 10 to Rule 1). The stage is assigned based on the most recent rule execution.
Click this slider to enable this feature. When this feature is selected the Rule Integration button is enabled. Click either or both the sliders to add the rule parameters:- Select a rule parameter from the Rule Parameters
drop-down field.
Note:
Only a unique parameter can be added in the list. - Additionally, click the delete icon to delete a parameter
- Click Apply.
Rules Aggregation Users can combine multiple rules with an “AND” condition, by ensuring that the appropriate stage is assigned when all specified criteria are met.
Click this slider to enable this feature. When this feature is selected the Rule Integration button is enabled. Click either or both the sliders to add the rule parameters:- Select a rule parameter from the Rule Parameters
drop-down field.
Note:
Only a unique parameter can be added in the list. - Additionally, click the delete icon to delete a parameter
- Click Apply.
Rating (Long Term) Click the Configuration icon to define this band. - In the Band Filter field, select the filters for the band. Multiple filters for a band can be selected.
- Select a band from the Band drop-down list.
- Define the lower limit in the Lower Limit field.
- Define the upper limit in the Upper Limit field. The upper limit must always be more than the lower limit. Note that the Lower Limit and Upper limit must not overlap between different stages.
- Select a stage value from the Stage drop-down list.
- You can click the Add button icon to define multiple bands.
- If you want to delete a band, click the Delete Button icon to delete a selected band.
- Click Apply
The Band values in the Stage table appear without a highlight, while the Notch Movement values appear with a grey highlight and are denoted in the upper right corner of the Quantitave pane.
Rating (Short Term) Click the Configuration icon to define this band. - In the Band Filter field, select the filters for the band. Multiple filters for a band can be selected.
- Define the lower limit in the Lower Limit field.
- Define the upper limit in the Upper Limit field. The upper limit must always be more than the lower limit. Note that the Lower Limit and Upper limit must not overlap between different stages.
- Select a stage value from the Stage drop-down list.
- You can click the Add button icon to define multiple bands.
- If you want to delete a band, click the Delete Button icon to delete a selected band.
- Click Apply
Delinquency Past Due Days Click the Configuration icon to define this band. - In the Band Filter field, select the filters for the band. Multiple filters for a band can be selected.
- Define the lower limit in the Lower Limit field.
- Define the upper limit in the Upper Limit field. The upper limit must always be more than the lower limit. Note that the Lower Limit and Upper limit must not overlap between different stages.
- Select a stage value from the Stage drop-down list.
- You can click the Add button icon to define multiple bands.
- If you want to delete a band, click the Delete Button icon to deleta a selected band.
- Click Apply
Note that the same Bands cannot be shared between different stages.
The Band values in the Stage table appear without a highlight, while the Notch Movement values appear with a grey highlight and are denoted in the upper right corner of the Quantitave pane.FICO Score Click the Configuration icon to define this band. - In the Band Filter field, select the filters for the band. Multiple filters for a band can be selected.
- Define the lower limit in the Lower Limit field.
- Define the upper limit in the Upper Limit field. The upper limit must always be more than the lower limit. Note that the Lower Limit and Upper limit must not overlap between different stages.
- Select a stage value from the Stage drop-down list.
- You can click the Add button icon to define multiple bands.
- If you want to delete a band, click the Delete Button icon to delete a selected band.
- Click Apply
LTV Click the Configuration icon to define this band in percentage. - In the Band Filter field, select the filters for the band. Multiple filters for a band can be selected.
- Define the lower limit in the Lower Limit field.
- Define the upper limit in the Upper Limit field. The upper limit must always be more than the lower limit. Note that the Lower Limit and Upper limit must not overlap between different stages.
- Select a stage value from the Stage drop-down list.
- You can click the Add button icon to define multiple bands.
- If you want to delete a band, click the Delete Button icon to delete a selected band.
- Click Apply
The Band values in the Stage table appear without a highlight, while the Notch Movement values appear with a grey highlight and are denoted in the upper right corner of the Quantitave pane.
12 Months PD Click the slider to enable or disable this feature. The Lower Limit and Upper limit cannot overlap between different stages.
Lifetime PD Click the slider to enable or disable this feature. - Select a rule parameter from the Rule Parameters
drop-down field.
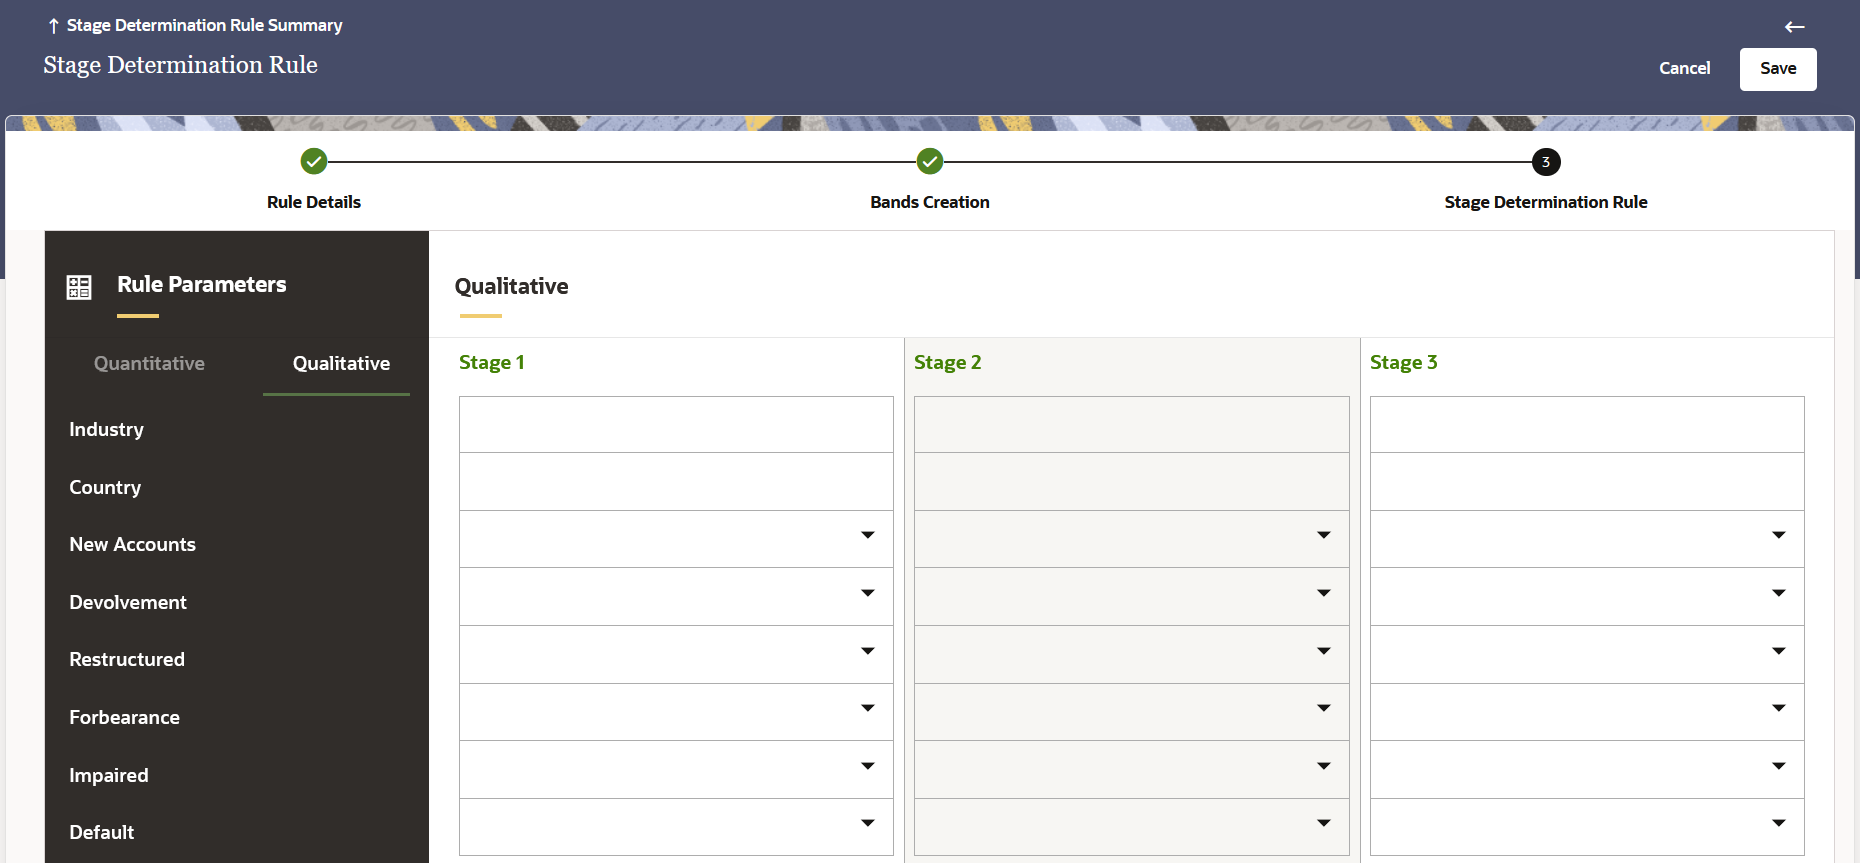
- Click the Qualitative tab to define the Stage Determination Rule -
Stage Determination Rules - Rule Parameters (Qualitative)form as
tabulated:

Option Description Industry In this row for each stage, click the adjacent row and select a value. You can select multiple values in this field
Country In this row for each stage, click the adjacent row and select a value. You can select multiple values in this field
New Accounts In this row for each stage, click the adjacent row and select either Yes or No. Devolvement In this row for each stage, click the adjacent row and select either Yes or No. Restructured In this row for each stage, click the adjacent row and select either Yes or No. Forbearance In this row for each stage, click the adjacent row and select either Yes or No. Impaired In this row for each stage, click the adjacent row and select either Yes or No. Default In this row for each stage, click the adjacent row and select either Yes or No. - Click Save.