11.4.4.1 OBIEE Server Configuration for Upgrade
Perform the following OBIEE server configuration steps. You can ignore the steps if OBIEE is already configured in your setup.
- Execute the following steps to implement the Writeback feature:
- Add the tag
<LightWriteback>true</LightWriteback>in between<ServerInstance></ServerInstance>in theinstanceconfig.xmlfile.For example:
<ServerInstance> <LightWriteback>true</LightWriteback> </ServerInstance> - Copy the writeback.xml file available in the
$FIC_HOME/OFS_LRM_DASHBOARDS/12.2.1.4.0/content/msgdb/directory to the following OBIEE server directories. If customMessages directory is not present, create the directory manually.Path1:
<BI Domain Home>/bidata/components/OBIPS/custommessagesFor example:
/scratch/oraobiee/Oracle/Middleware/Oracle_Home/user_projects/domain s/bi/bidata/components/OBIPS/custommessagesPath2:
<BI Domain Home>/bidata/service_instances/ssi/metadata/content/msgdb/l_en/custo mMessagesFor example:
/scratch/oraobiee/Oracle/Middleware/Oracle_Home/user_projects/domain s/bi/bidata/service_instances/ssi/metadata/content/msgdb/l_en/custom Messages - Restart BI Services.
- Login to OBIEE Analytics and navigate to Administration section on the right top corner.
- Click Manage Privileges and scroll down to Writeback .
- Grant Writeback to Database privilege to Authenticated User and BI Administrator roles.
- Add the tag
- Perform the following OBIEE presentation server configuration
steps:
- Navigate to the
<<Oracle BI Instance Home>/config/fmwconfig/biconfig/OBIPS directory. - Edit the file
instanceconfig.xml. - Insert the following code within the XML tag <Views> </Views>.
<Charts> <MaxVisibleColumns>50000</MaxVisibleColumns> <MaxVisiblePages>25000</MaxVisiblePages> <MaxVisibleRows>10000000</MaxVisibleRows> <MaxVisibleSections>50000</MaxVisibleSections> <JavaHostReadLimitInKB>10240</JavaHostReadLimitInKB> </Charts> - Insert the following code within the XML tag <Views> </Views>.
<Table> <DefaultRowsDisplayedInDelivery>75</DefaultRowsDisplayedInDelivery> <DefaultRowsDisplayedInDownload>6500</DefaultRowsDisplayedInDownload> <MaxCells>4000000</MaxCells> <MaxVisibleRows>140000</MaxVisibleRows> </Table> <Narrative> <MaxRecords>500000</MaxRecords> <DefaultRowsDisplayed>25</DefaultRowsDisplayed> </Narrative> - Save the file and restart the BI services.
Note:
Take a backup of the instanceconfig.xml file before making any changes.
- Navigate to the
- For Intraday RBI reporting template, ensure that you update the following SQL query in the setup master table:
- Name of the Bank:
UPDATE SETUP_MASTER SET V_COMPONENT_VALUE = '<<Bank Name>>' WHERE V_COMPONENT_CODE = 'INTRA_DAY_BANK'; - Whether the Bank provides Correspondent banking services (Y or N)
UPDATE SETUP_MASTER SET V_COMPONENT_VALUE = '<<Y or N>>' WHERE V_COMPONENT_CODE = 'PROVIDE_CORRESPONDENT_BANKING_SERVICES';
- Name of the Bank:
- Perform the following RPD changes, to set the Early Warning Indicators 1 and 2:
- Open the Repository in Online or Offline mode.
- Select Manage and then select Variables .
- Navigate to hierarchy Repository, select Variables , and then select Static .
- Modify EARLYWARNIND1 and EARLYWARNIND2 variable values as required.
- Save and commit the changes to RPD.
Note:
You must redeploy the RPD on BI server if you have made changes in the offline mode.
- For OBIEE reporting, configure the following:
- Navigate to the <
<obiee <<Oracle BI Instance Home>/config/fmwconfig/biconfig/OBIJHdirectory. - Modify the
config.xmlfile. - Increase parameter value for the following tag:
<XMLP>
<XMLP> <InputStreamLimitInKB>40000</InputStreamLimitInKB> <ReadRequestBeforeProcessing>true</ReadRequestBeforeProcessing> </XMLP> <DVT> <InputStreamLimitInKB>40000</InputStreamLimitInKB> </DVT> - Save the
config.xmlfile. - Navigate to the
<<obiee <<Oracle BI Instance Home>/config/fmwconfig/biconfig/OBIPSdirectory. - Modify the
instanceconfig.xmlfile. - Increase the parameter value for tag if already exists or add the following code:
<Charts> <MaxVisibleColumns>50000</MaxVisibleColumns> <MaxVisiblePages>25000</MaxVisiblePages> <MaxVisibleRows>100000</MaxVisibleRows> <MaxVisibleSections>50000</MaxVisibleSections> <JavaHostReadLimitInKB>10240</JavaHostReadLimitInKB> </Charts> and <Pivot> <MaxCells>1920000</MaxCells> <MaxPagesToRollOutInDelivery>10000</MaxPagesToRollOutInDelivery> <MaxVisibleColumns>50000</MaxVisibleColumns> <MaxVisiblePages>100000</MaxVisiblePages> <MaxVisibleRows>10000000</MaxVisibleRows> <MaxVisibleSections>50000</MaxVisibleSections> <DefaultRowsDisplayed>100000</DefaultRowsDisplayed> </Pivot> under <Views> tag - Save the
instanceconfig.xmlfile. - Restart the BI Services.
- Navigate to the <
- To configure the real-time intraday reporting Auto Refresh Dashboard Interval to perform the following steps:
- Log in to the respective server where LRM analytics is deployed.
- After successful login, select Liquidity Risk , and then select Intraday Real Time Monitoring .
- Select Edit Dashboard from Page options in Intraday Real Time Monitoring Dashboard.
- In the Intraday Real Time Auto Dashboard Refresh section from the Edit Dashboard page, select Properties from the text object (which is to the top right corner of the text object).
- From the HTML code in the Properties dialog box, edit the auto-refresh interval in the setInterval method to the required time.
Note:
This value must be edited in terms of seconds*1000. For example, If the required refresh interval is 5 minutes (5*60 = 300 seconds), then the refresh time in the set Interval method should be 300*1000 = 300000 and the HTML code should be as follows, “setInterval('refreshTheFrame()',"300000");” in the text object properties. - After editing is completed, submit and save the Dashboard.
- Open the required dashboard and verify whether the dashboard is refreshed automatically in the given interval.
- Intraday BIS reports are configured with data source LRM. You can create a new data source LRM DB in case it is needed that these reports populate from other database sources.
- Steps to configure Intraday BIS reports with new data sources:
- Create a data source with name LRM DB in the system
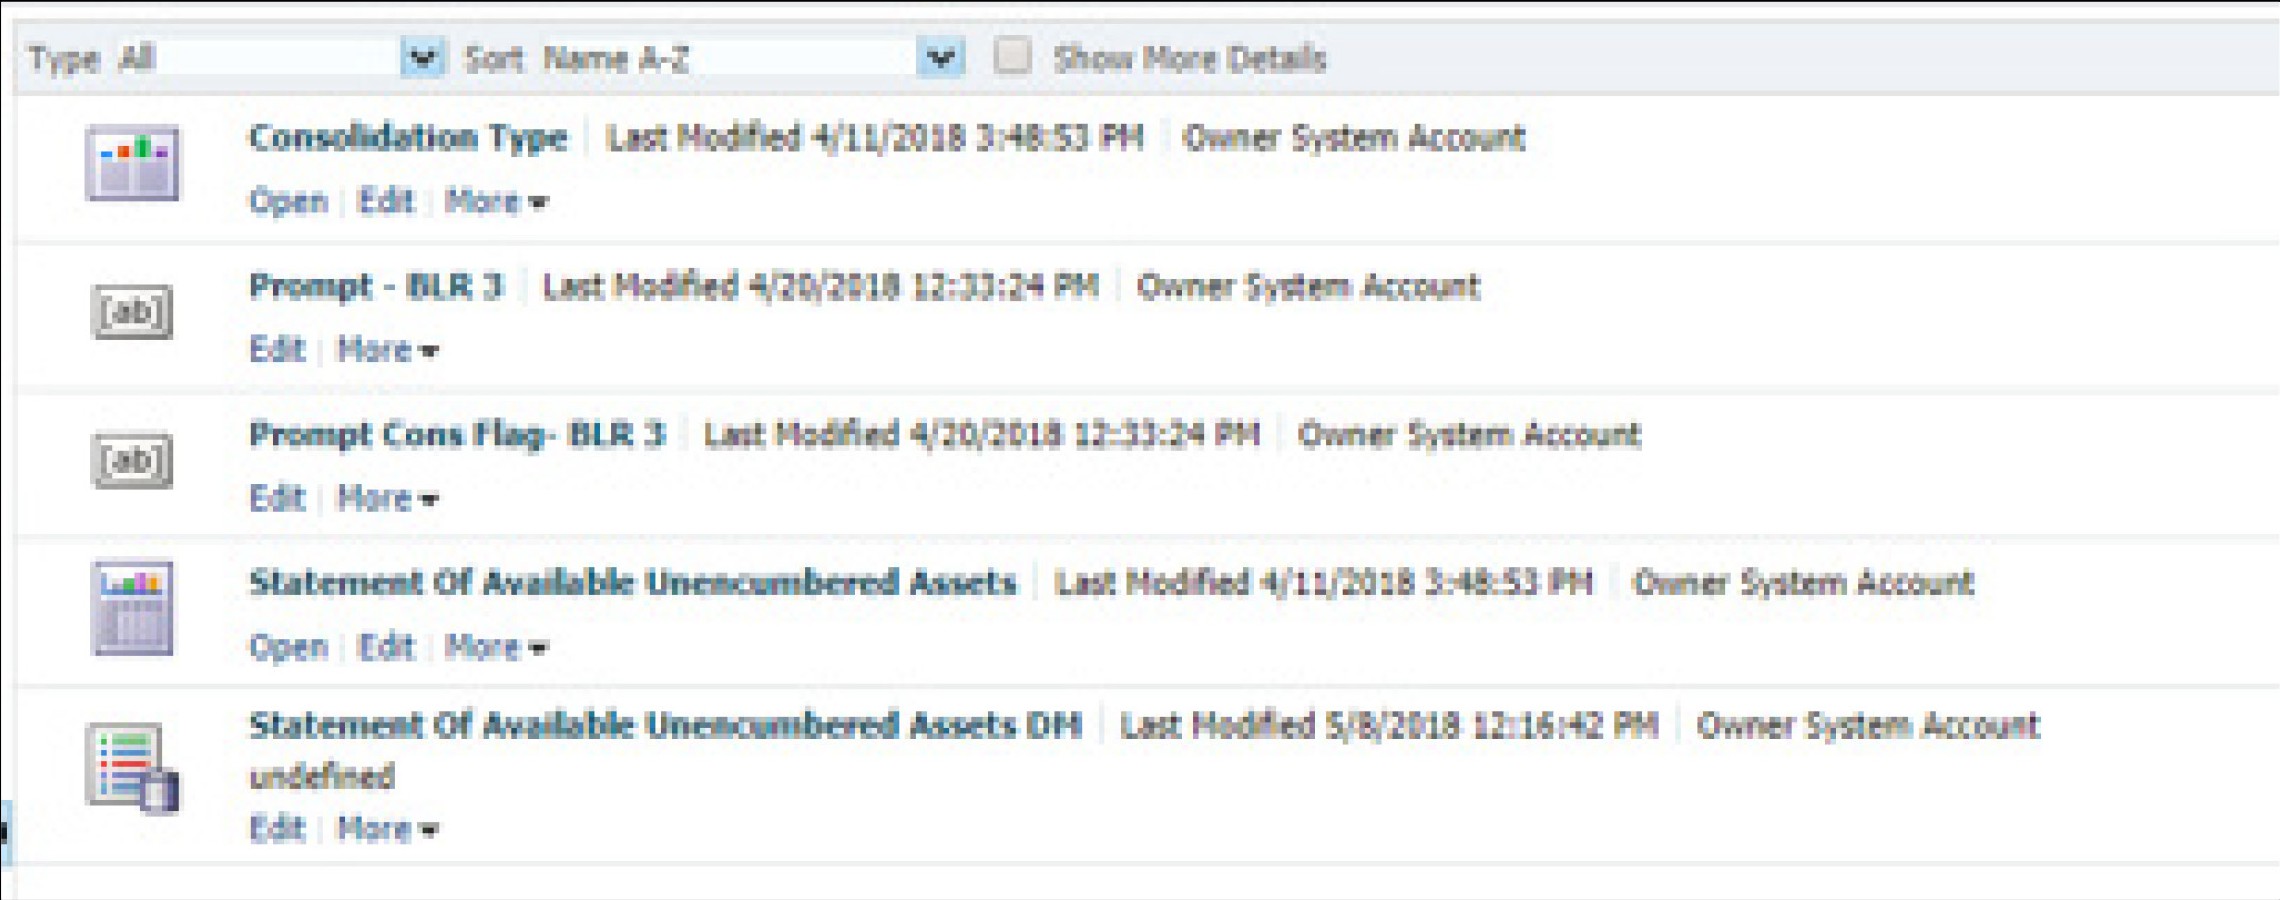
- Edit the data model for the report you wish to change the data source.
Figure 11-2 Edit Data Model

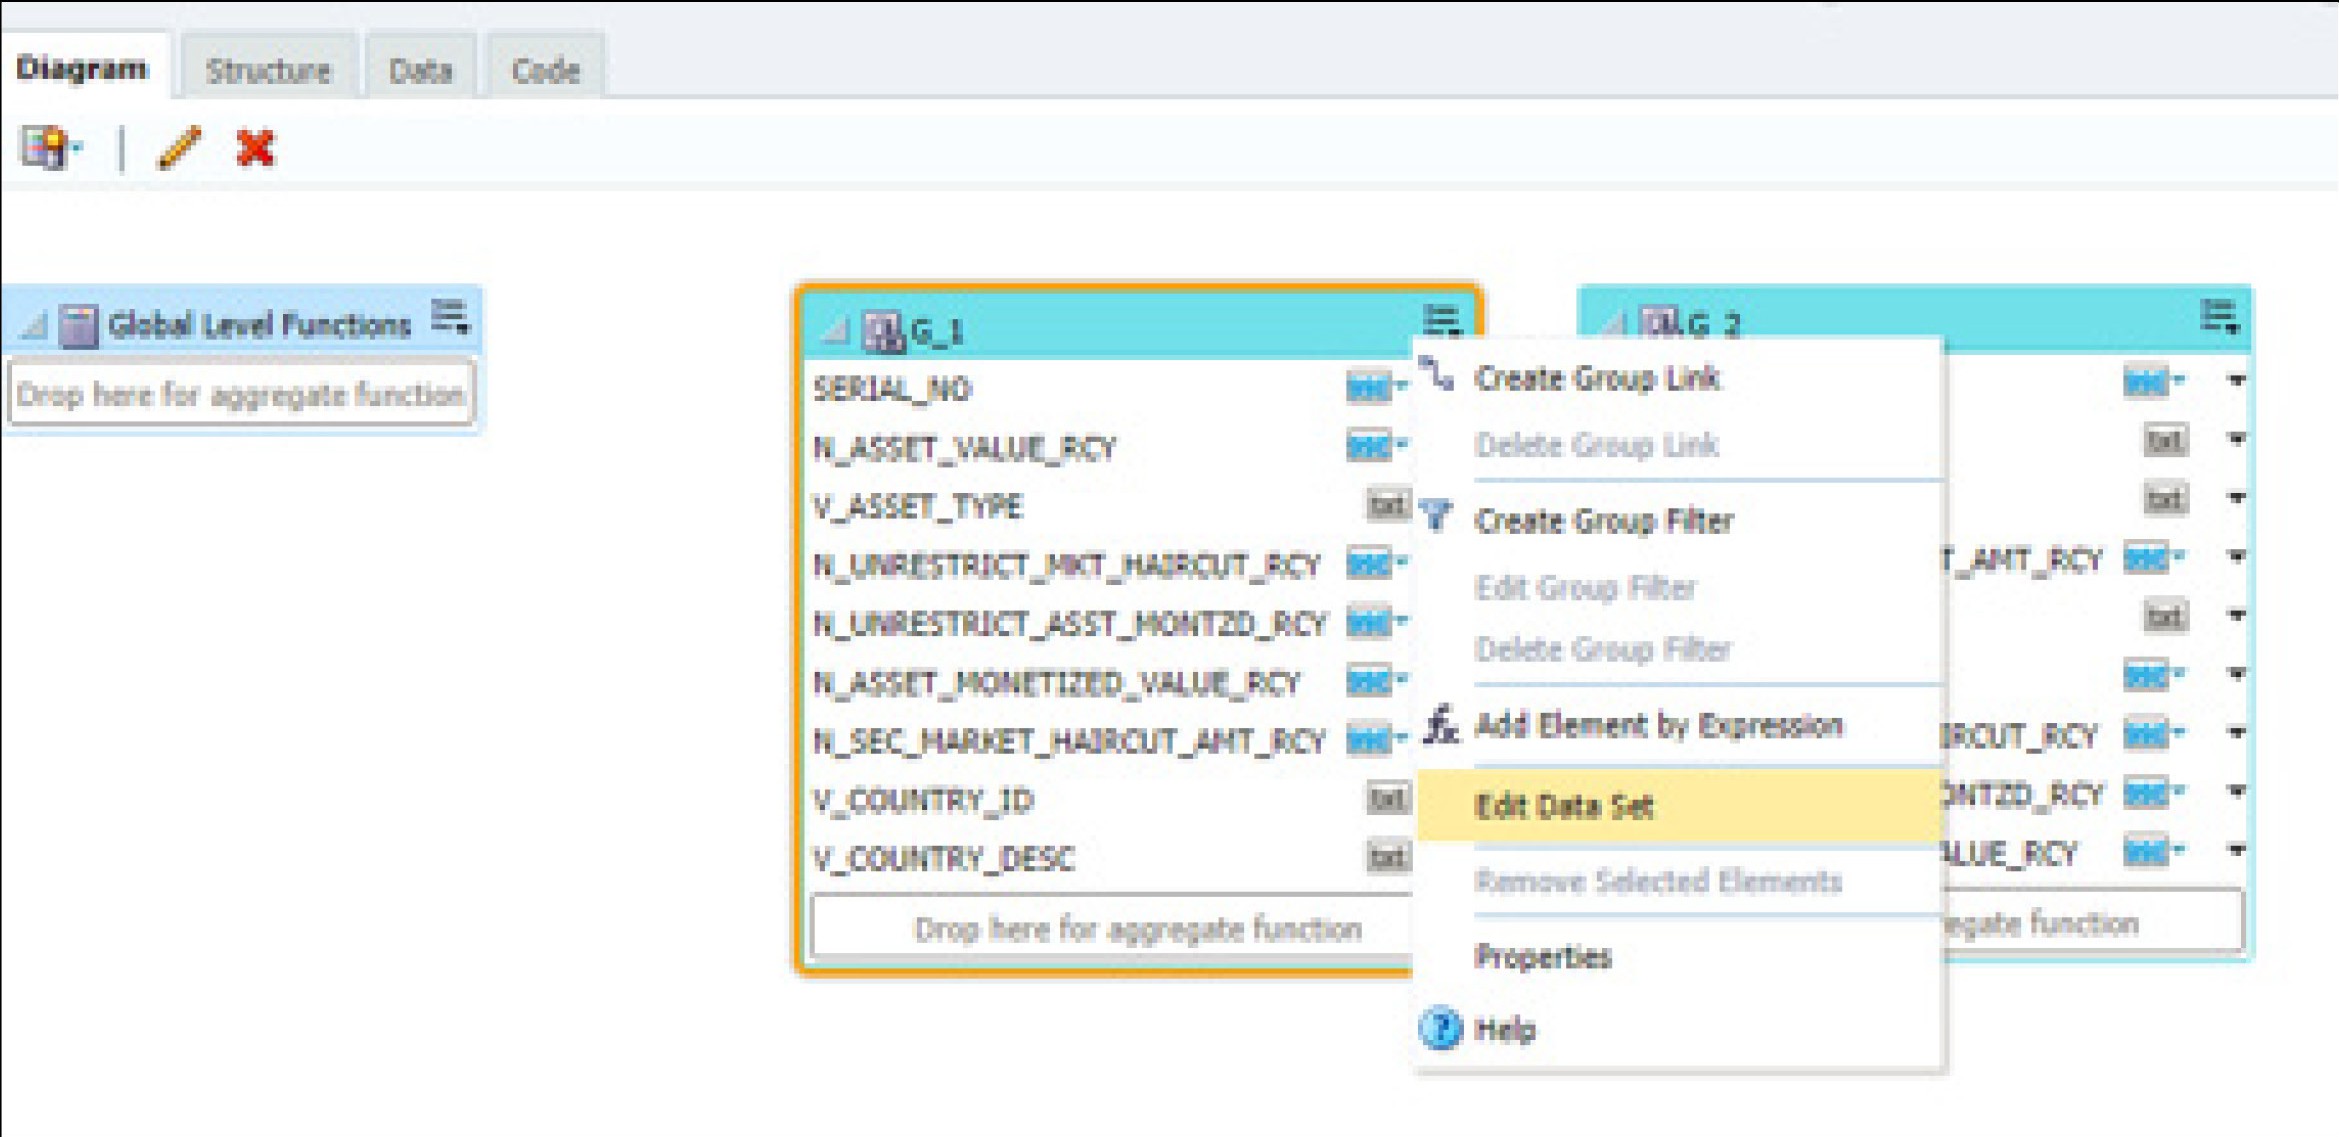
- Click the group present in the data set and edit the dataset properties. The Edit Data set dialog box is displayed.
Figure 11-3 Edit Data Set

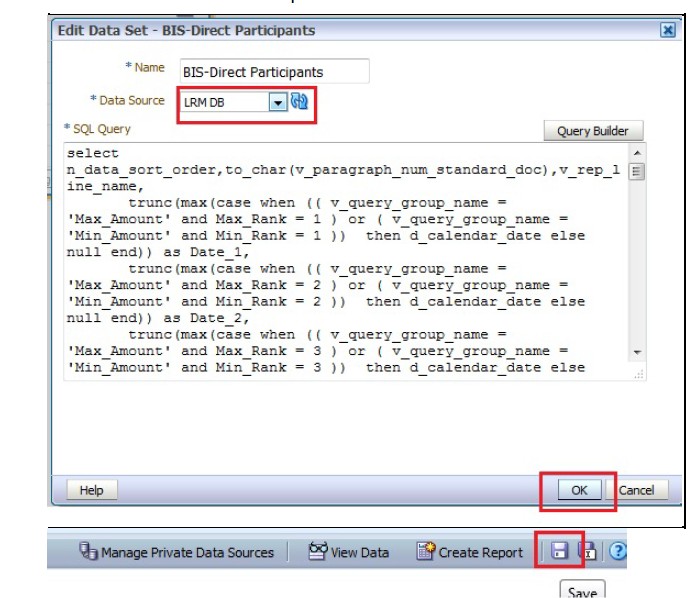
- Choose the data source LRM DB . Click OK and save the Data model.
Note:
Since these reports are pointing to the LRM DB data source by default, an error message appears if the LRM DB data source is not created in the system. Ignore this error and proceed to the next step.Figure 11-4 Edit Data Set – BIS-Direct Participants

- Perform this step for all the reports you wish to change the data source.
Note:
Data model to be changed for Intraday BIS reports in the /Shared Folders/Intra-day/ directory are as follows:- DM - BIS-Direct Participants
- DM - BIS-Correspondent Banks
- DM - BIS-Respondent banks
- You do not require to configure OBIEE if you are using the existing data source that is LRM which is used by other regulatory reports
Note:
- For enabling the Right to be Forgotten, see Right to be Forgotten
- For enabling Data Redaction, see Data Redaction section, and Data Redaction section under Data Security and Data Privacy chapter in OFS Analytical Applications Infrastructure Administration Guide.
- Steps to configure Intraday BIS reports with new data sources: