Creating a New Batch
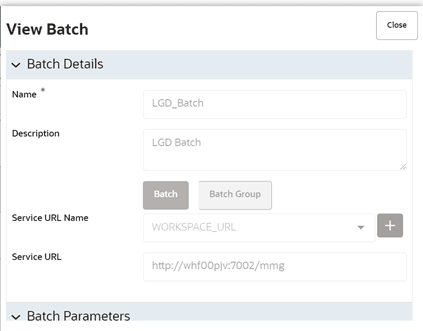
- In the Define Batch window, click Add. The Create a New Batch Window is displayed.
- Specify the details as tabulated.
Table 22-6 Fields in the Create a New Batch window and their Description
Field Description Batch Details Batch Name The Batch Name is auto-generated by the system or you can give a custom name. You can specify a Batch name based on the following conditions:
Note:
- The Batch Name should be unique across the Information Domain.
- The Batch Name must be alphanumeric and should not start with a number.
- The Batch Name should not exceed 60 characters in length.
- The Batch Name should not contain any special characters except “_”.
Batch Description Enter a description for the Batch based on the Batch name.
Note: The Batch description should be alphanumeric. It should not exceed 200 characters in length.
Service URL Name/ Service URL Select the Service URL name from the drop-down list, if it is available. The Service URL is displayed in the Service URL field.
Note: For Modeling WORKSPACE_URL must be selected.
To add a new Service URL, enter a name to identify it in the Service URL Name Field and enter the correct URL in the Service URL Field. You can enter a partial URL here and the remaining URL in the Task Service URL.
- From the Batch Parameters pane, click
Add to add a new Batch Parameter. By default,
$FICMISDATE$ and $BATCHRUNID$
are added as Batch parameters. You can delete a parameter by clicking Delete corresponding to the parameter.
- Click Save. The new Batch is created and displayed in
the Define Batch Window
Figure 22-8 The View Batch Window
