Details Screen
The user logs into the Details screen to edit and view a workspace.
Log into MMG User Interface. Click on the three dots and click on Details, which directs you to the Details screen.
This screen is divided into four columns: The first three gives information about the workspace and fourth (extreme right) focuses on the execution history of the workspace population.
The information present in first three columns is the one that user enters when creating/editing a workspace.
The workspace data/information is given by the user when they create or edit a workspace.
The basic Details screen is as follows:
Figure 6-14 Details screen
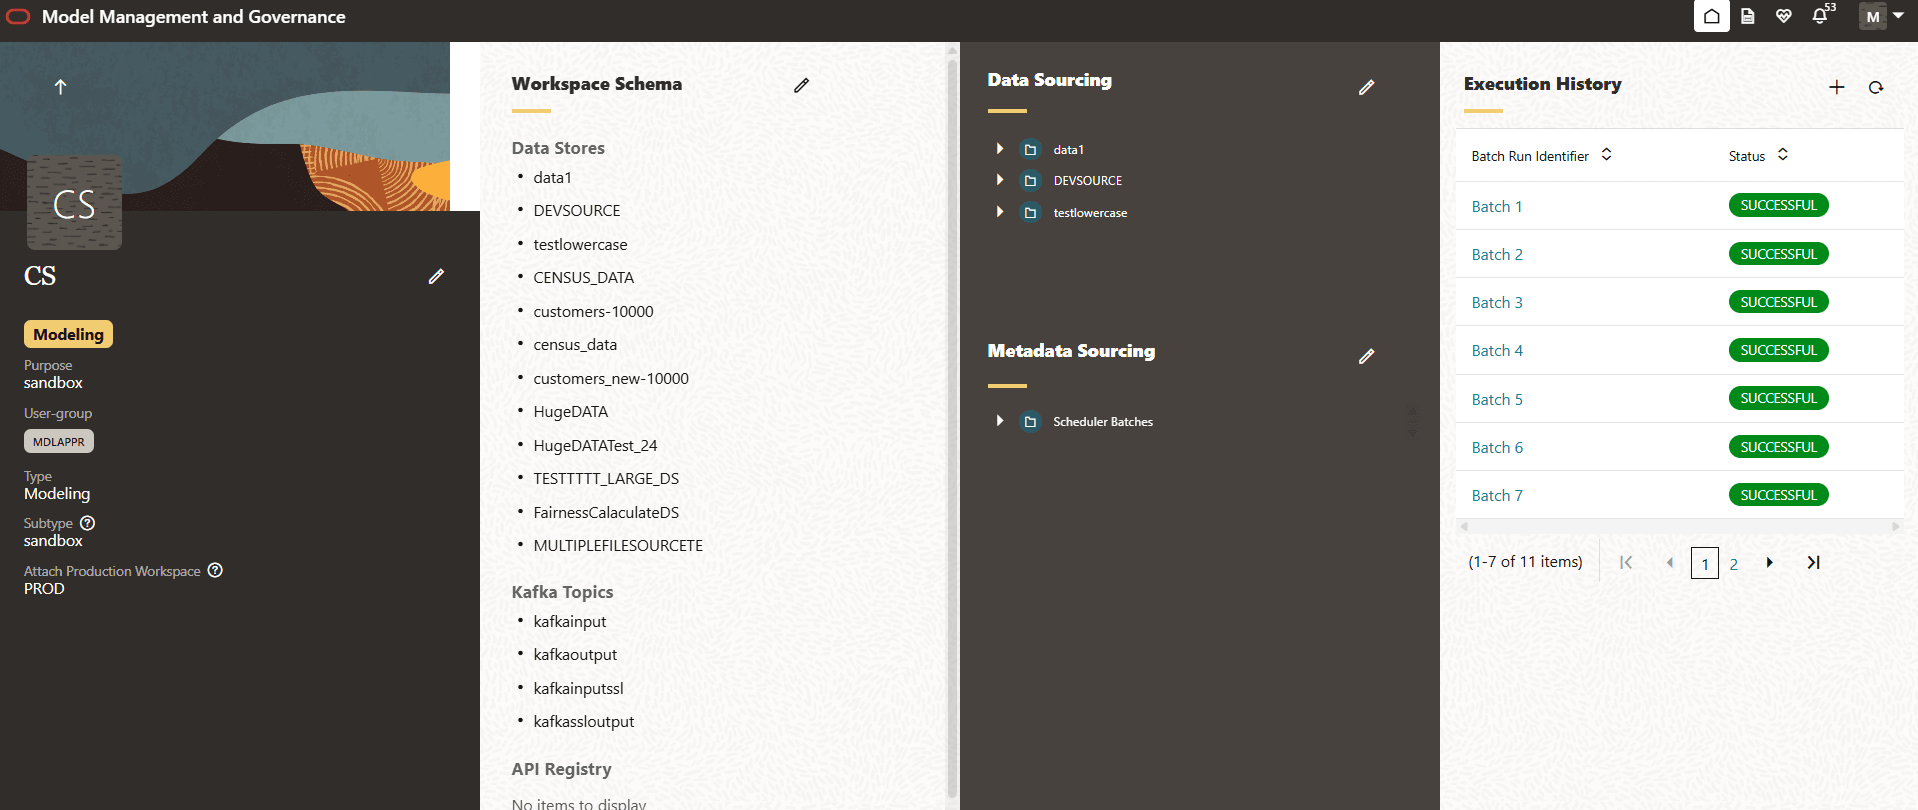
The first panel(column) is the basic Details screen, contains the workspace name, purpose, user-group, type, subtype, and the attach production workspace. You can edit the details in this section if you have edit rights.
Workspace Schema
- Data Stores
- Kafka Topics
- API Registry
- Conda Environment
Figure 6-15 Workspace Schema
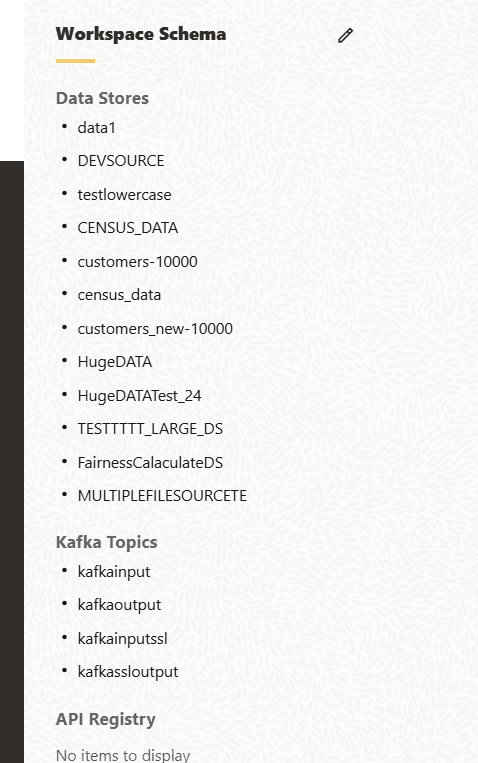
Click on the pencil icon next to Workspace Schema to edit the same.
A pop-up box is displayed with the edit options. Click Save to save the information edited.
Figure 6-16 Workspace Schema
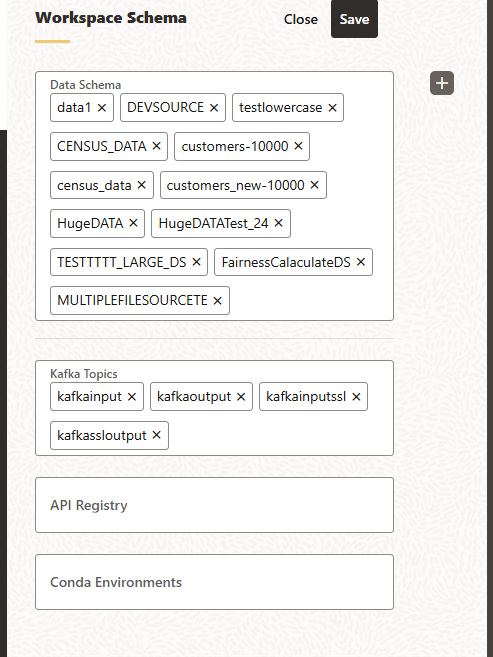
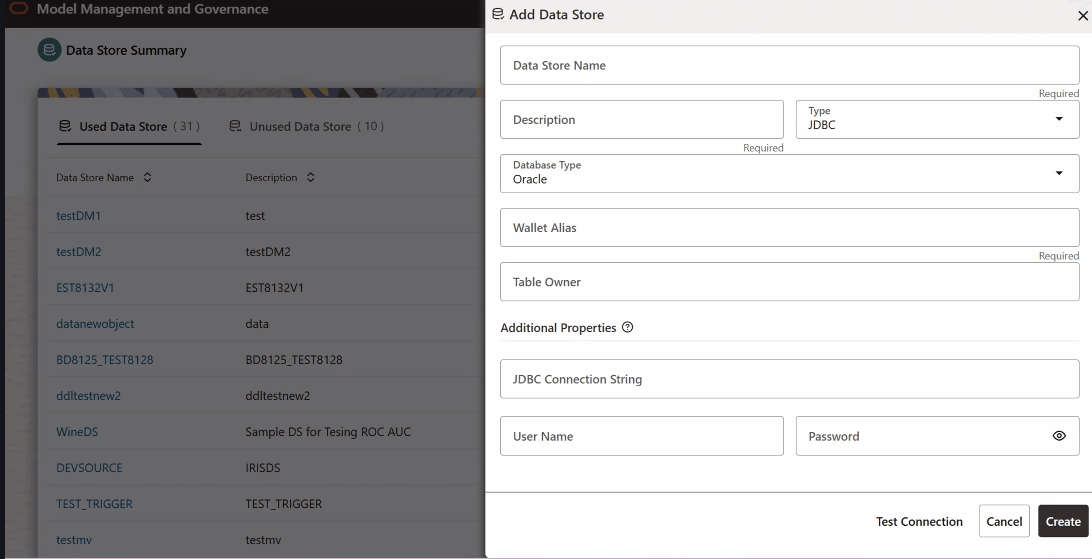
Click the plus icon next to the Workspace Schema to create/add a Datastore.
Figure 6-17 Add a Datastore
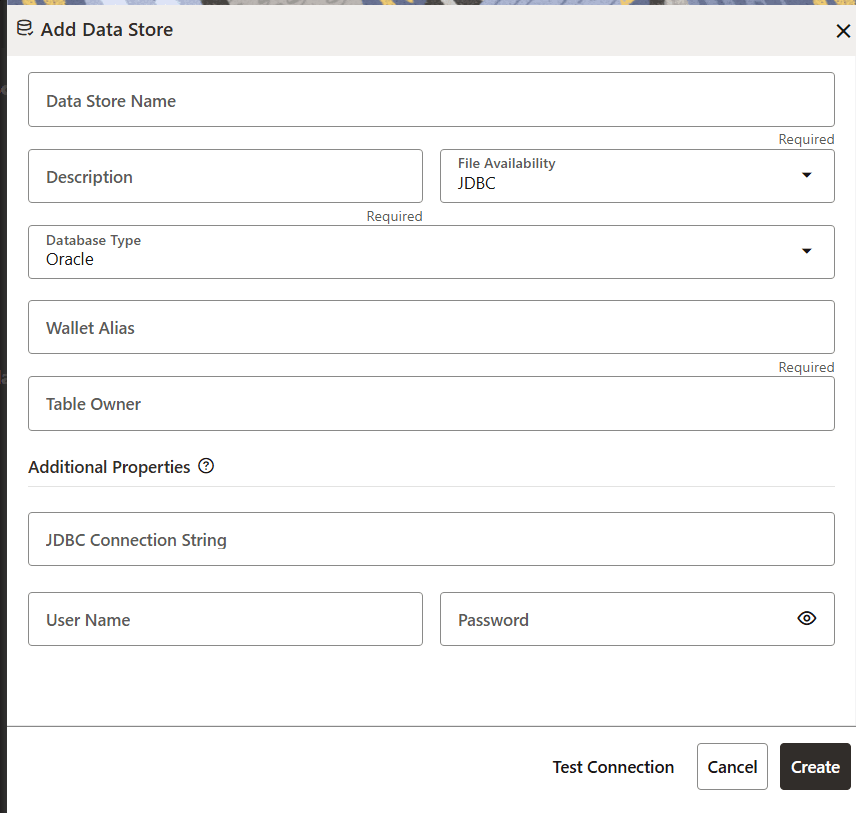
Figure 6-18 Additional Properties
Data Sourcing
- Data Sourcing
- Metadata Sourcing
Figure 6-19 Data Sourcing
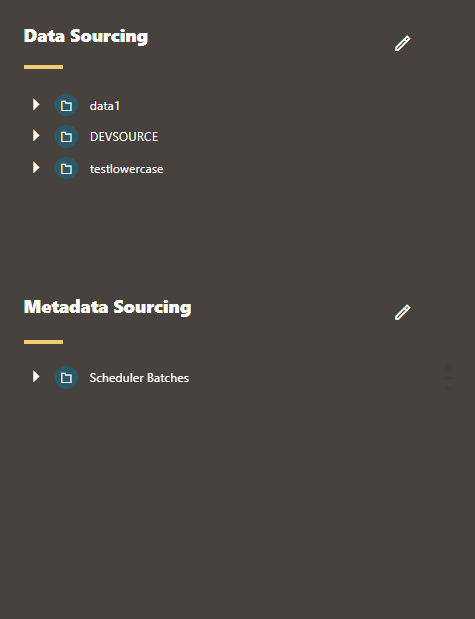
Click on the pencil icon next to Data Sourcing to edit the same.
A pop-up box is displayed with the edit options.
Figure 6-20 Edit Data Sourcing
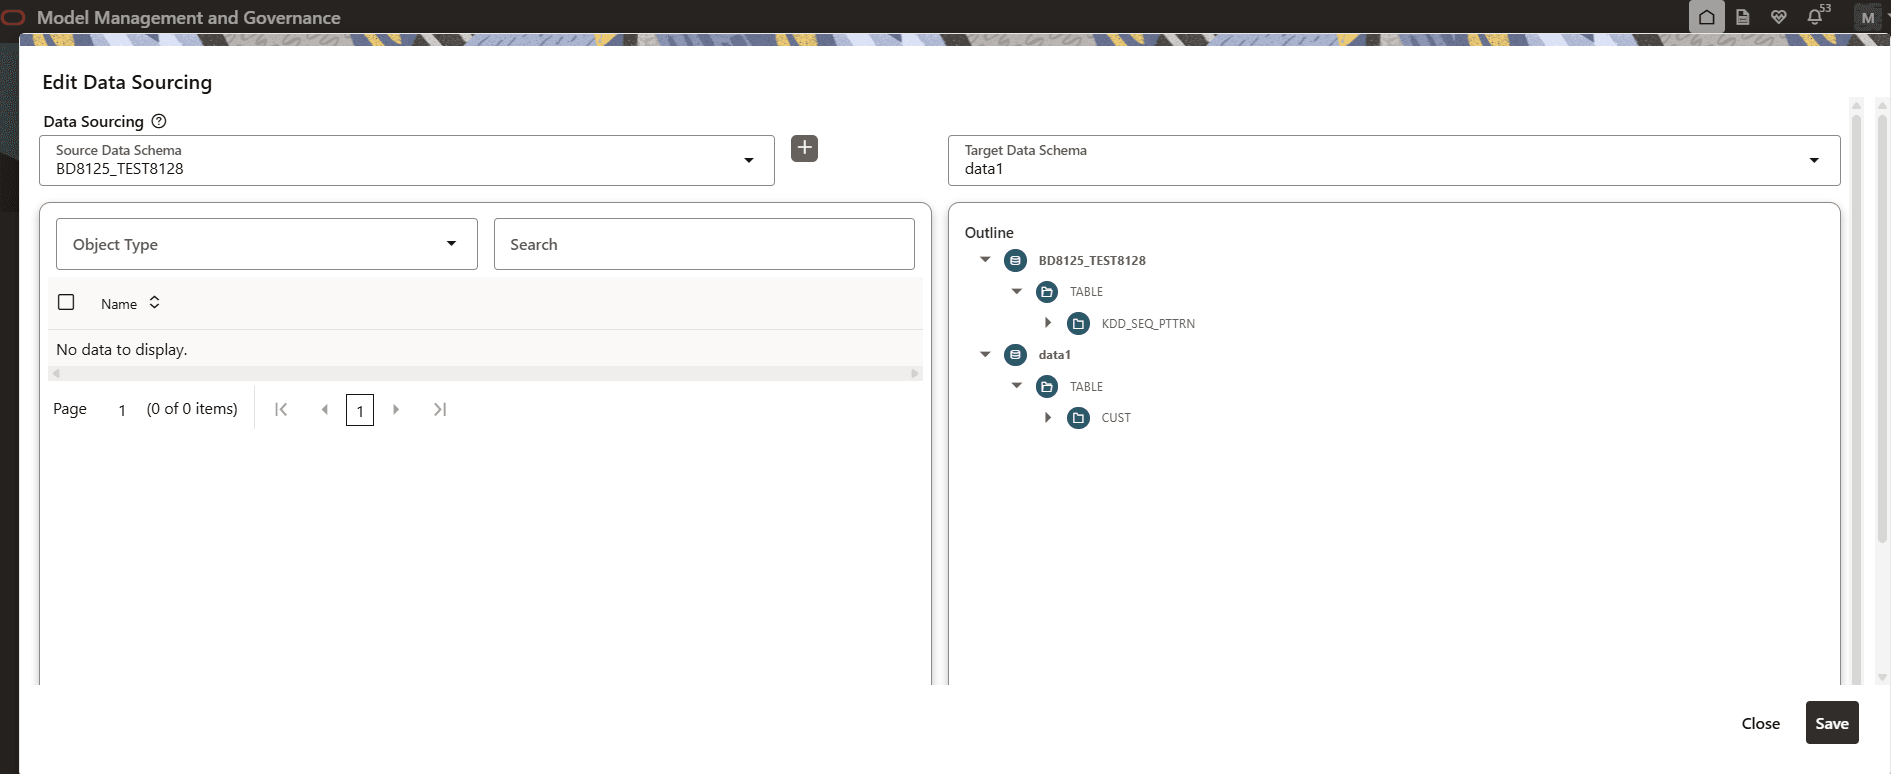
Click Save to save the information edited.
Click on the pencil icon next to Metadata Sourcing to edit the same.
A pop-up box is displayed with the edit options.
Figure 6-21 Edit Metadata Sourcing page
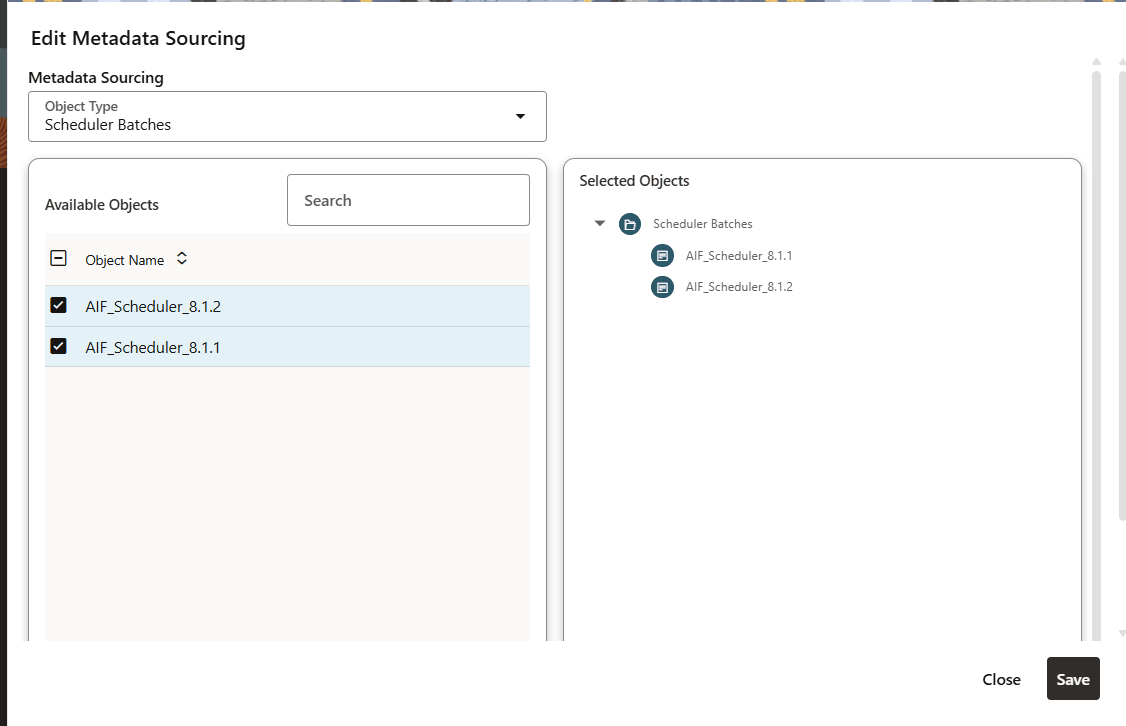
In this window, you can add new objects or edit the existing ones.x
Click Save to save the information edited.
Data Population Jobs
In the Data Population Jobs section, the user can see the output of the population under Batch Run Identifier and status of each workspace population.
Figure 6-22 Data Population Job

Click the Batch and the Task Details window is dappears.
Figure 6-23 Task details
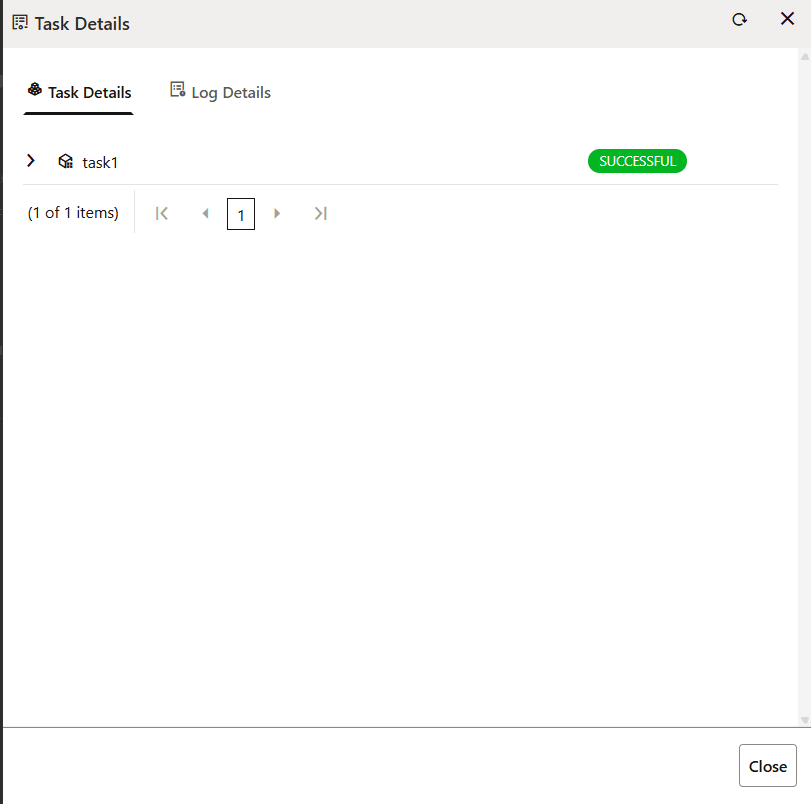
Click Close to close the window.
Click on the Populate icon to create a new data population job.
Figure 6-24 Populate Workspace page
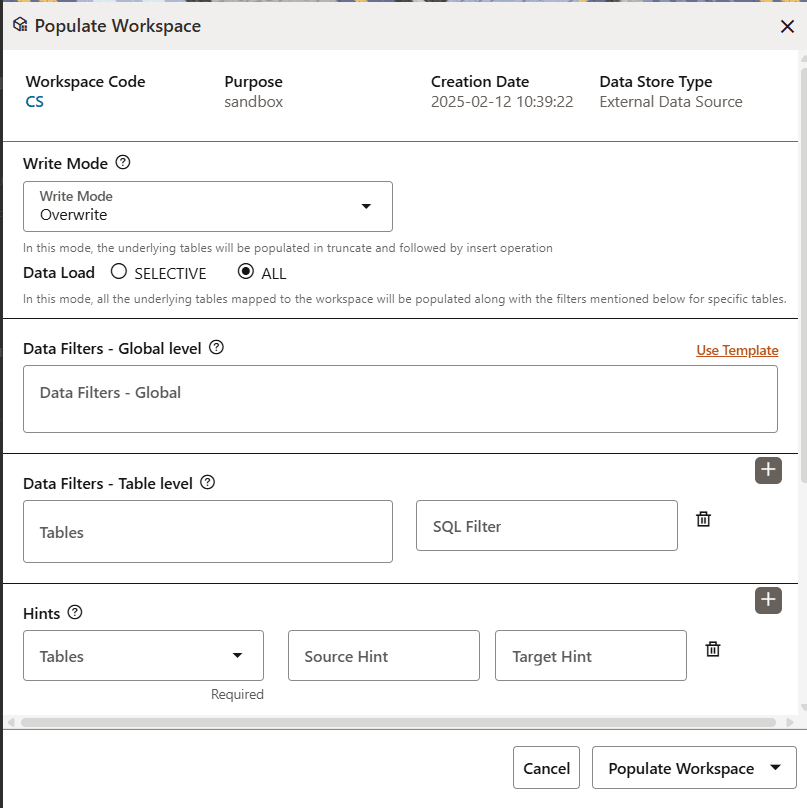
- Write Mode - Select either Overwrite or Append.
- Data Load - Select either SELECTIVE or ALL.
- Data Filters - Global level - Enter values or click the Use Template link to add the data via a template.
- Data Filters - Table level - Select a table from the Table drop-down list. Add an SQL filter in the SQL Filter field. Additionally, click the Delete icon to delete the data.
- Hints - Select a table from the Table drop-down list. Add a value for the Source Hint and Target Hint fields. Additionally, click the Delete icon to delete the data.
- Additional Parameters - Enter values in the Source Prescript and Target Prescript fields. You can also modify the values in the Fetch Size and Batch Commit Size fields.
- Additional Parameters - Select either Unlimited or Custom Rejection Threshold. If Custom Rejection Threshold is selected, then the Rejection Threshold fields is enabled for editing.
Click either Populate Workspace or Create Batch or Create and Execute Batch.
Click Save to save the information edited.
Note:
The View Workspace screen and the Edit Workspace screen has now been merged into one and is called the Details screen.