Navigation in the Summary Screen
To open the Segmentation Mapping screen, from the LHS Menu, select Maintenance, and then select Segmentation Mapping. When you navigate to the Segmentation Mapping Summary screen, the Segments stored within your current Default Folder are displayed in this screen.
The Segmentation Mapping screen is divided under two sections: the Search section and the Summary table. The title bar of the summary page provides the following actions for the user:
The Action icons are as follows:
- Add: Click the Add icon to create a new Segment. The Add icon is disabled if any of the rows in the summary table are selected.
- Multiple Delete: Select one or more Segments in the summary table and click the Delete icon to delete the selected Segments.
- Refresh: Click this icon to refresh the summary page.
- Help: Click this icon to view the Segmentation Mapping help page.
- Segment Range Lookup: Click this button to view value ranges for segmentation dimensions.
Segment Range Lookup
The Segment Range Lookup screen enables users to define and maintain value ranges for segmentation dimensions.
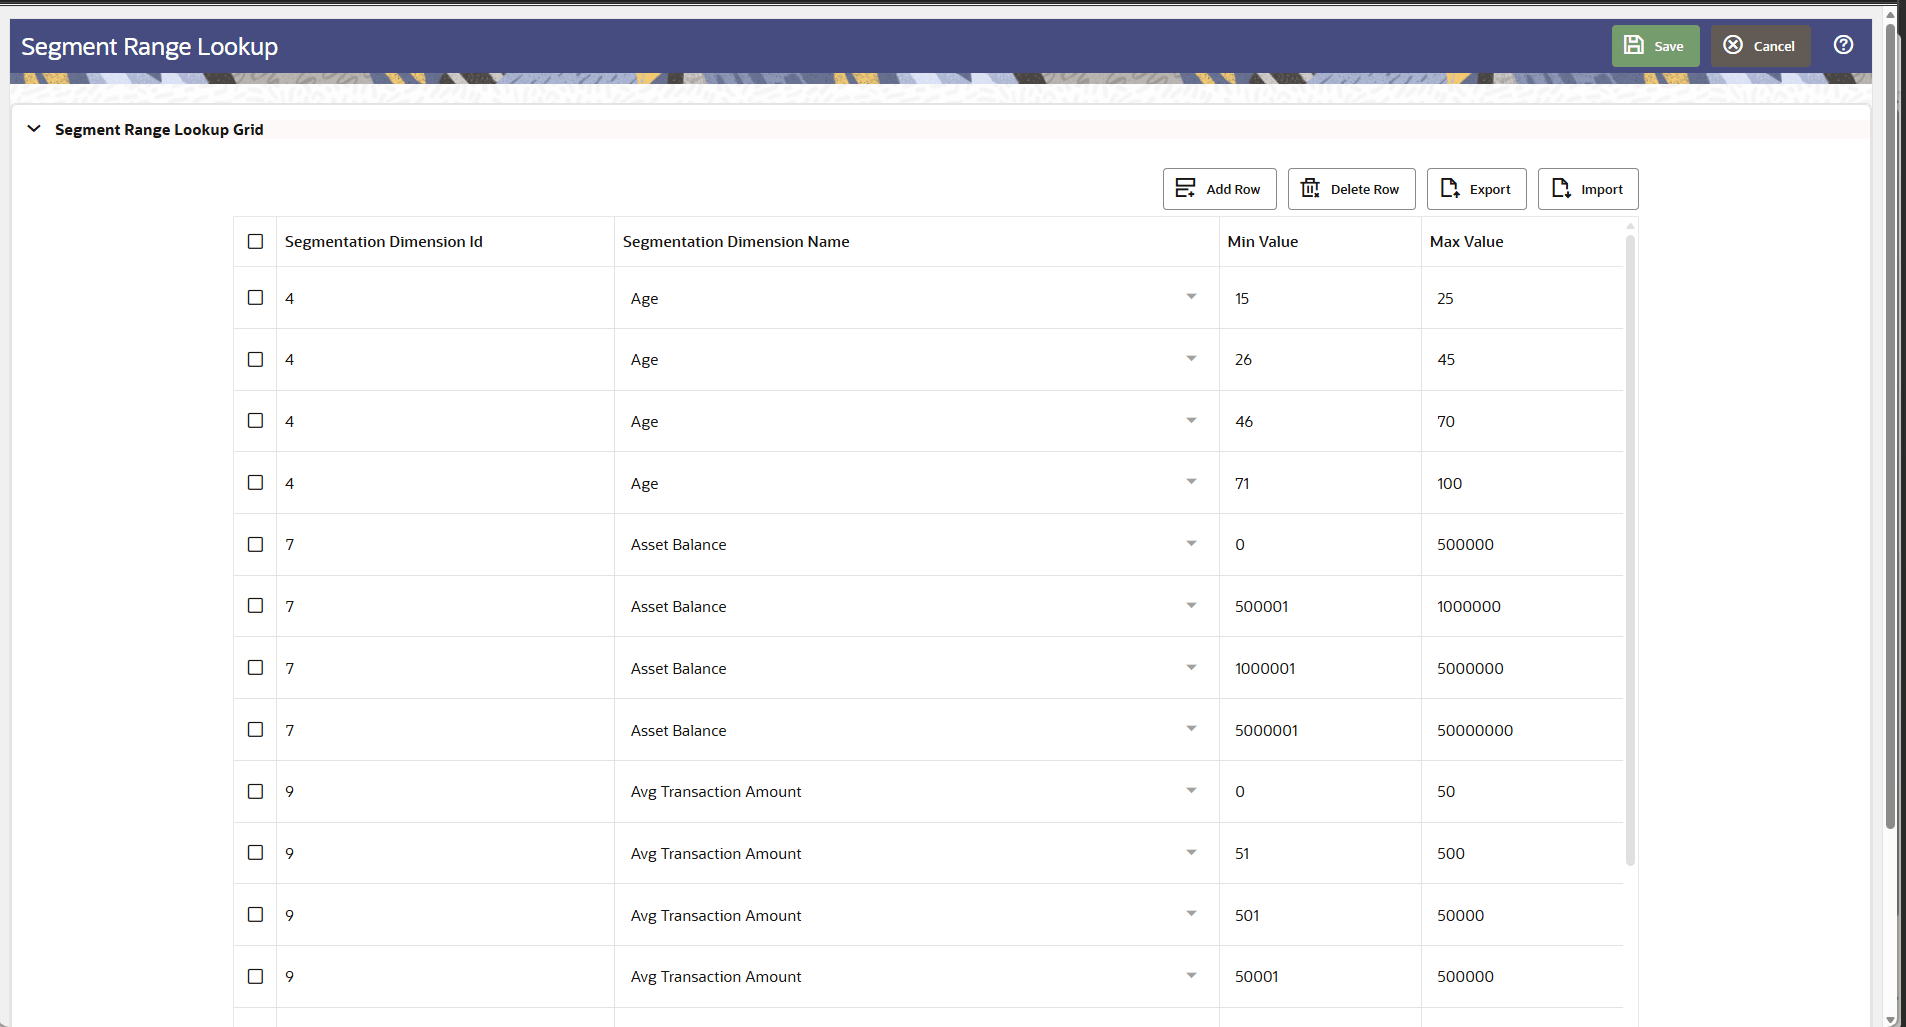
Figure 6-10 Segment Range Lookup
The table includes the following columns:
- Selection checkbox
- Segmentation Dimension Id
- Segmentation Dimension Name
- Min Value
- Max Value
The toolbar above the table provides the following actions:
- Add Row — Adds a new range definition.
- Delete Row — Deletes the selected range definition.
- Export — Exports the grid data.
- Import — Imports range definitions into the grid.