4.2.2 File Upload Using File Upload Utility
To upload files using the File Upload utility, follow these steps:
- Extract the FILEUPLOAD_UTIL.zip file under the $HOME directory.
- Place the Data Loader input file in the $HOME/FILEUPLOAD_UTIL
directory.
Figure 4-1 Data Loader Input File Path

- Edit the Env_setup.sh file to update the ENV
variables. For more information to get the IDCS URL, see Get the OAuth Client ID and Client
Secret for getting the URL.
IDCS_URL=<idcs-url>/oauth2/v1/token
Example: https://idcs-0cb0c2b3ba624afca67467fd5eb9db49.identity.xxyy.xxyyy.com/oauth2/v1/token
ENCODED=<OAuth Client ID>:<OAuth Client Secret> (Encode them using base64encode)
See Get the OAuth Client ID and Client Secret for getting the URL. for the Client ID and Client Secret details.
Example:
ZnRwcWExMDEyMzEtcHJkX0FQUElEOjBkMmU5MDBiLTlhYjItNGFmOS05OWM0LTEwNTYyMDVkYWYwNQ==
USERNAME=<App login user>
Note:
<App login user> should have FILE_UPLOAD role mapped.PASSWORD=<App login password>
TENANT=<abcdef-prd>
PBSMHOST=<PBSMhostdetail>
Example : dc.pbsmcloud.us-xxxxx -1.ocs.oc-test.com
Figure 4-2 PBSM Host Details

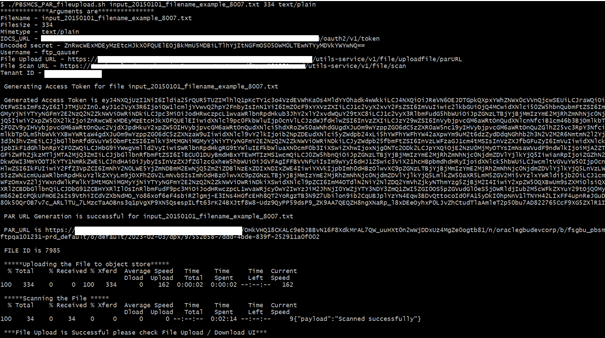
- Execute PBSMCS_PAR_fileupload.sh with parameters
– filename<space>filesize<space>mimetype. File size must be in bytes.
This script generates the access token and the PAR URL. It also uploads the file
into the object store and scans the file too.
Note:
To upload multiple files, execute the script for each file.Example: ./PBSMCS_PAR_fileupload.sh input_20150101_filename_example_8007.txt 334 text/plain
Figure 4-3 Example of Input File

- After the execution is completed, check the File Upload/Download UI to confirm that
the uploaded file is appearing.
Figure 4-4 File Upload/Download UI
