3.6.1.4 Create Nullify Policy
This section provides the details on nullifying the column from selected tables based on user defined criteria.
To create Nullify Policy, follow these steps:
- Navigate to New Policy page.
- Follow the steps mentioned in below sections:
- Step 1: Policy Definition
- Step 2: Choose Columns
- Step 3: Condition
- Step 4: Preview and Submit
Step 1: Policy Definition section
- From Policy Details tab, click Start.
The Policy Definition page is displayed.
Figure 3-36 Policy Definition section
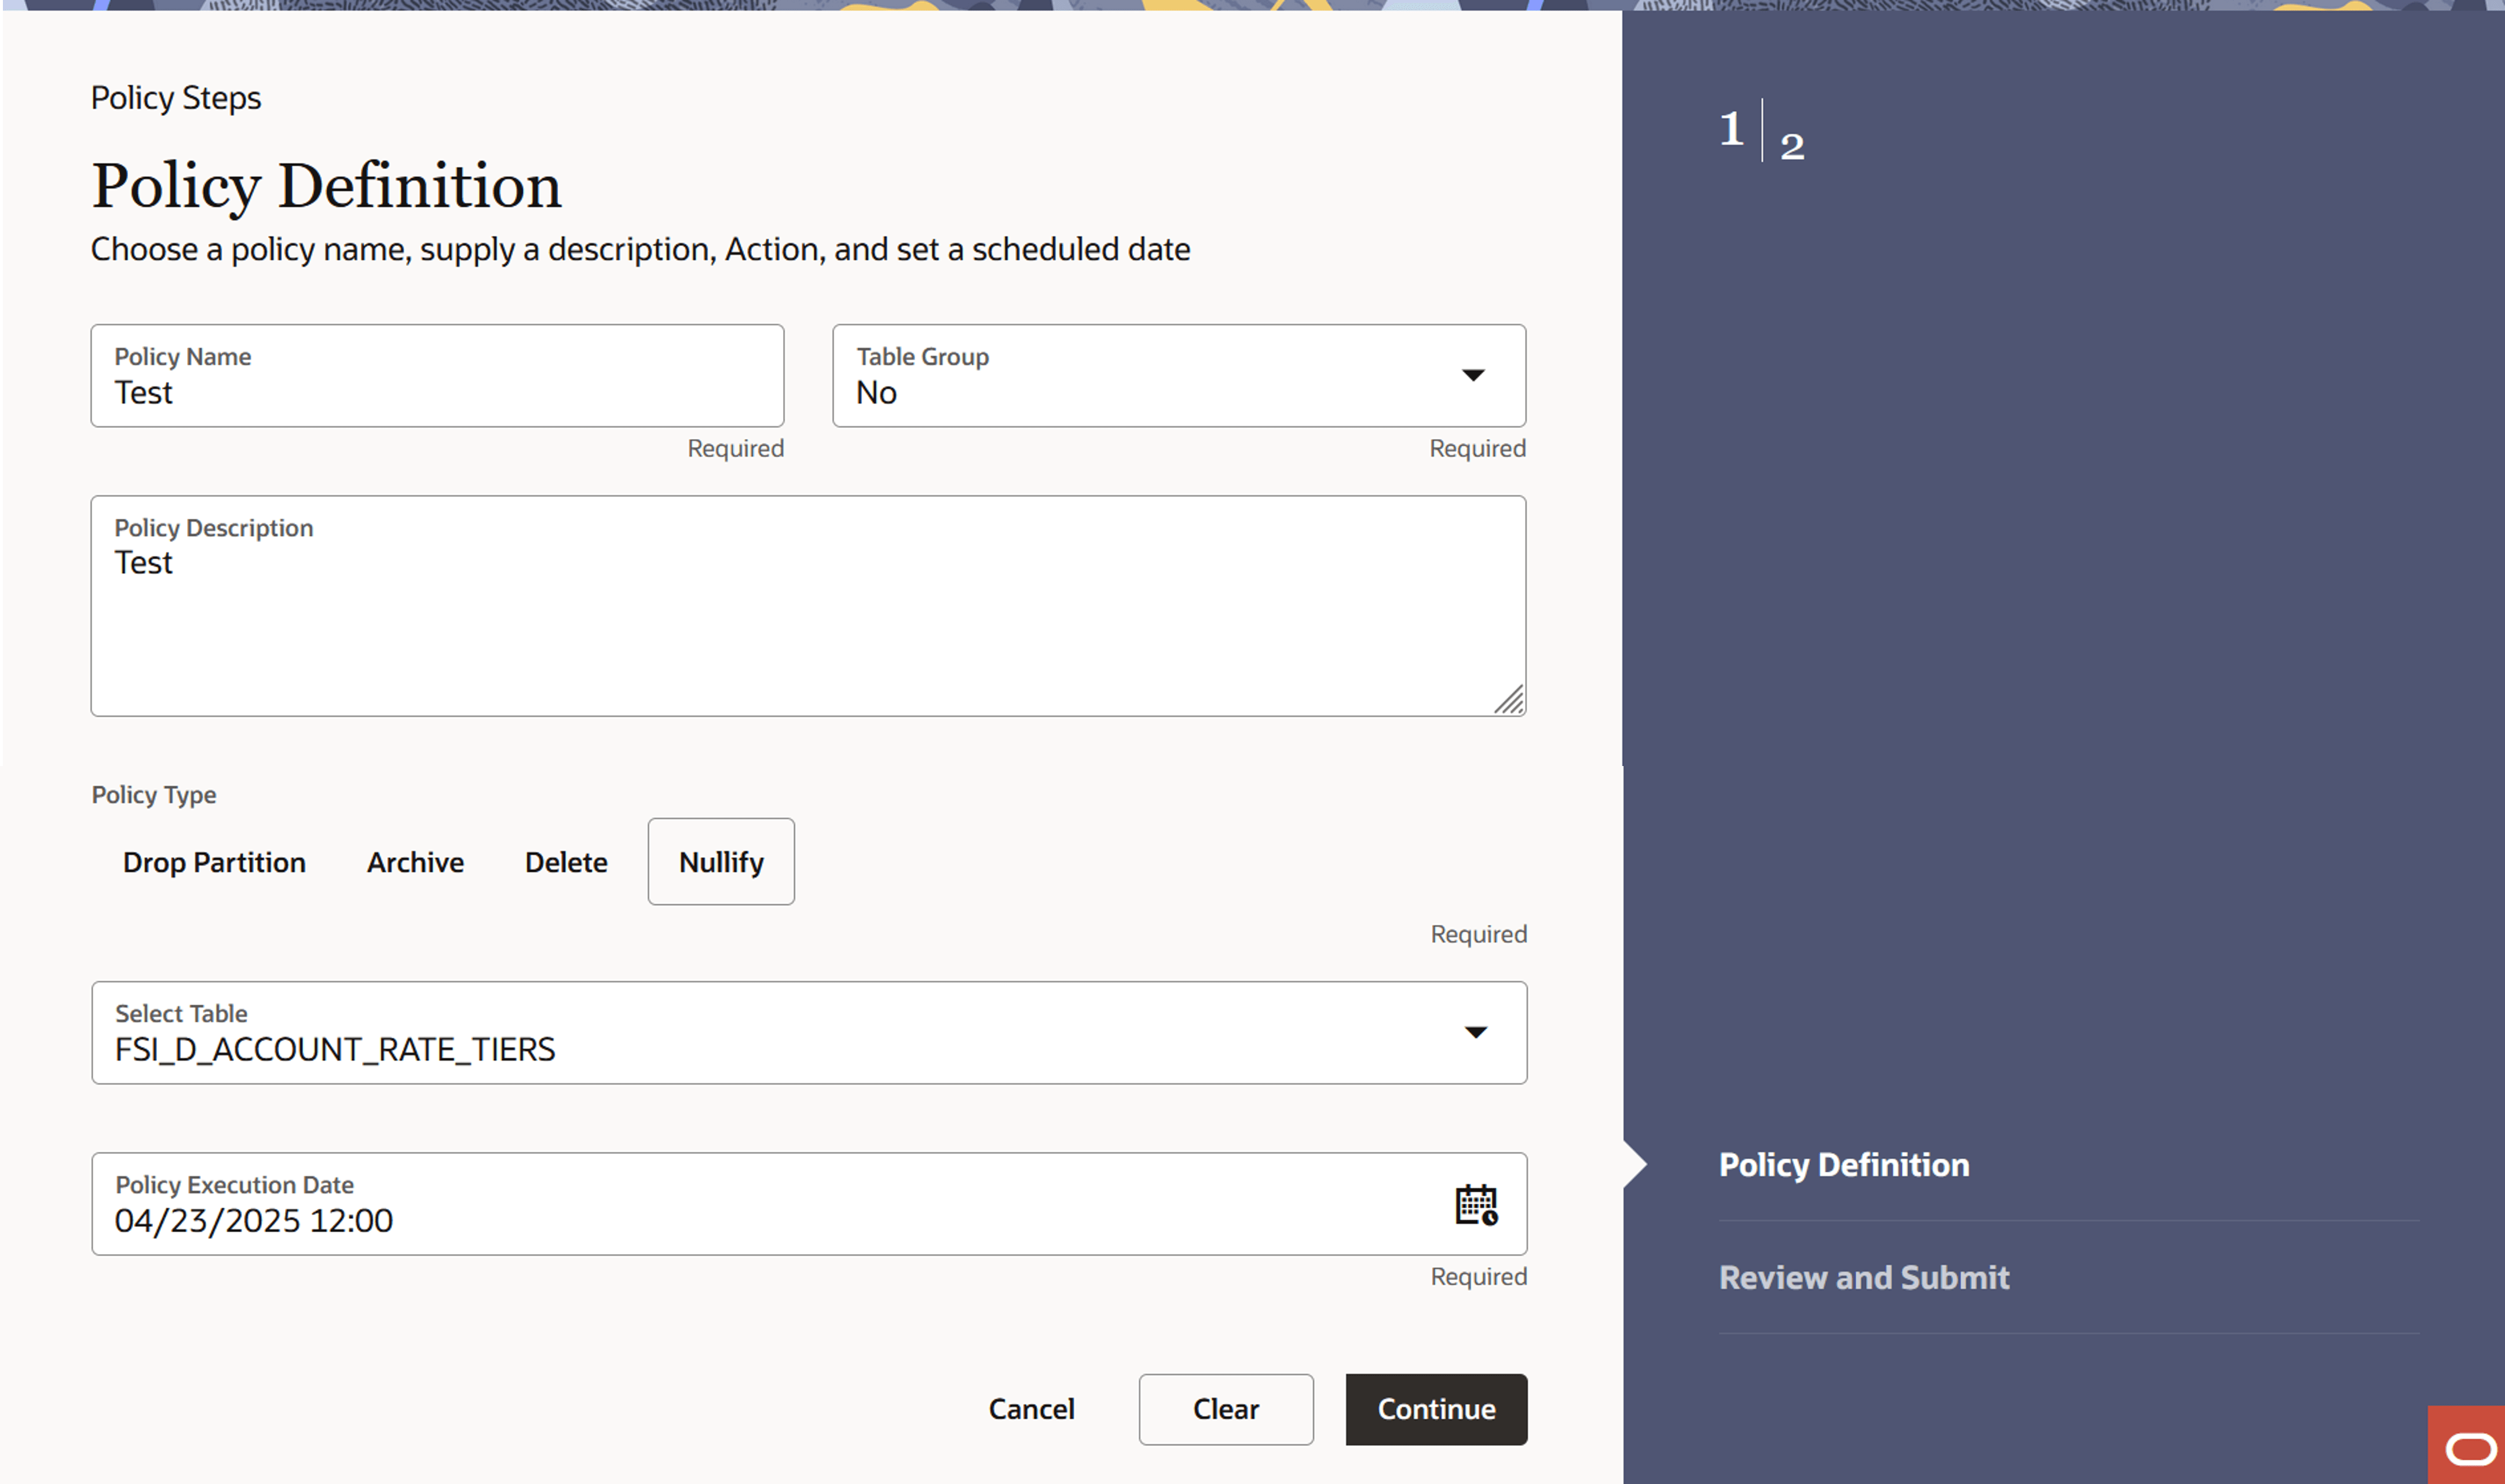
- Enter the following details:
- Name: Name of Policy
- Description: Description of Policy
- Table Group: If this option is selected as No, then you can select Policy Type as Drop Partition.
- Type: Type of Policy as Nullify
- Policy Execution Date: Select the execution date and time of policy using calendar
Step 2: Choose Columns section
- Navigate to the Choose Columns section.
Figure 3-37 Choose Columns
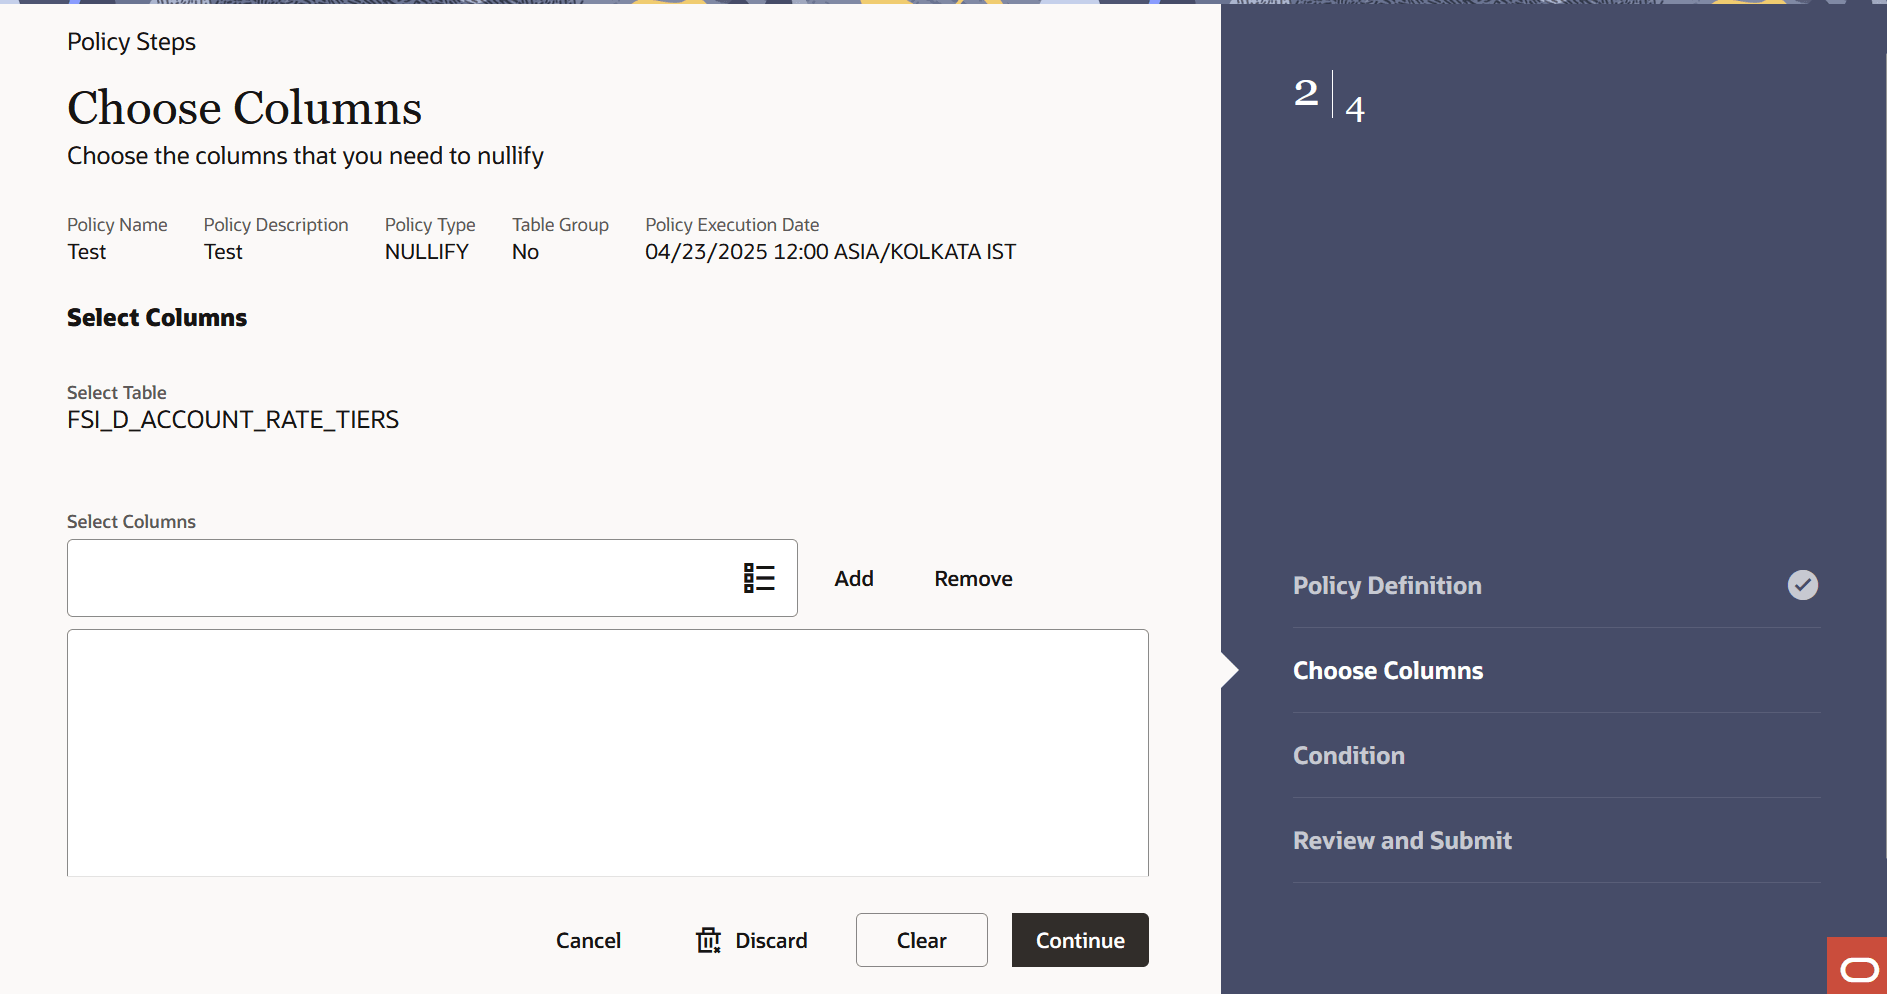
- To select the columns which you want to nullify, click
in Select Columns field. The Search window is displayed.
Figure 3-38 Search Columns

Figure 3-39 Search Columns
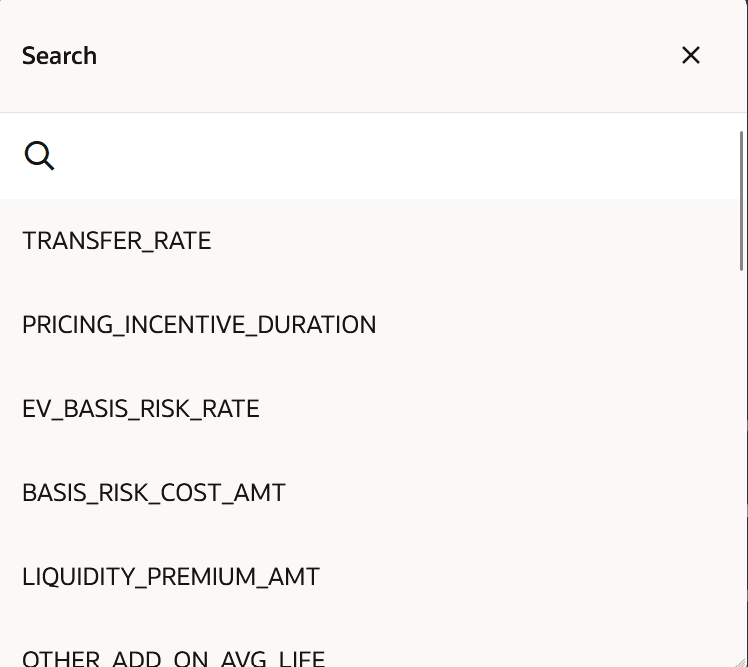
- Select columns and click Add.
- Click Continue.
Step 3: Conditions
This section allows you to define the conditions(s) to archive the table.
- Navigate to the Conditions section.
Figure 3-40 Conditions section
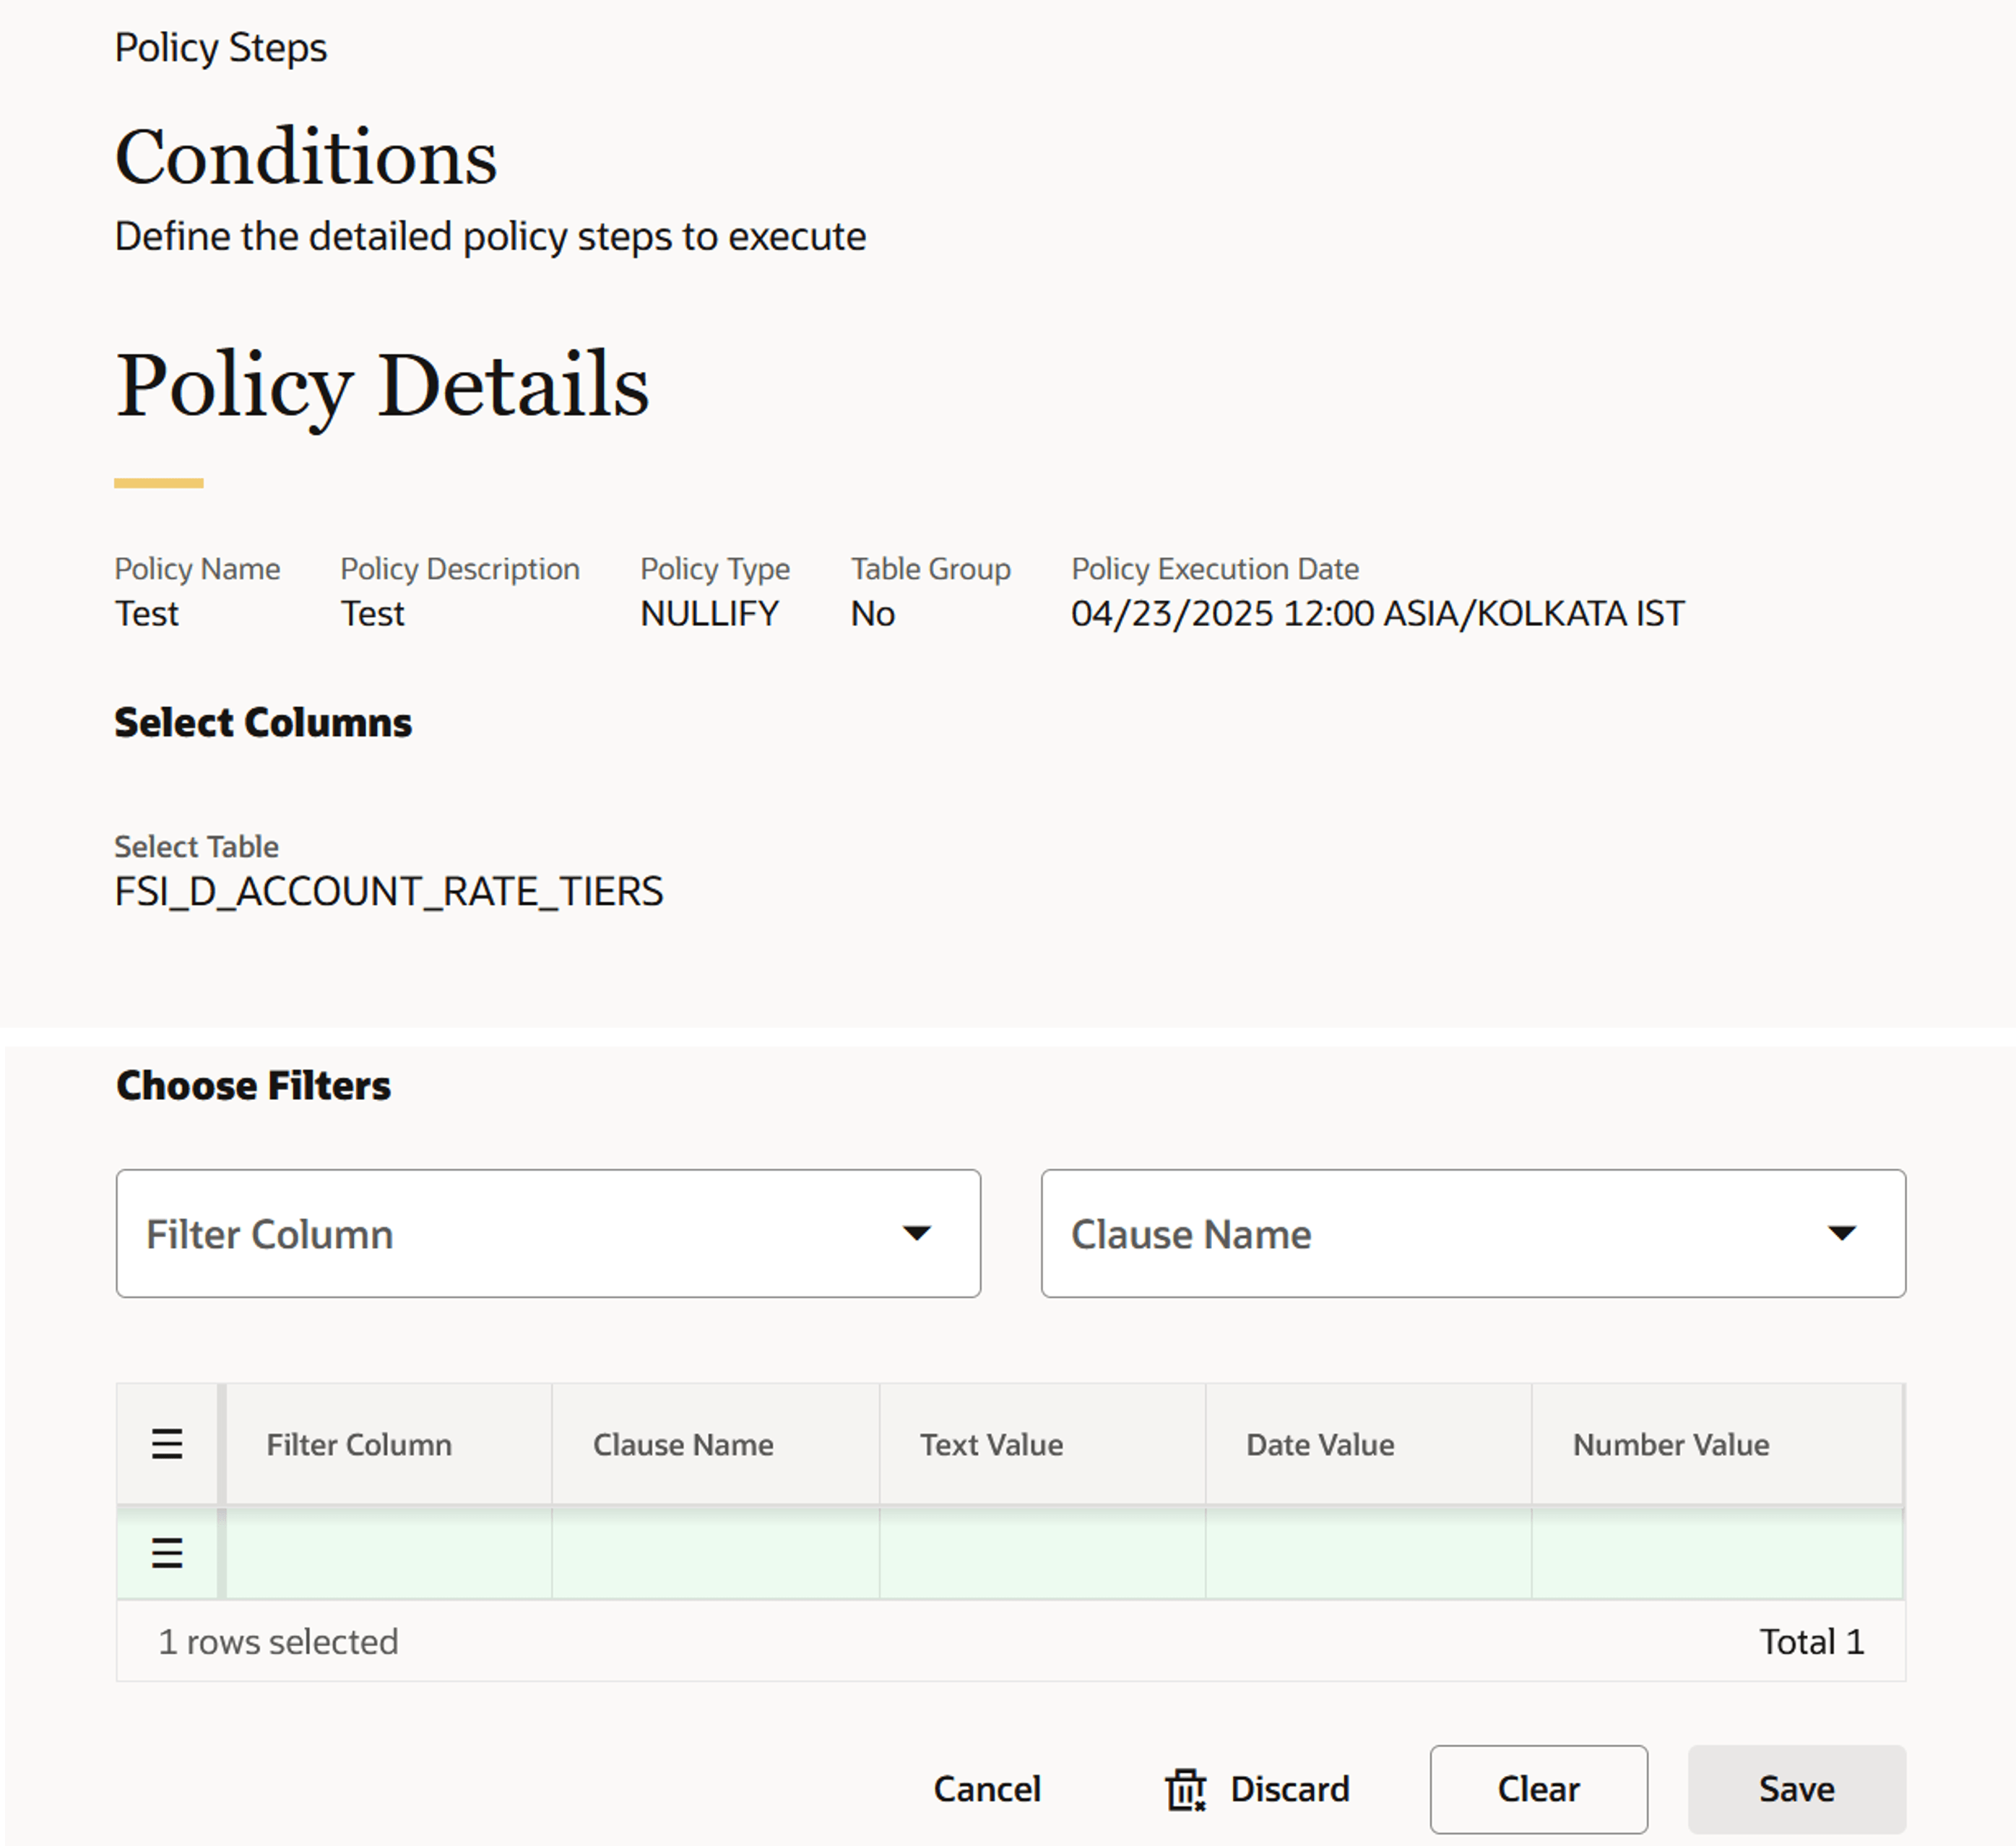
- Select the column(s) using Filter Column.
- Select operator from Clause Name drop-down. The list of operators
displays based on the selected Column Name.
Note:
You must select at least one condition to avoid the full table archive. Use AND if you want to use multiple columns. You can select columns from pre-defined list. Don’t use wild card characters. Supported operators are: >, <, <=, and =>.
- Enter condition value for selected column.
For example, If you have selected Column as Account Number, then select Equals operator from Clause Name drop-down, and enter alphanumeric value in Value field.
Click Row Actions icon to view single row, add a new row, create duplicate row, delete row, refresh row, or revert changes.
To add more conditions, define the condition and click Save.
- Click Continue.
Step 4: Preview and Submit section
- Navigate to Preview and Submit section.
Review the policy details.
Figure 3-41 Preview and Submit section
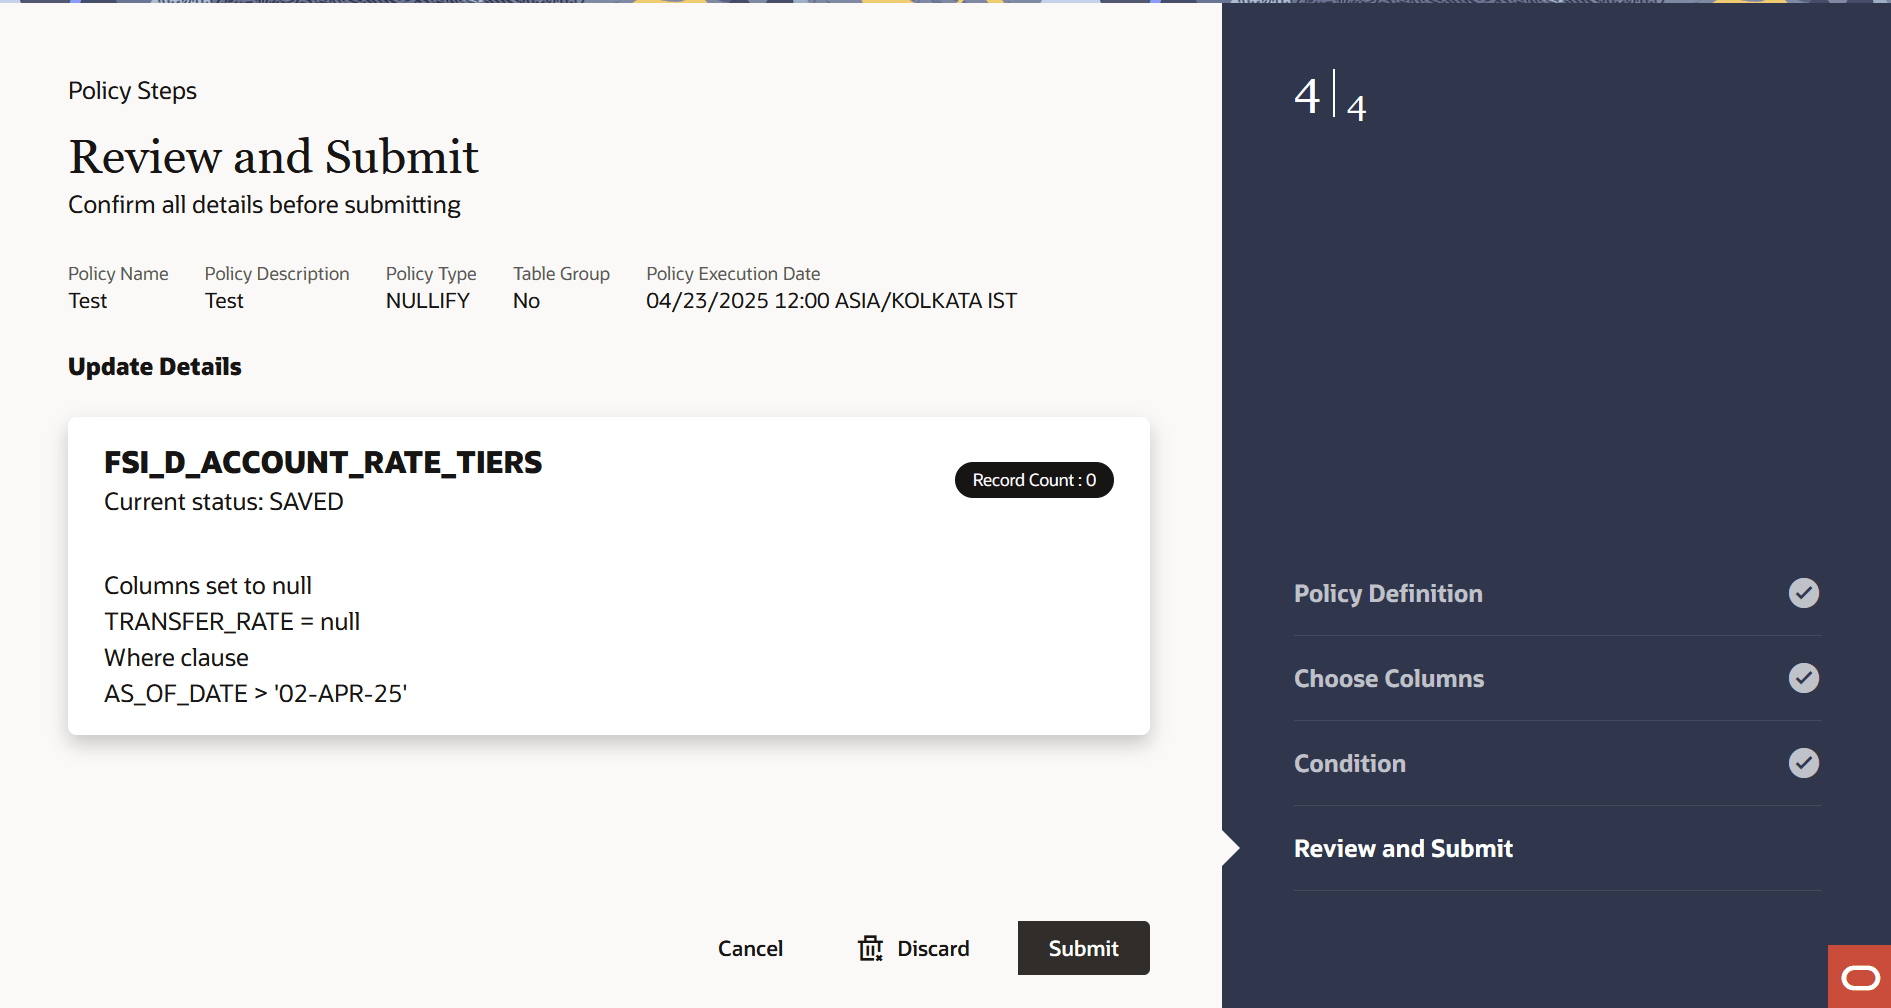
- Click Submit to create the policy. The
created policy will be displayed on Data Housekeeping
Summary page.
Note:
Data that is archived remains in the same table but is invisible to user. Thus, they cannot be inserted back as it will violate unique constraint of concerned table.