3.8.1.3 Actions Performed on Reconciliation Definition
To delete one or multiple Reconciliation Definitions, you can select the checkboxes against each one of them and press the Delete button.
A confirmation message will let you confirm and delete selected definitions.
You can also perform search based on following fields:
- Name
- Reconciliation Dimensions
- Source tables against which reconciliation is performed
- Folder where the reconciliation definition is stored
The following screen display the Actions menu from which the different actions that you can perform on existing Reconciliation Definitions.
Figure 3-54 Actions Icon and Different Actions
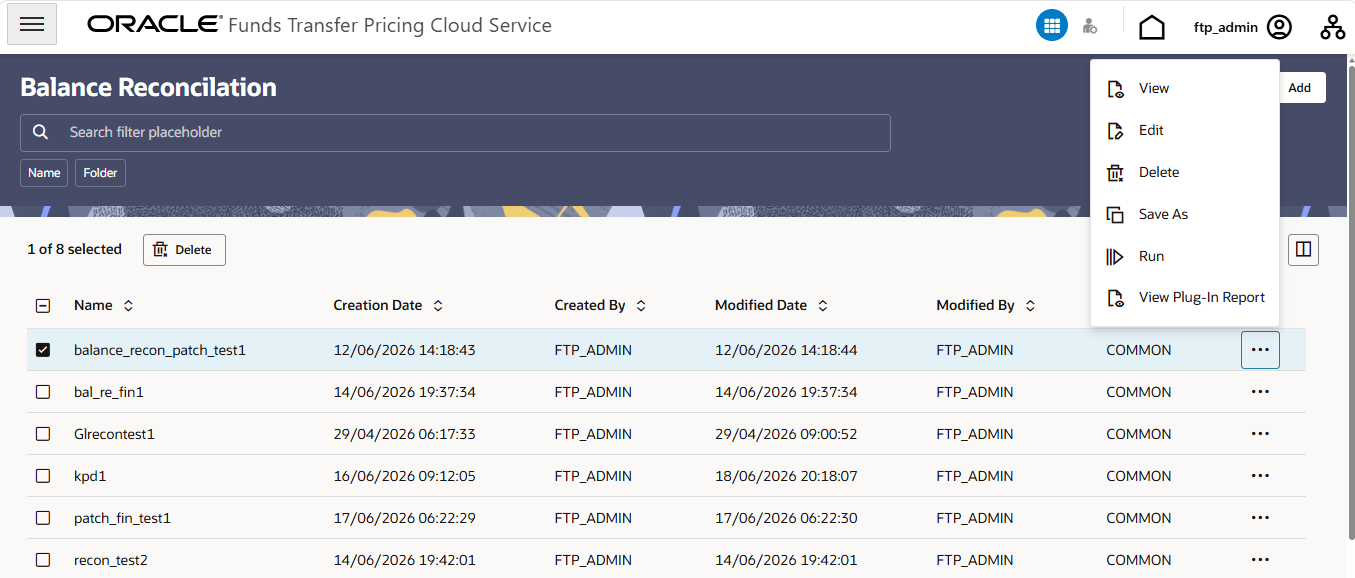
The following are the actions:
- View: Click this action button and view the definition in read only format.
- Edit: Click this action button and edit the definition.
- Delete: Click this action to delete the selected definition.
- Save As: Click this action to create a new definition by copying the selected definition.
- Run: Click this action to execute the reconciliation based on the selected parameters.
As-of-Date is a run time parameter, you can choose for which date reconciliation needs to be performed.
- View Plug-In-Report: Click this action to view the generated Reconciliation Report for the selected run.
- Execution Details: Click this action to view all the runs for a selected definition, along with the user information of who triggered the execution.
The View Plug-In-Report option displays the generated Plug-In-Report for the selected reconciliation run.
When you open a reconciliation definition in edit mode, the More menu displays the following additional options:- Run: Click this option to run the reconciliation definition.
- View Logs: Click this option to view the execution logs for the reconciliation difference report.
- View Difference Report: Click this option to view the reconciliation difference report generated for the selected run.
The reconciliation definition screen displays the Last Execution Status for Difference Report. This status indicates the latest execution result for the difference report, including whether the execution completed successfully and the date and time of completion.
After clicking Process, the Reconciliation Difference Report is generated. You can also access the generated report using the View Difference Report option available from the More menu on the reconciliation definition screen.Note:
In the View Difference Report screen, placeholder dimension columns are visible along with the selected reconciliation dimensions. These columns are displayed in the report output to support reconciliation analysis across activated placeholder dimensions.Figure 3-55 Reconciliation Difference Report
The detailed report is displayed as follows, where you can filter out insignificant difference using ‘Threshold Percentage’, also threshold can be applied at each row level or for whole Balance Sheet category level. If threshold is applied at Balance Sheet category level, all the rows that belong to the Balance Sheet category which is less than given percentage will be hidden from the Reconciliation Difference Report. A download button allows you to download the Reconciliation Report.
You can select Filter at Category Level toggle switch to apply threshold at ‘consolidated difference reports’, which is at balance sheet category level OR can directly apply the threshold to each difference row, which is available at the unique combination of selected key dimensions.
You can select the ID / Code toggle switch to see the CD data. By default, the toggle switch displays the ID data.
You can also change the unit of balance to thousands or millions.
You can see difference in both percentage and absolute format.
Figure 3-56 Differences in Percentage and Absolute Formats
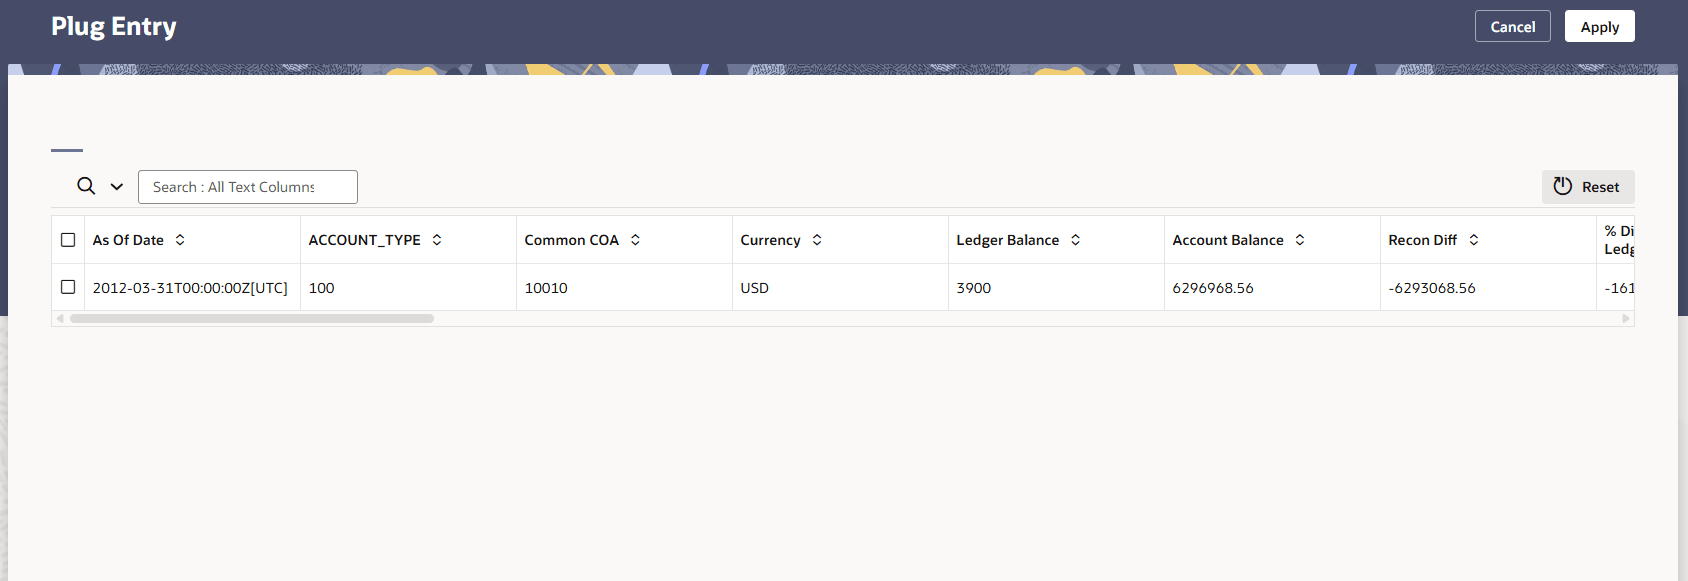
As a next step to create the plug entries for filtered rows, you can click the Apply button in extreme right corner. Following a grid appears, along with default attributes fetched from default product attributes: if you like, you can update any of these attributes before plug entries are created for the selected difference records. You can use the Edit and Save button to edit the default product attributes like Amortization Type, Interest Rate Code, and so on. You cannot edit any Code (CD) or VARCHAR attributes. Only attributes like Number, Rates, Dates, Term can be edited. All types of balances like Org balance, Current/Average balance are same as the reconciliation difference.
After you are convinced with the entered values for all the account attributes, you can click Apply. A job will be submitted and plug entries will be created in the FSI D Ledger Instruments table. To differentiate the plug entries from the customer real accounts, Data source CD will be used, with value 3, which signifies the ‘Difference balance entries due to reconciliation performed between account and ledger’.
Note:
Beginning with the 26B release, plug records created to account for portfolio-level balance differences must be loaded exclusively into the FSI D Ledger Instruments table.Figure 3-57 Differences in Percentage and Absolute Formats
Figure 3-58 Plug Entires
Viewing the Plug-in Report
After the Balance Reconciliation run is completed, users can view the generated report from the action menu.
- Navigate to the Balance Reconciliation Summary screen.
- Select the completed Balance Reconciliation definition or run for which you want to view the report.
- Click the Action menu icon for the selected row.
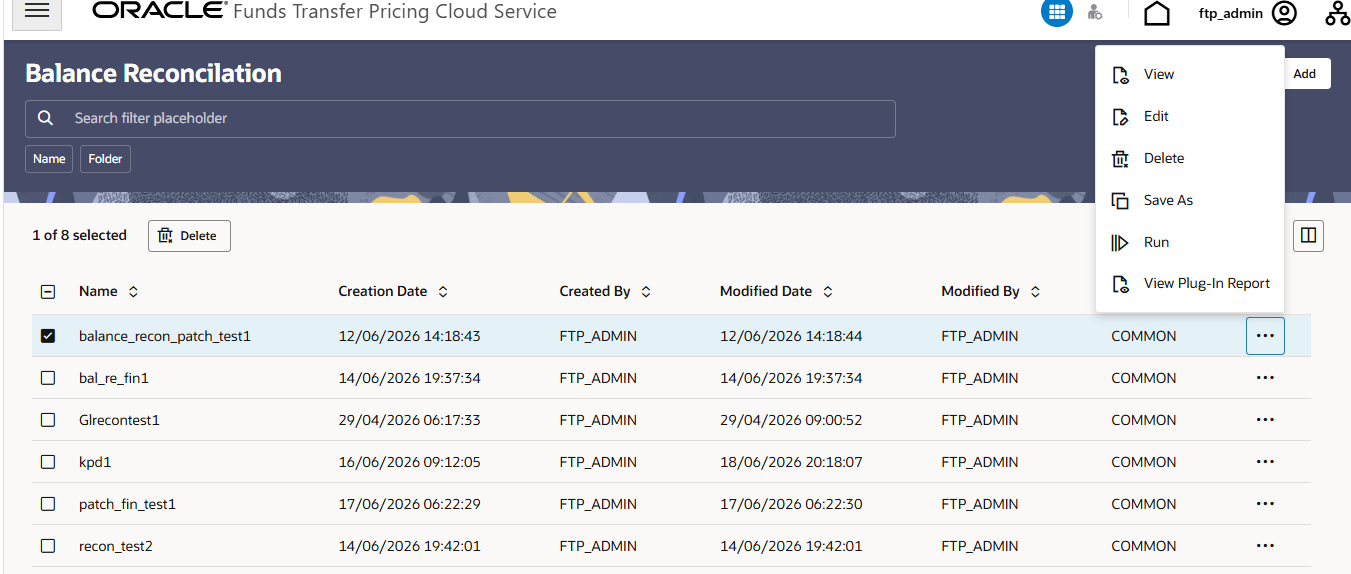
- Select View Plug-In Report.
Figure 3-59 View Plug-In Report
The GL Recon Audit page is displayed.
- Enter or select the required From As Of Date and To As Of Date.
- Click Apply.
The report displays the audit reconciliation differences for the selected period, including details such as As Of Date, Common Chart of Accounts, General Ledger Account, Ledger Balance, Account Book Balance, Account Par Balance, Reconciliation Difference, and percentage difference values.
Running a Balance Reconciliation Definition
Use the Run option to execute a Balance Reconciliation definition.
- Navigate to the Balance Reconciliation Summary screen.
- Select the completed Balance Reconciliation definition or run for which you want to view the report.
- Click the Action menu icon for the selected row.
- Select Run.
Figure 3-60 Run Option
A confirmation message is displayed: You are about to submit FTP job for processing. Do you want to continue?
- Click Yes to continue.
- In the Execute panel, select the Effective Date.
- Click Run.
The Balance Reconciliation process is submitted for execution. After submission, the reconciliation definition page displays the Last Execution Status for Difference Report. The status changes to In Progress while the process is running.
- After the run is completed, the Run Completed popup is displayed with the message: GL reconciliation completed successfully. Do you want to view the Difference Report?
- Click View Difference Report to open the generated reconciliation difference report.
- To remain on the current page without opening the report, click Stay.
Viewing or Editing a Balance Reconciliation Definition
From the Balance Reconciliation summary screen, users can open an existing reconciliation definition in view or edit mode.
- Navigate to the Balance Reconciliation summary screen.
- Locate the required reconciliation definition.
- Click the Action menu icon for the selected row.
- Select View to open the definition in read-only mode, or select Edit to modify the definition.
The definition screen displays the reconciliation setup details, including the definition name, description, folder, access type, balances, tables, and selected reconciliation configuration.
Actions Available from the Definition Screen
- Run: Executes the Balance Reconciliation definition.
- View Logs: Opens the Logviewer Service page for the latest execution.
- View Difference Report: Opens the generated reconciliation difference report.
- Cancel: Closes the menu without performing an action.
Viewing Logs from the Execution Status
Users can also open the log details directly from the execution status.
- Open the Balance Reconciliation definition in view or edit mode.
- Do either of the following:
- Go to Last Execution Status for Difference Report and click the green tick icon next to Completed Successfully.
- Click View Logs.
The Logviewer Service page is displayed. This page shows the batch run ID, process ID, log statistics, severity counts, timestamps, and execution messages for the selected Balance Reconciliation run.