- Installation and Configuration Guide
- Post-installation
- Create and Deploy the EAR/WAR Files
- Explode the EAR File
- Install Application
7.6.2.1 Install Application
To install the Application, follow these steps:
- Select Install Application Assistant from the Navigation Tree to display the
window.
Figure 7-3 Install Application Assistant

- Click Next.
Figure 7-4 Install Application Assistant
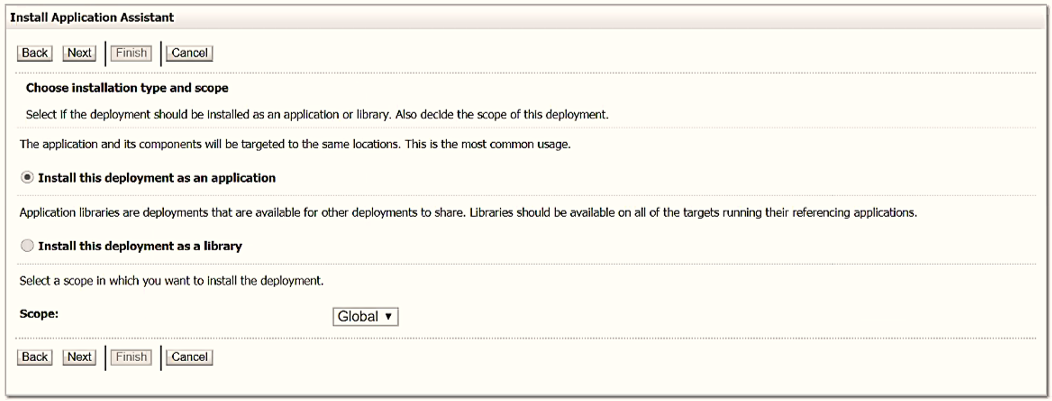
- From the Choose targeting style section, select Install this
deployment as an application, and click
Next. The Optional Settings window is
displayed.
Figure 7-5 Optional Settings
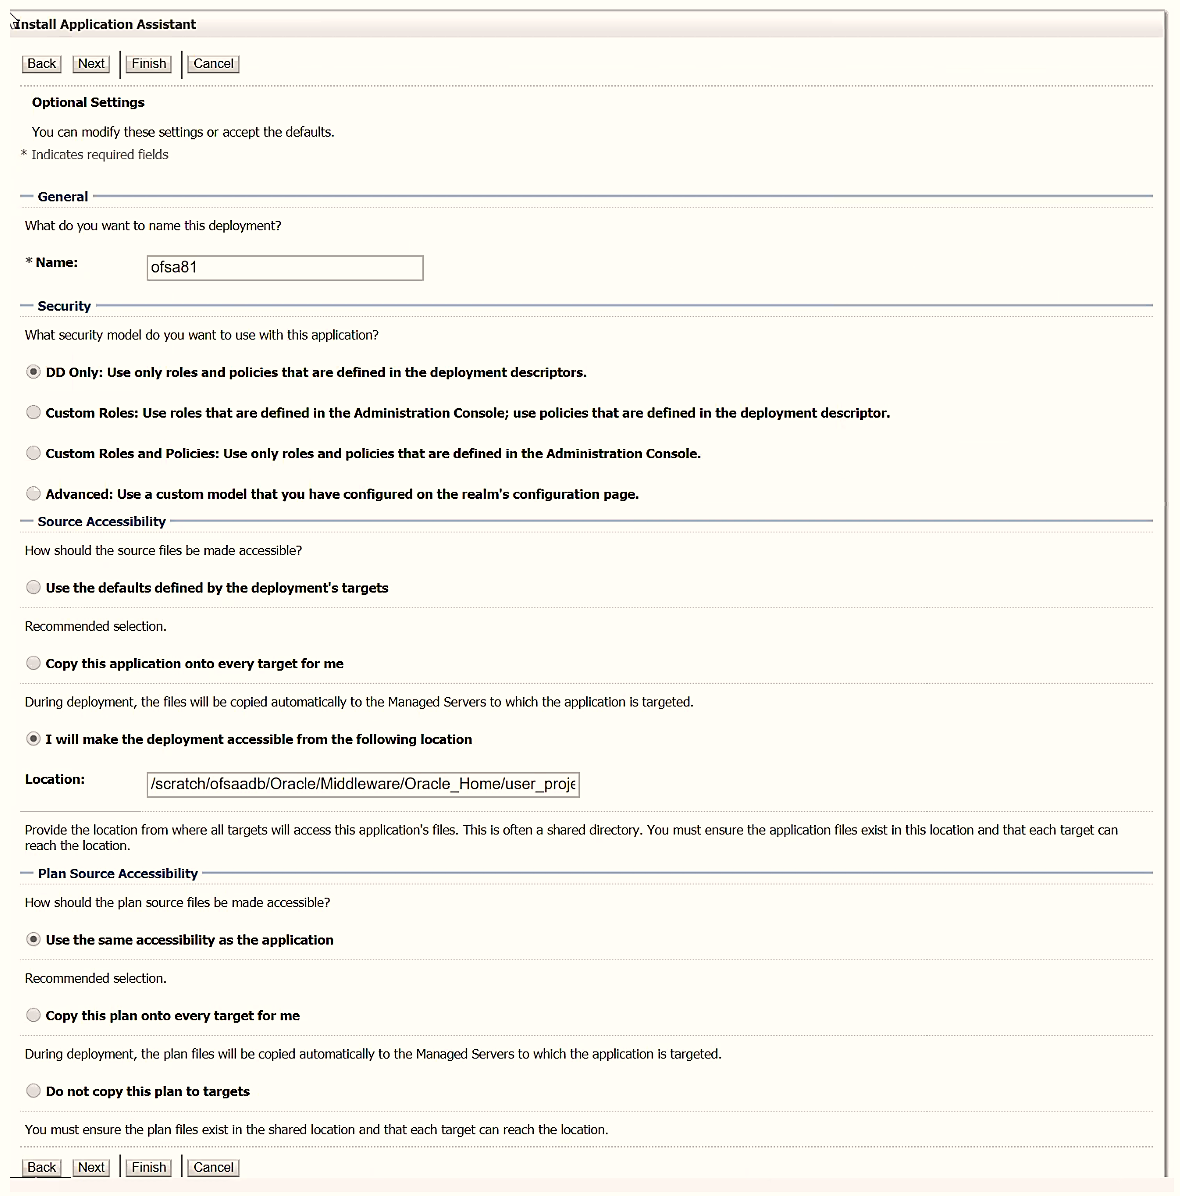
- Enter a Name for the deployment if required.
- Under the Security section, select the DD Only: Use only roles and policies that are defined in the deployment descriptors option.
- Select I will make the deployment available from the following location under the Source accessibility section.
- Click Next to display the Deployment Summary
window.
Figure 7-6 Deployment Summary
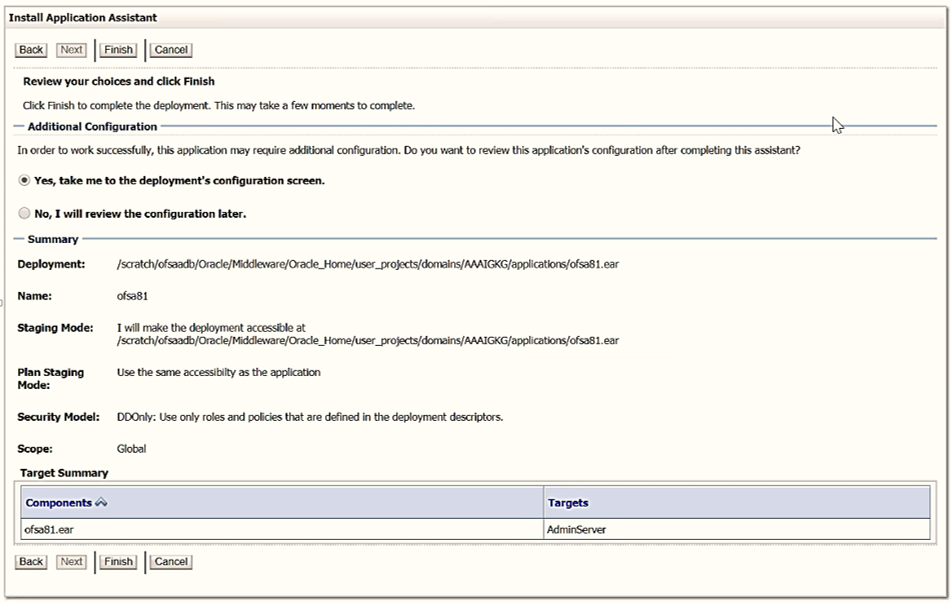
- Select Yes, take me to the deployment's configuration screen.
- Click Finish to display the Settings for <Deployment
Name> window.
Figure 7-7 Settings for Deployment Name
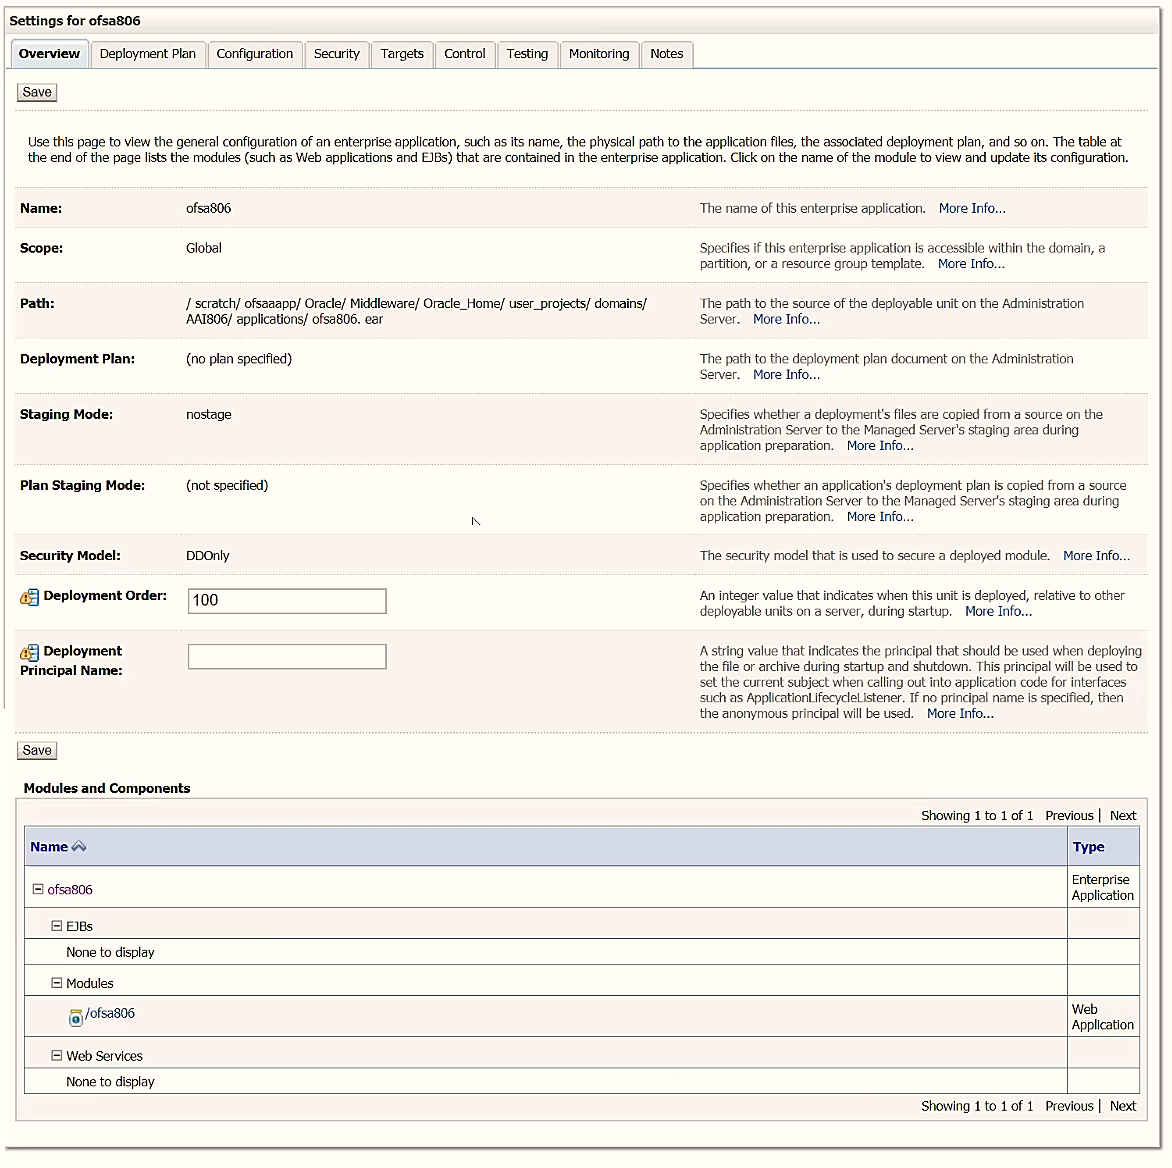
- Review the general configuration details of the deployment. You can also update the configuration of the deployment in this window. In the Overview tab, you can view the complete deployment configuration.
- Click Save to update the changes, if any.
- From the navigation tree, click Deployments to display
the Summary of Deployments window.
Figure 7-8 Summary of Deployments
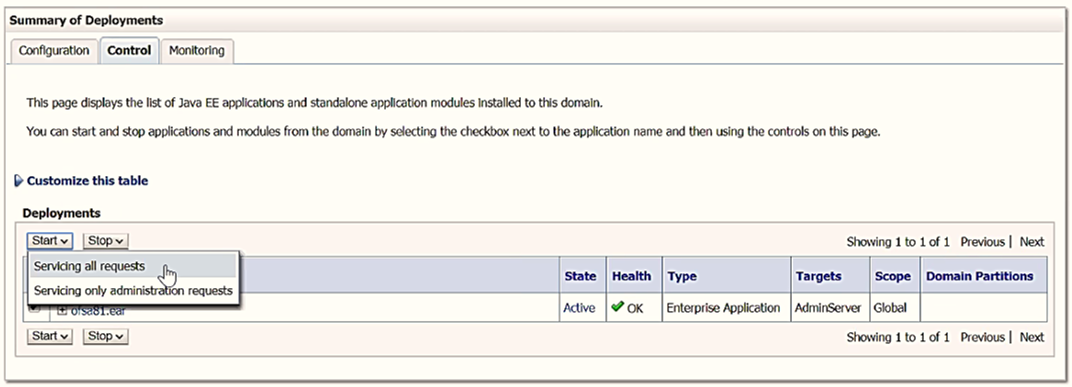
- Select the newly deployed Infrastructure application.
- Click Start and then select Servicing all
requests.
Note:
Verify that the Infrastructure server is up and running. For more information, see Start the Infrastructure Services.Figure 7-9 Summary of Deployments
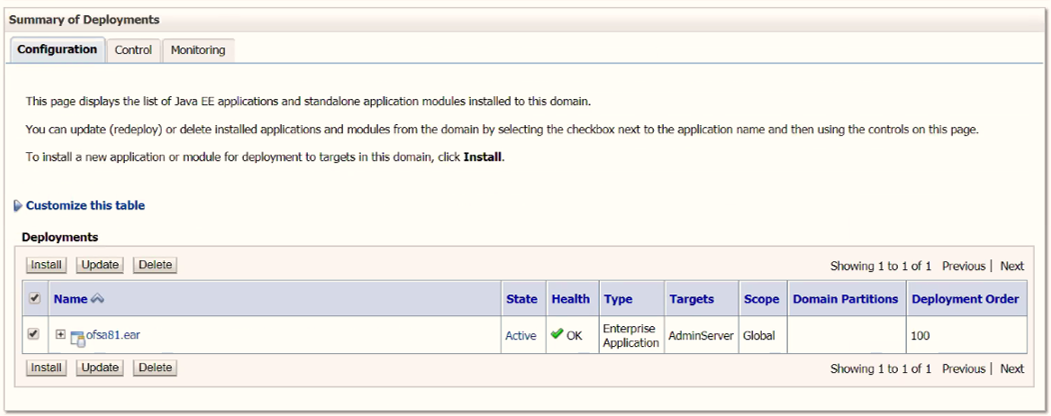
- The state of the deployed application is displayed as Active if started successfully.