2 Configure Name with Whitespace Screening for Existing Environments
This chapter describes the steps to prepare your existing environment for Name with Whitespace Screening by managing watchlist indices and running relevant batch processes.
The following steps must be done to enable this feature.
Perform the following steps on the existing environment:
- From the Navigation List, click Watchlist Management > Private Watchlist. The Private Watchlist page appears.
- Select the all the data and click the Export
Icon. The Save window appears.
Figure 2-1 The Export Icon

- Navigate to you desired location, click Save.
The Private Watchlist data is saved successfully.
- Close the Private Watchlist page.
- Navigate to the Oracle Financial Services Crime and Compliance Management Anti Money Laundering Cloud Service landing page.
- From the Navigation List, click
Watchlist Management > Index
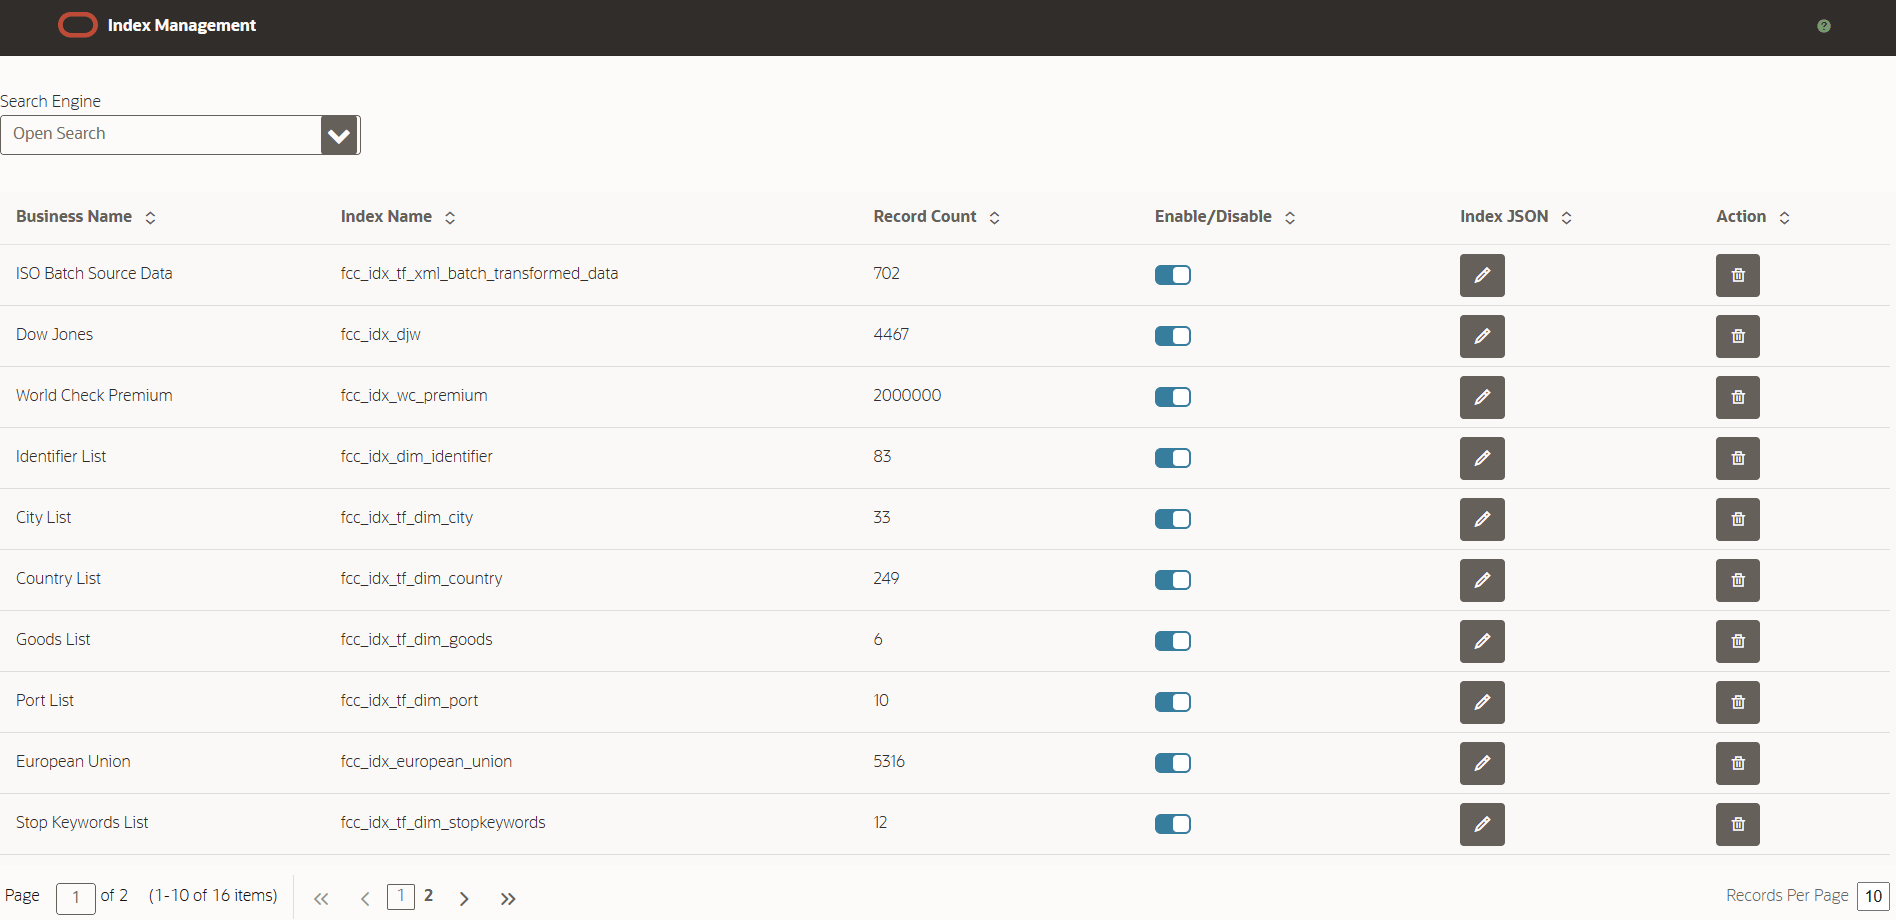
Management. The Index Management page appears.
Figure 2-2 The Index Management page

- If you are using any of the following Watchlist Indices,
Delta Watchlists Indices and Source Data Indices on the
Index Management. For each index, click the Delete
 icon. When the confirmation pop-up appears, click OK.
- Watchlist indices:
- Office Of Foreign Assets Control
- United Nations
- HM Treasury
- Dow Jones
- World Check Premium
- World Check Standard
- European Union
- Private Watchlist
- Delta watchlist indices:
- World Check Premium Delta
- World Check Standard Delta
- Dow Jones Delta
- Source Data indices:
- ISO Batch Source Data
- NACHA Batch Source Data
- Watchlist indices:
- Close the Index Management Page.
- From the Navigation List, click Watchlist Management > Private Watchlist. The Private Watchlist page appears.
- If any data exists, select all the data, click Delete
 icon to delete.
- Now upload your existing data to the private watchlist:
- Click Import
 . A pop-up window appears.
- Select your file and click Open. The file is uploaded and the records are displayed on the Private Watchlist grid.
- Click Import
- Close the Private Watchlist page.
- From the Navigation List, click Batch
Administration > Scheduler Service.
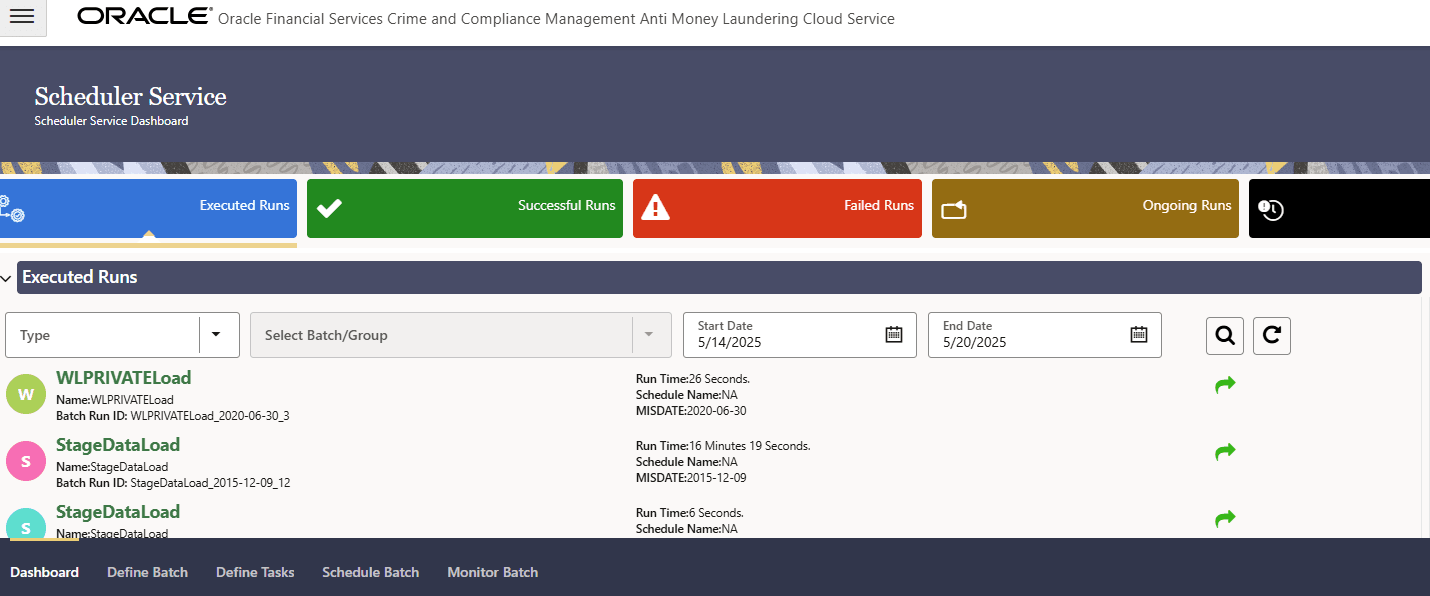
The Scheduler Service dashboard appears.
Figure 2-3 The Scheduler Service Dashboard screen

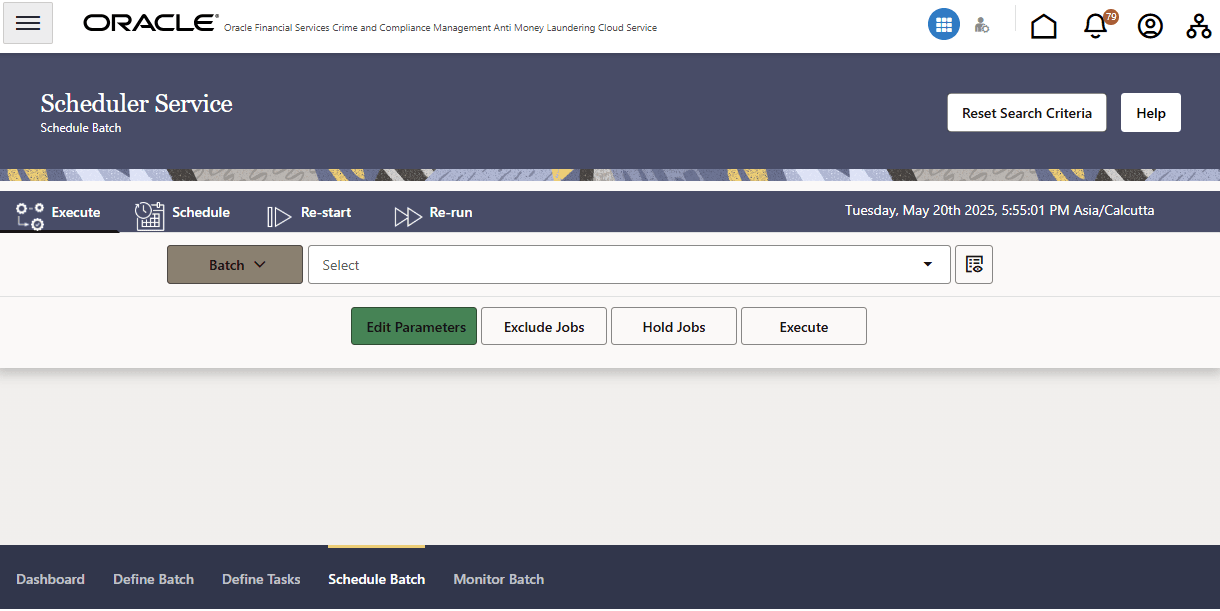
- Click the Schedule Batch Tab.
Figure 2-4 The Scheduler Batch Tab

- From the following list of batches, if you want to use any or
if you deleted any related indices on the Index Management screen, select
each batch from the drop-down list and click Execute, one at a time.
Ensure that each batch completes successfully before proceeding to the next.
- WLOFACLoad
- WLUNLoad
- WLHMTLoad
- WLDJWLoad
- WLWCPremiumLoad
- WLWCStandardLoad
- WLEULoad
- WLPRIVATELoad
- WLWCPremiumDeltaLoad
- WLWCStandardDeltaLoad
- WLDJWDeltaLoad
- ISO20022BatchScreening
- NACHABatchScreenig
After completing the above steps, you can perform name screening with whitespace handling for both real-time transactions (SWIFT, FEDWIRE, ISO) and batch processing (ISO, NACHA) in the existing environment.