- User Guide
- Maintenance
- Financial Calendar and Periods
- Creating and Editing Periods
Creating and Editing Periods
- Click Maintenance and then click Financial Calendar and Periods.
- Click Refresh to populate the list of calendars. The Default calendar will automatically appear unless you change the name.
- Click the Default calendar. You
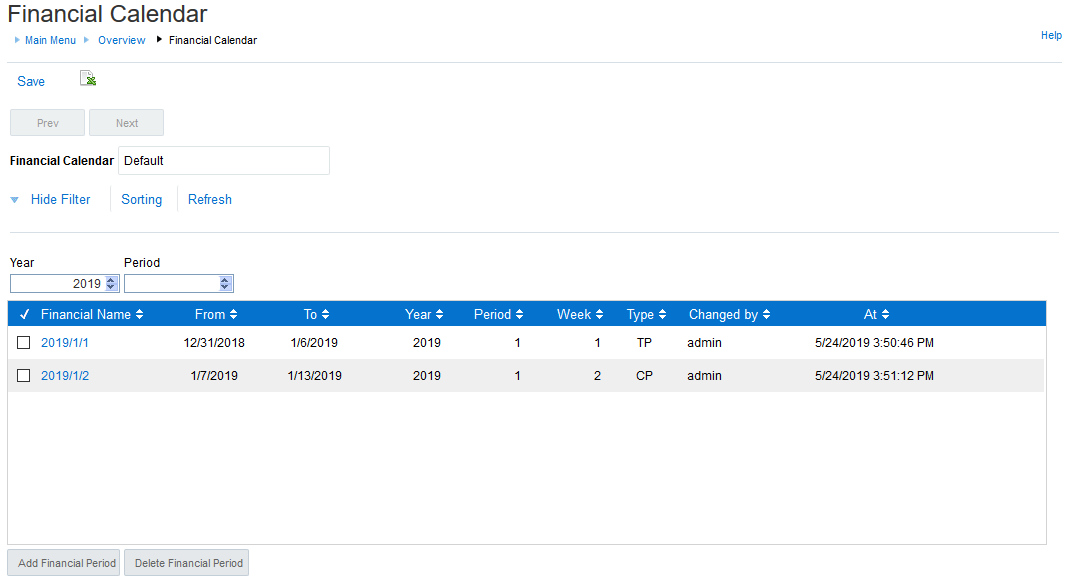
will see a screen with the financial calendar details.
 The Financial Calendar screen includes the following features:
-
To save the current view, click Save.
-
To export the data from the grid to Microsoft Excel, click the Microsoft Excel icon
 .
.
-
To view other calendars, click Prev or Next.
-
To remove the Year and Period filters above the grid, click Hide Filter.
-
To sort the content in the grid, click Sorting .
-
- To add a financial period, click Add Financial
Period and complete the following fields:
-
Financial Calendar: automatically named Default but can be renamed.
-
Year: enter the year for the period.
-
Period: enter a period number.
-
Week: enter a week number.
-
Financial Period: automatically generated, but can be edited if necessary.
-
Date From: select start date of the period from the calendar.
-
Date To: select the end date of the period from the calendar.
-
Period Type: select one of these options:
-
Trading Period: the default option for calendars imported from Reporting and Analytics.
-
Closing Period : select this option when using Inventory Exports in the Close Financial Periods module.
-
- Click OK to save.
- Click Save on the Financial Calendar screen.
-
- To edit an existing calendar, select the calender in the Financial Name column.
- Update the information and click OK.
- Click Save on the Financial Calendar screen.
Parent topic: Financial Calendar and Periods