2 Castles S1F2 Mobile Order and Payment Terminal
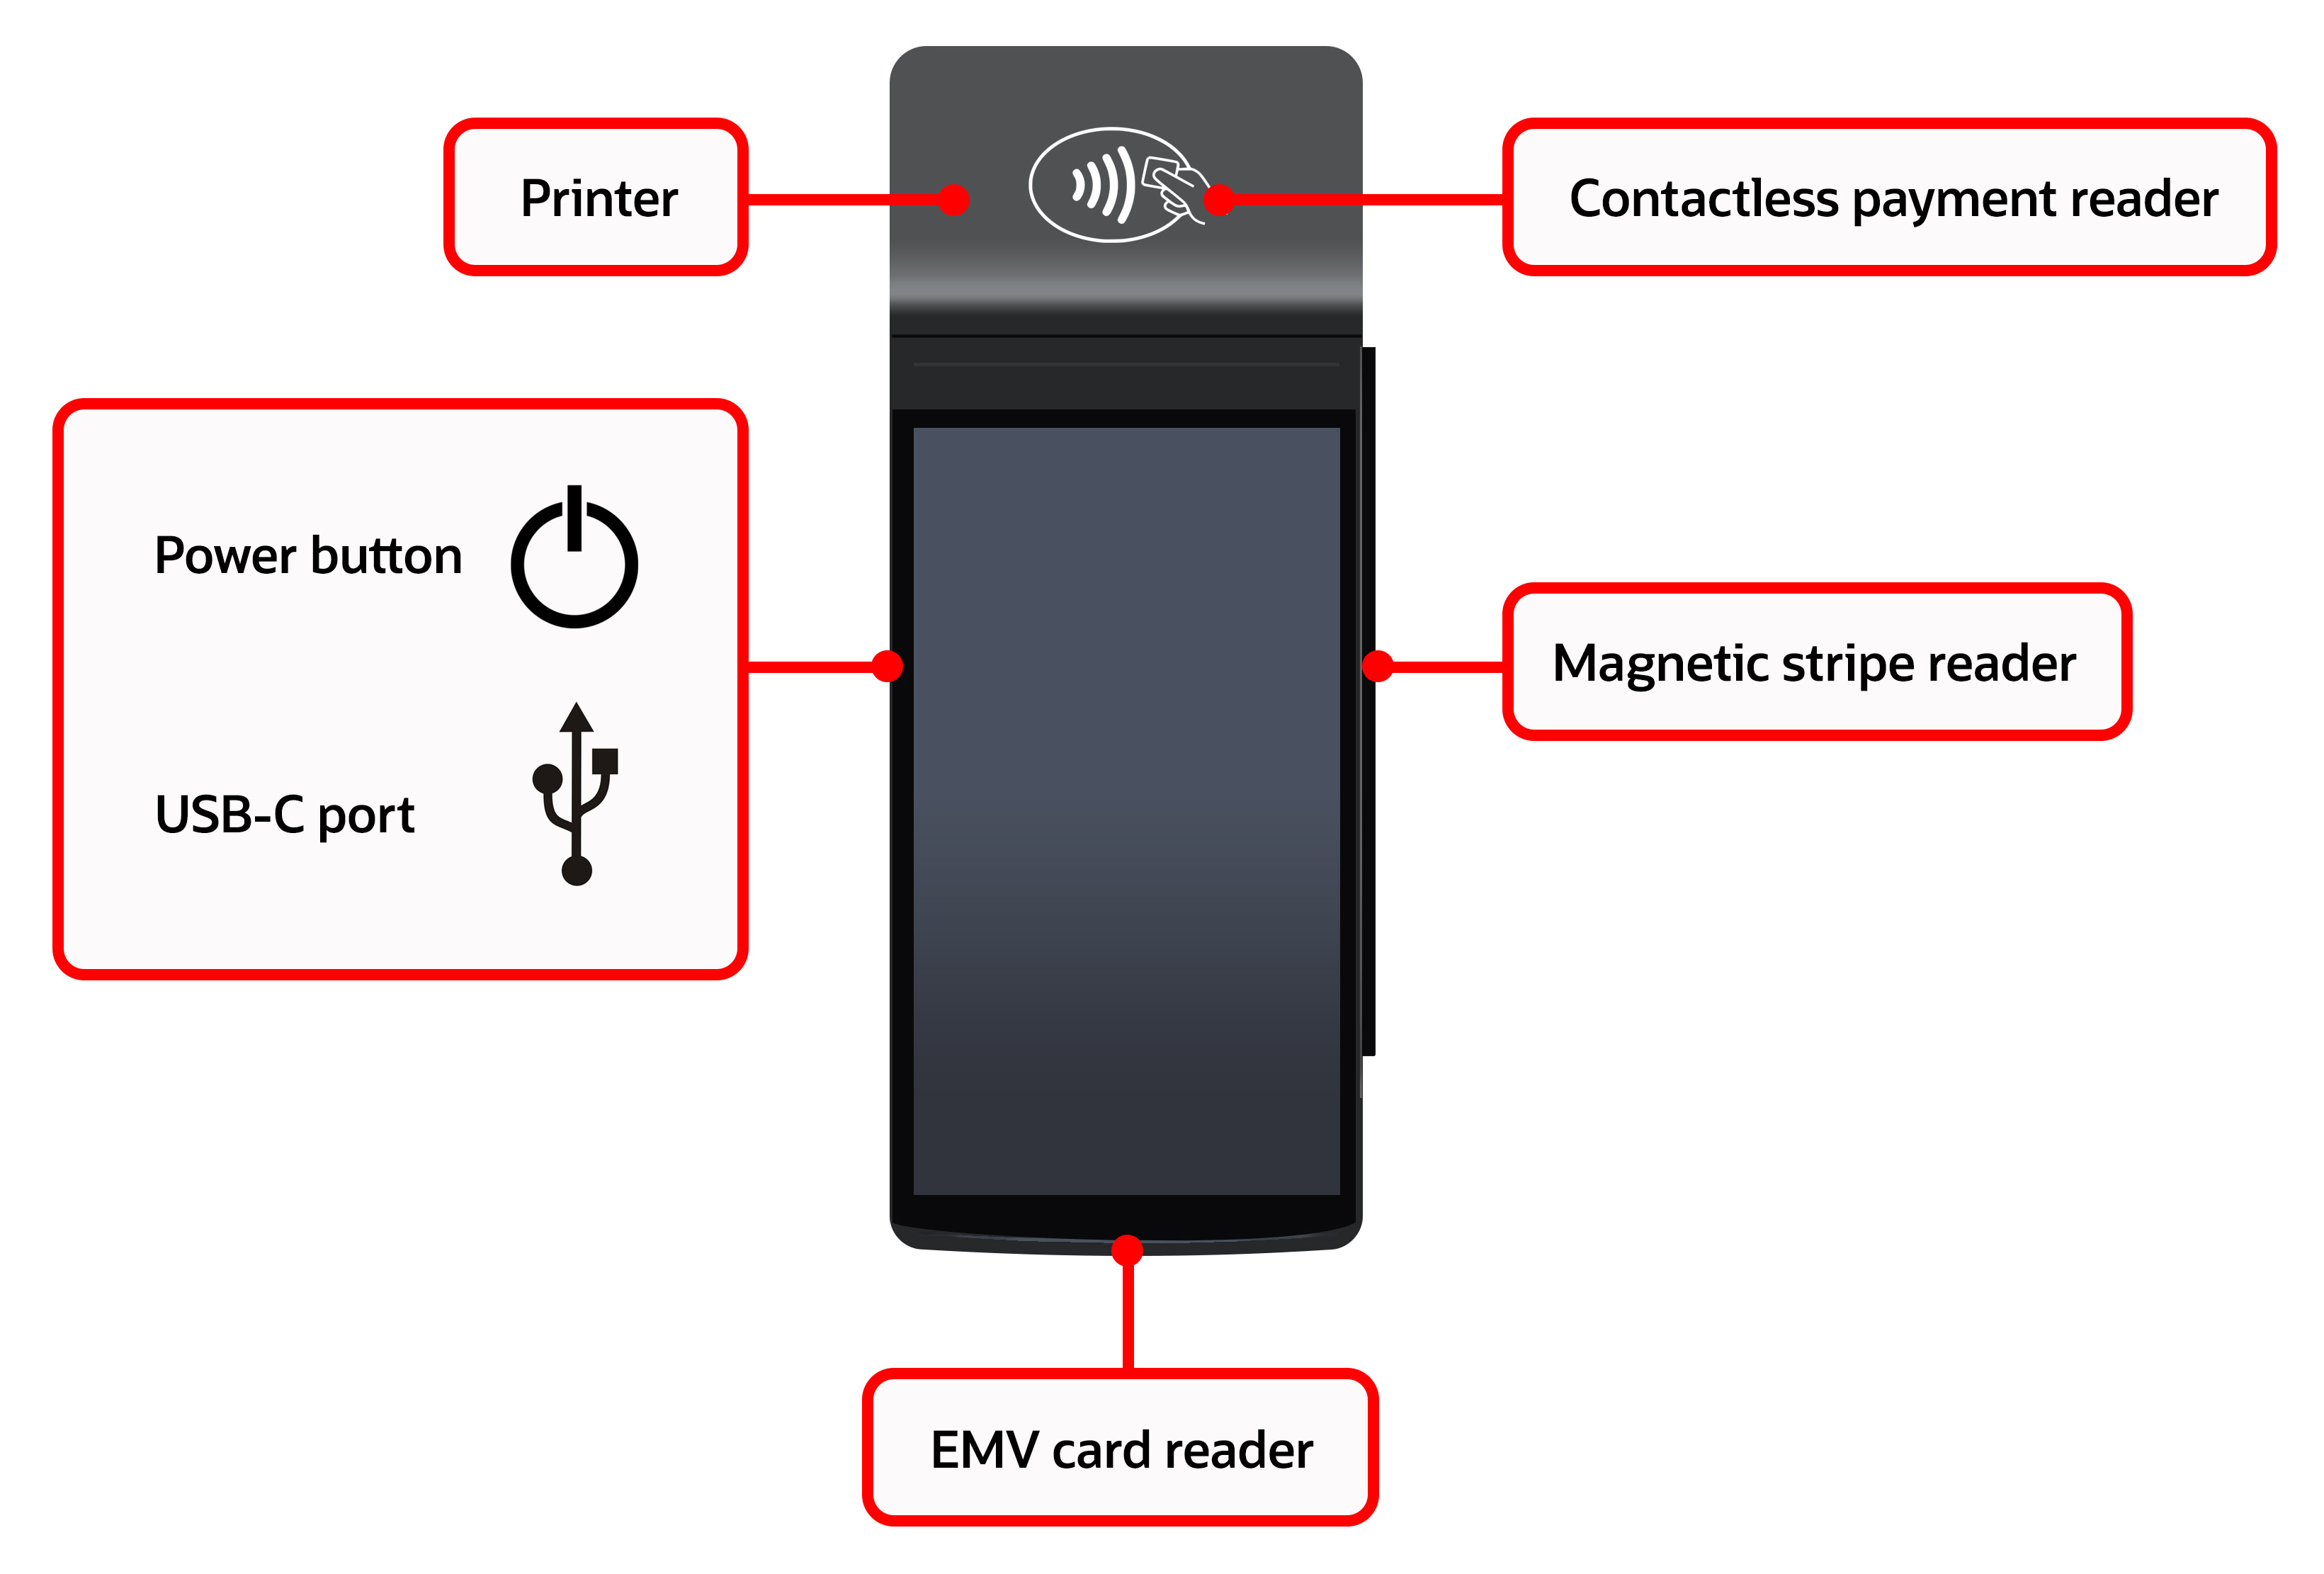
Inspect the Box
Verify that the box containing the terminal hasn't been opened and that the security seal is intact. The security seal is a green and white label with a bar code and a number stuck across the lid of the box. If the security seal is not intact, do not unpack or use the terminal. Contact your Oracle MICROS representative for assistance.

Unpack and Inspect the Terminal
-
Unpack the box and verify the serial number on the terminal is the same as the serial number on the box.
-
Inspect the terminal for tampering. Check for missing seals or screws, additional wires or labels, holes in the device, and anything inserted in or attached to any part of the terminal.
Insert the Paper Roll
-
Locate the paper roll packed inside the shipping box.
-
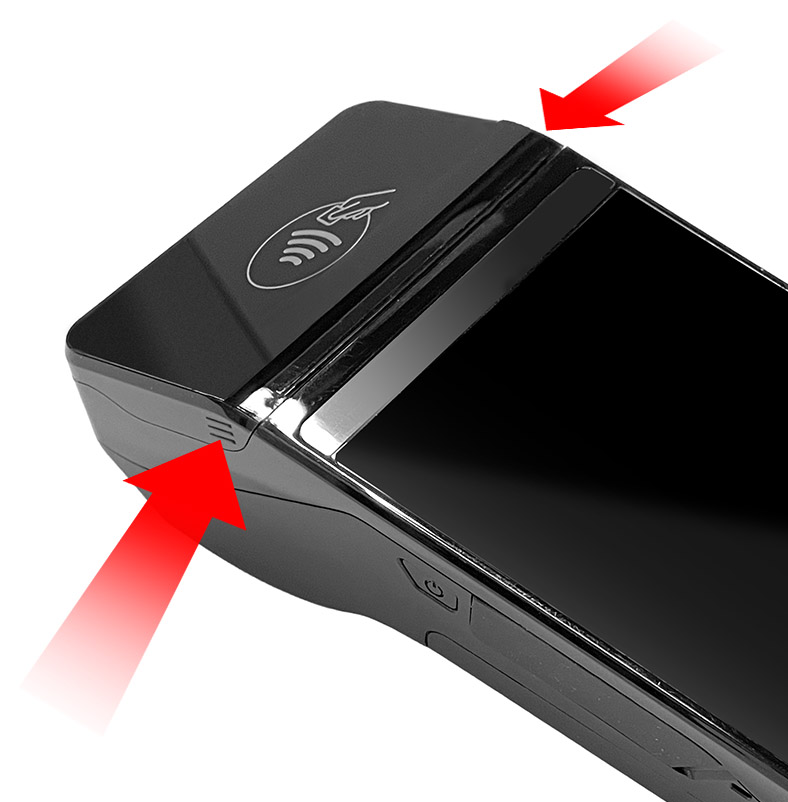
Press the sides of the terminal paper roll cover and lift to open.
-
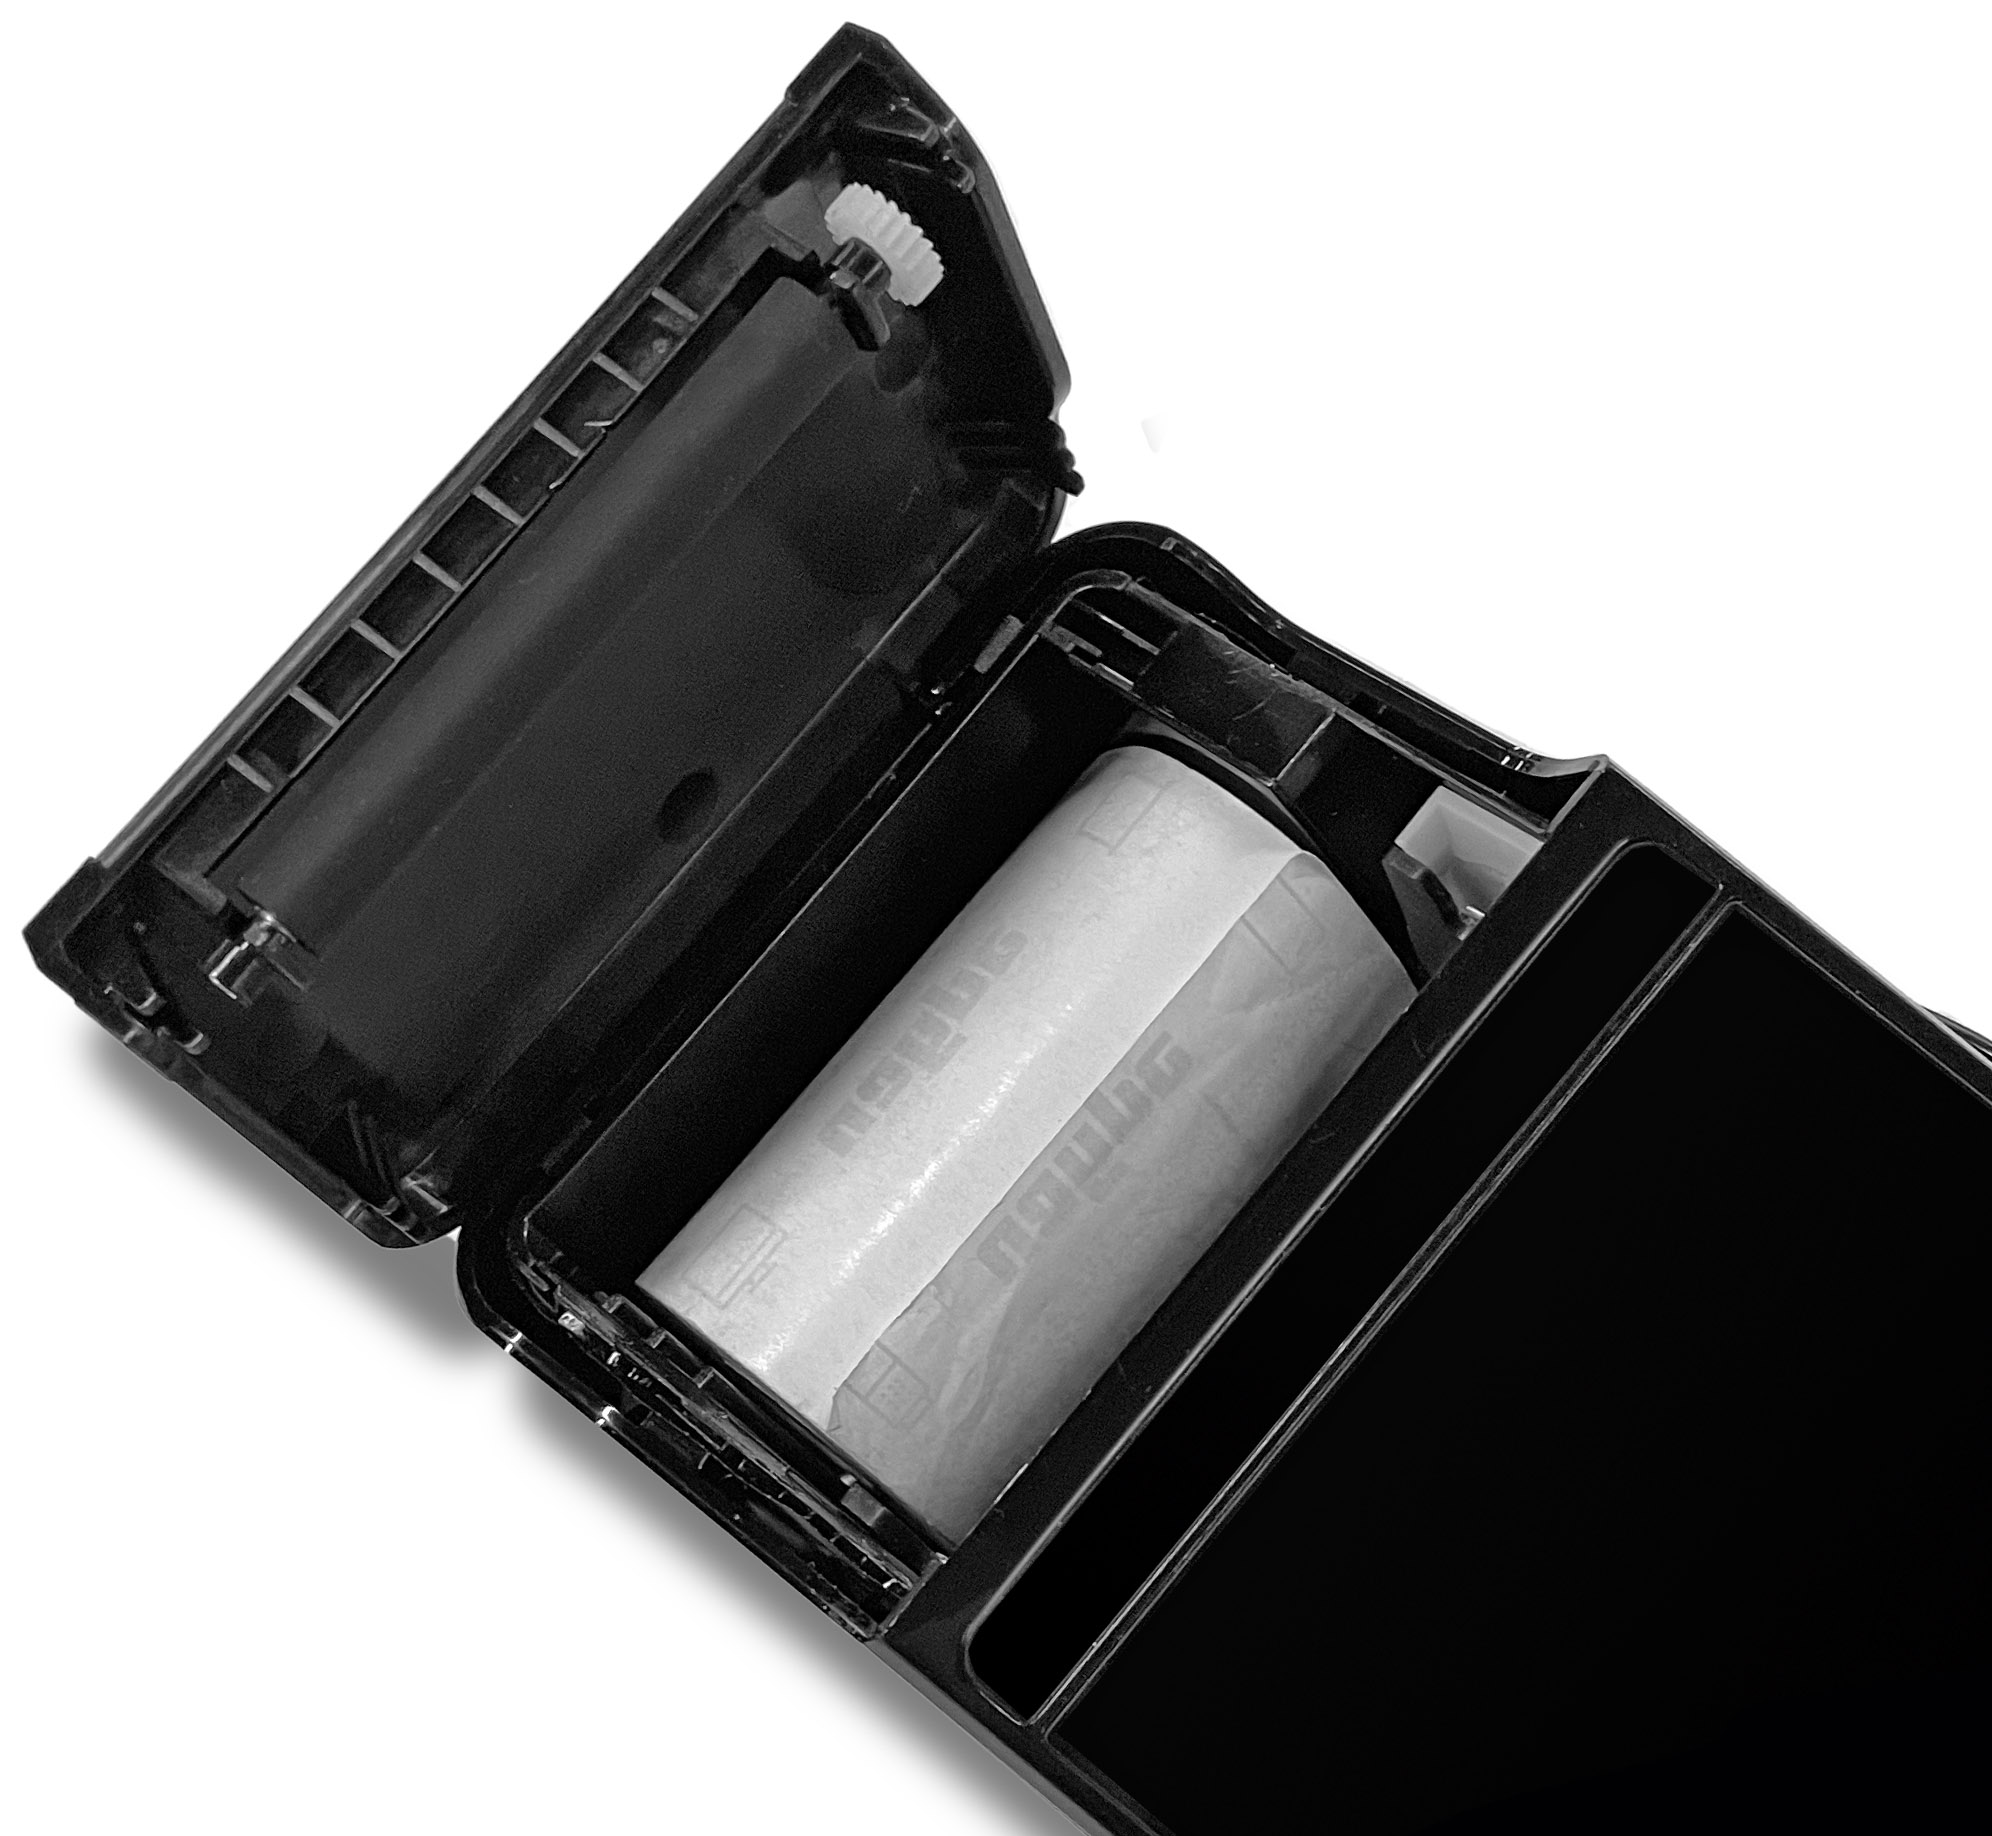
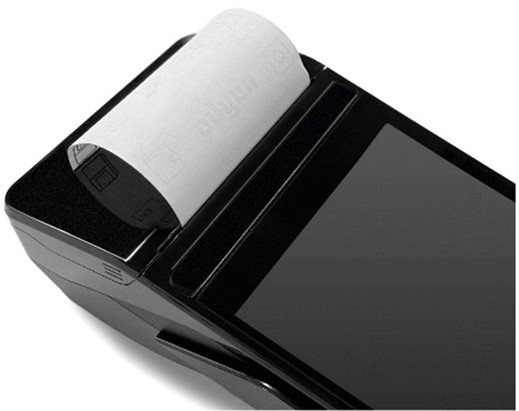
Place the paper roll in the compartment and close the cover, making sure the paper extends over the contactless logo.
First-time Setup and Configuration
Note:
Before you power on the terminal, you must configure some settings in the Simphony EMC. See the Castles S1F2 Mobile Order and Payment Terminal documentation page for more information.-
Connect the terminal to a power supply, then press and hold the power button until the display turns on. Let the battery charge for at least four hours while you continue with the next steps.
-
If the Select a Home app prompt appears, followed by the Default apps screen:
-
On the Default apps screen, tap the back arrow on the upper left.
-
On the Select a Home app prompt, tap Adyen, and then tap Always on the lower right.
-
-
On the Welcome screen, select your language, and then tap the arrow button.
-
On the Setup Wi-Fi screen, tap +.
-
On the Wi-Fi screen, tap Wi-Fi preferences.
-
On the Wi-Fi preferences screen, tap Turn on Wi-Fi automatically.
-
On the Turn on Wi-Fi scanning? prompt, tap TURN ON, and then tap the back arrow at the top of the screen.
-
On the Wi-Fi screen, tap Use Wi-Fi to enable the Wi-Fi capability.
-
Select a Wi-Fi network from the list or tap + and add the name (SSID) of the Wi-Fi network.
-
Enter the Wi-Fi password, and then tap CONNECT.
-
On the Select store screen, tap the check to confirm the store assignment.
-
The terminal downloads a series of updates. Tap OK on any prompts that appear during this process.
-
On the Allow Simphony to access photos and media on your device? prompt, tap ALLOW.
-
Enter your EMC login credentials to begin downloading the Simphony client.
-
After download and installation completes, log on to Simphony.
Power Off the Terminal
To power off the terminal, press and hold the power button until a dialog box appears, and then tap Power Off.
Charge the Battery
Connect the terminal to a power supply to charge the battery. An icon at the top of the display indicates the battery charge level. The power port LED light shows the current charging status of the battery. Orange light: Battery charging. Green light: Battery fully charged.
-
Orange light: Battery charging.
-
Green light: Battery fully charged.
Note:
Oracle MICROS recommends using only the included power adapter to charge the battery.Swap the Battery
-
Power off the terminal.
-
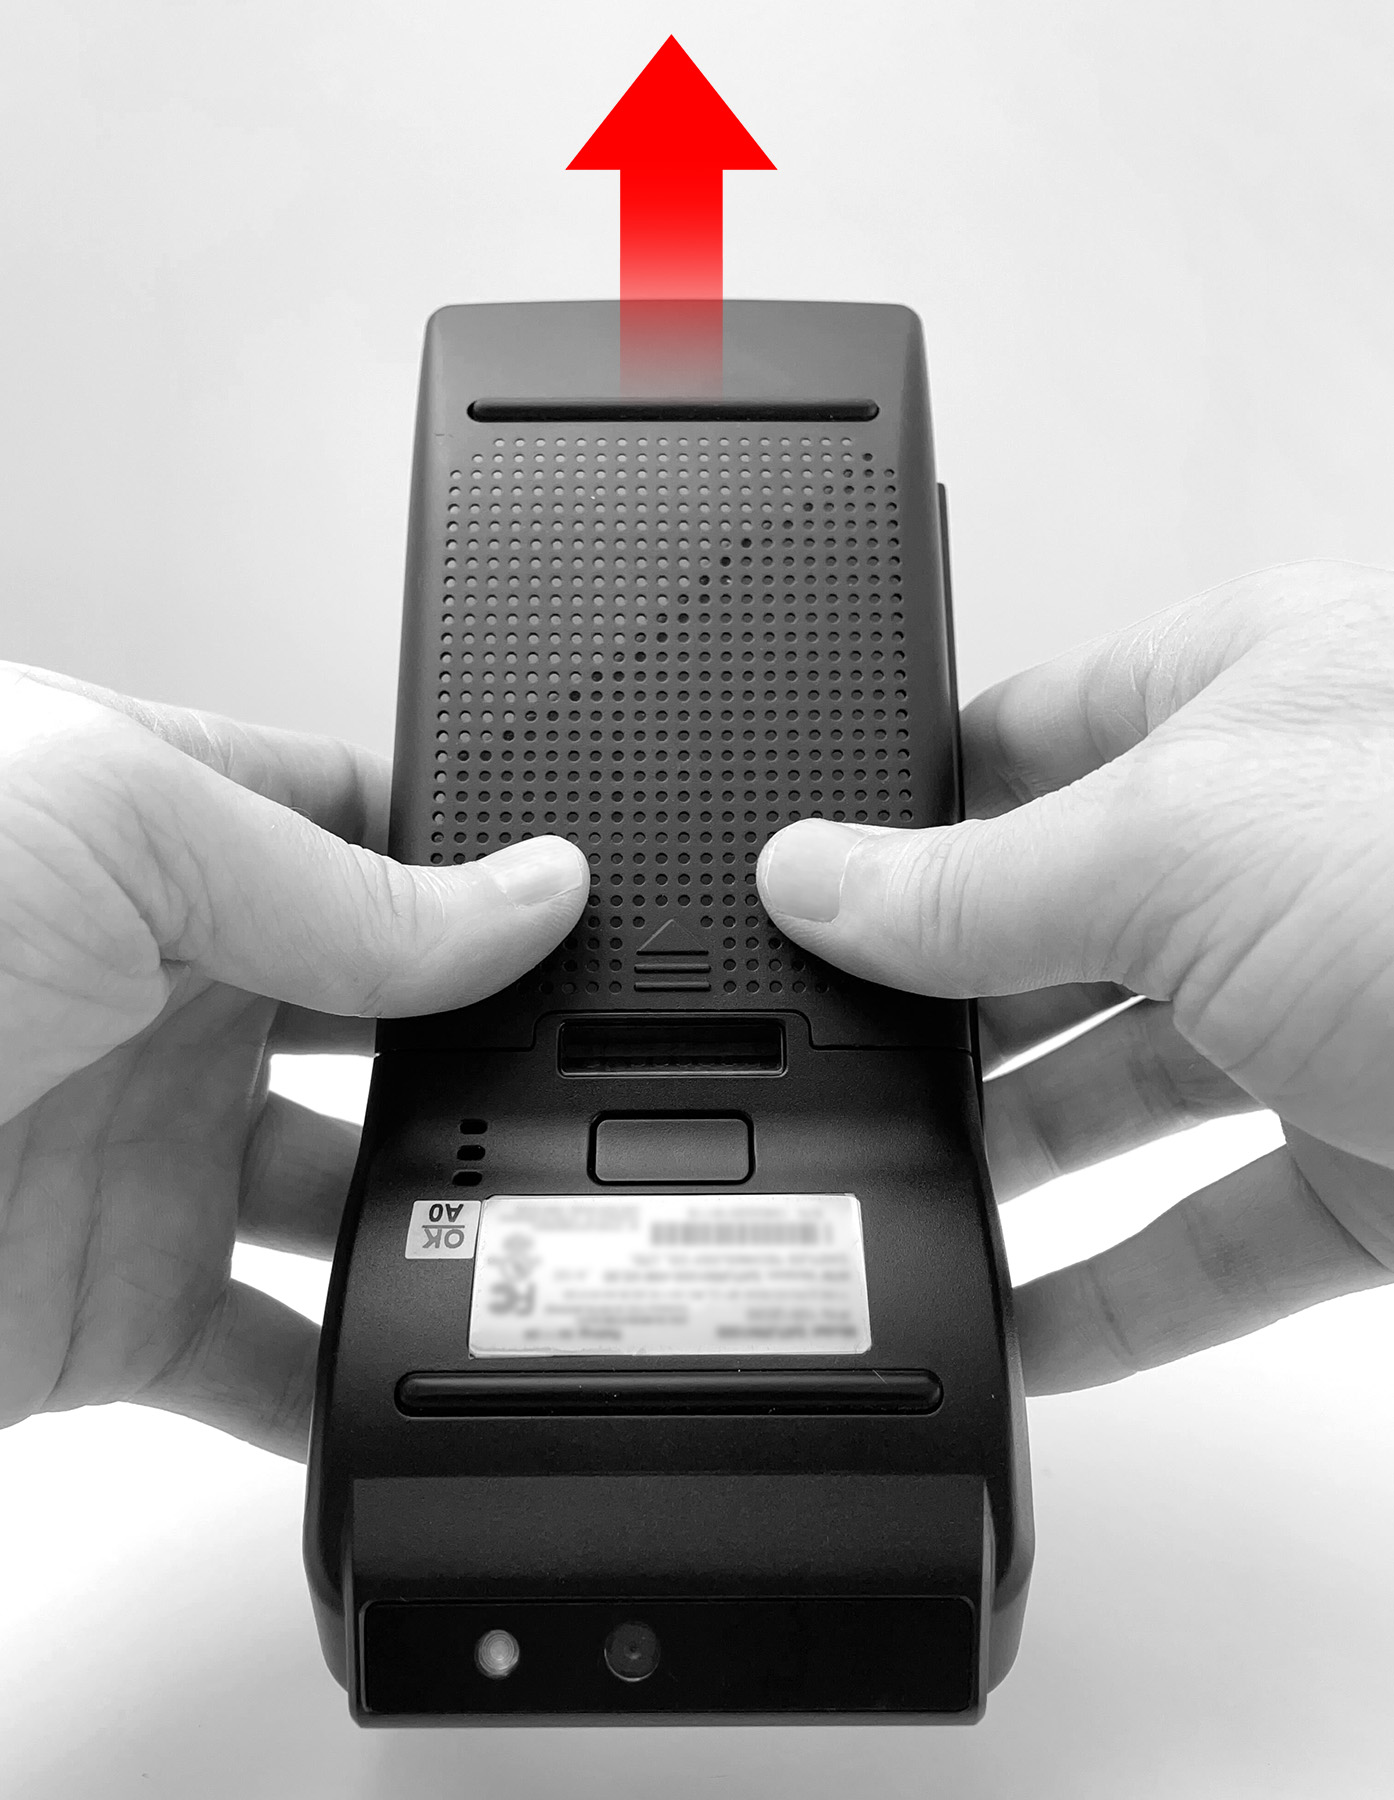
Hold the terminal face down and use your thumbs to push the rear cover away from the enclosure in the direction of the arrow. Set aside the cover.
-
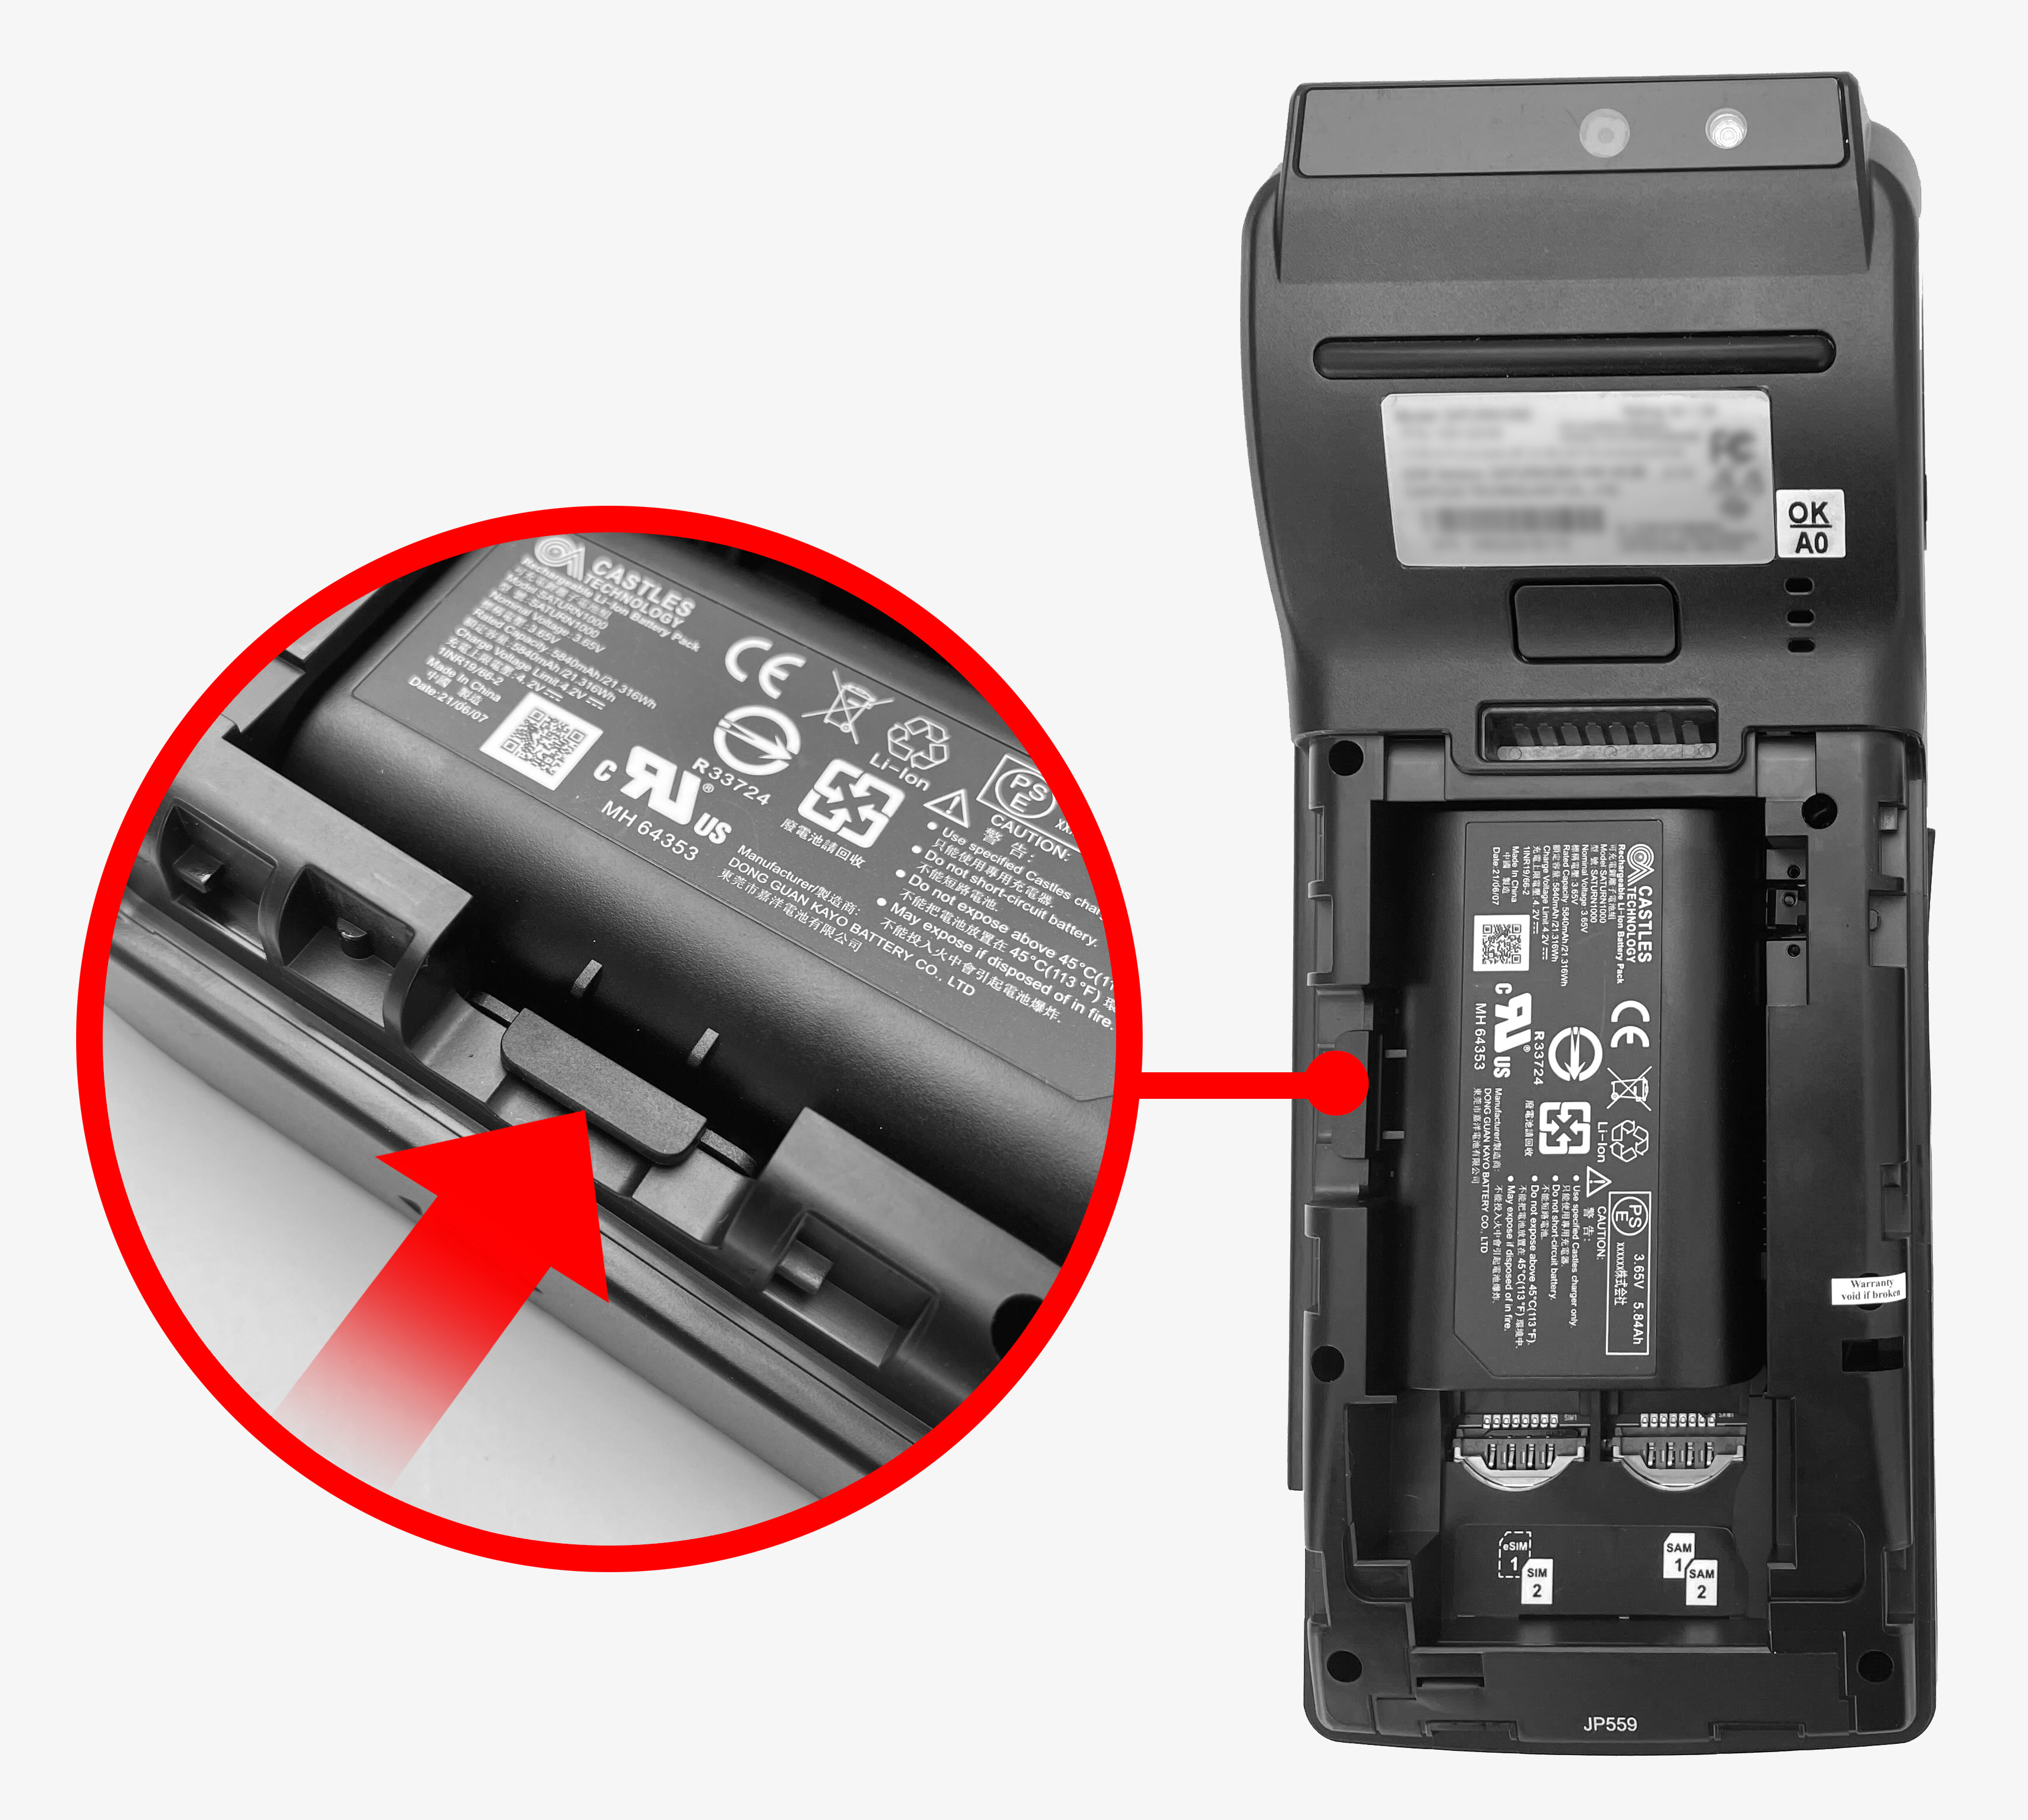
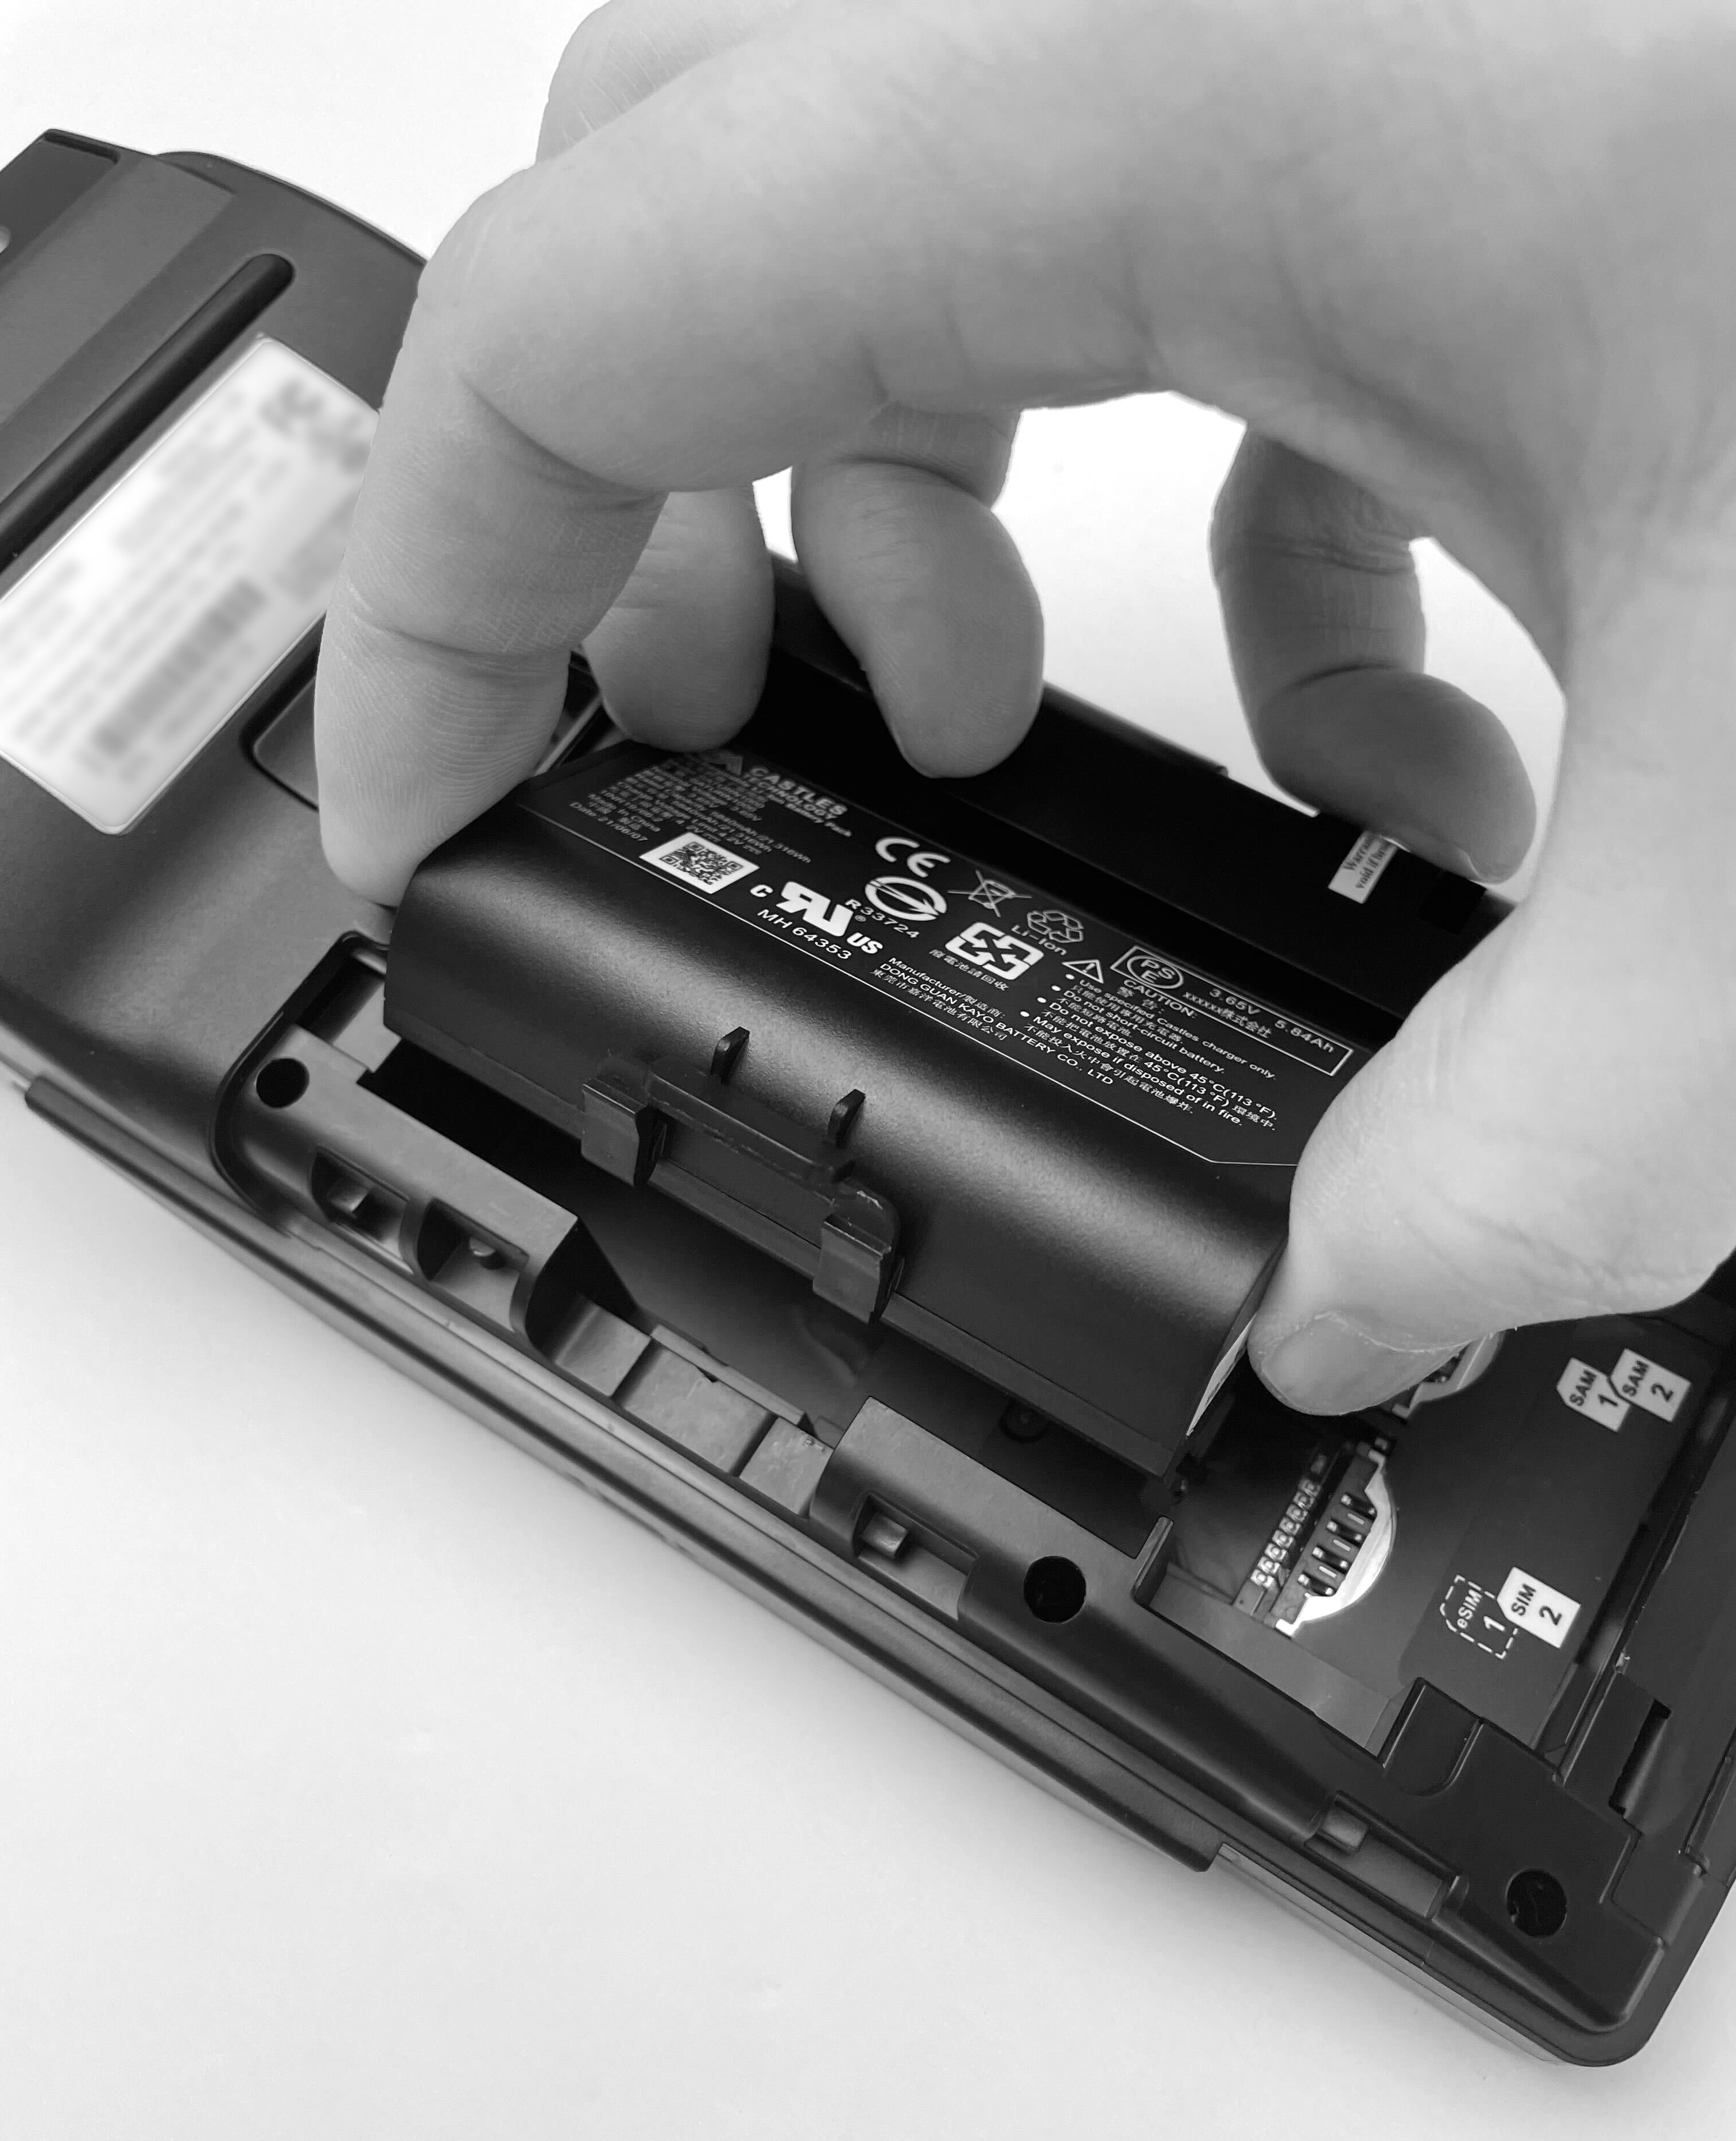
Push the battery locking tab toward the battery until it clicks into place, and then lift the battery out of the compartment.
-
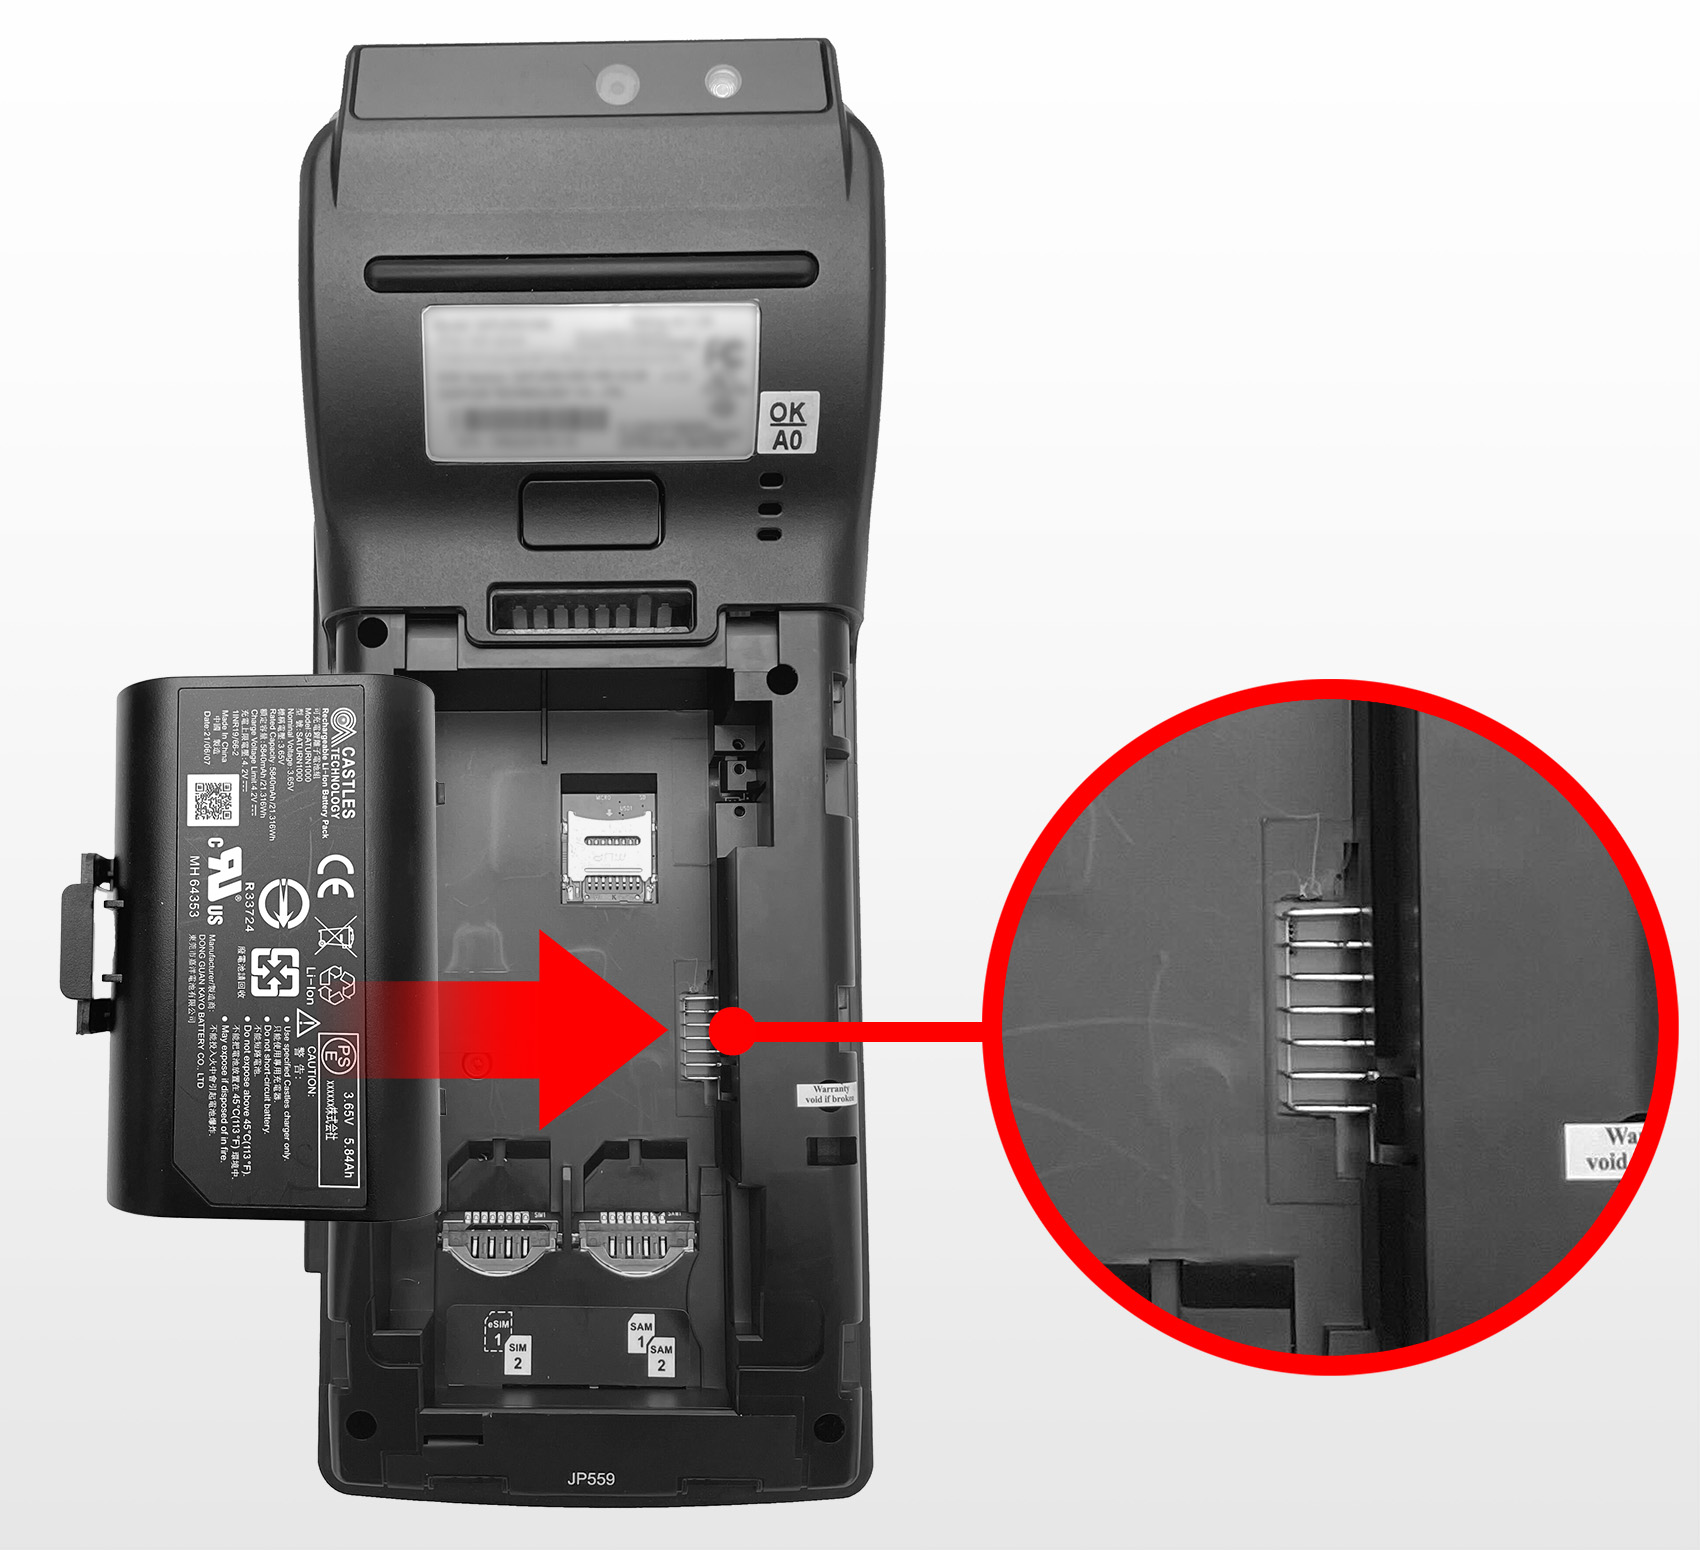
Place a charged battery in the compartment. Align the battery connectors with terminal pins to attach the battery.
-
Press down on the battery to ensure it locks into place.
-
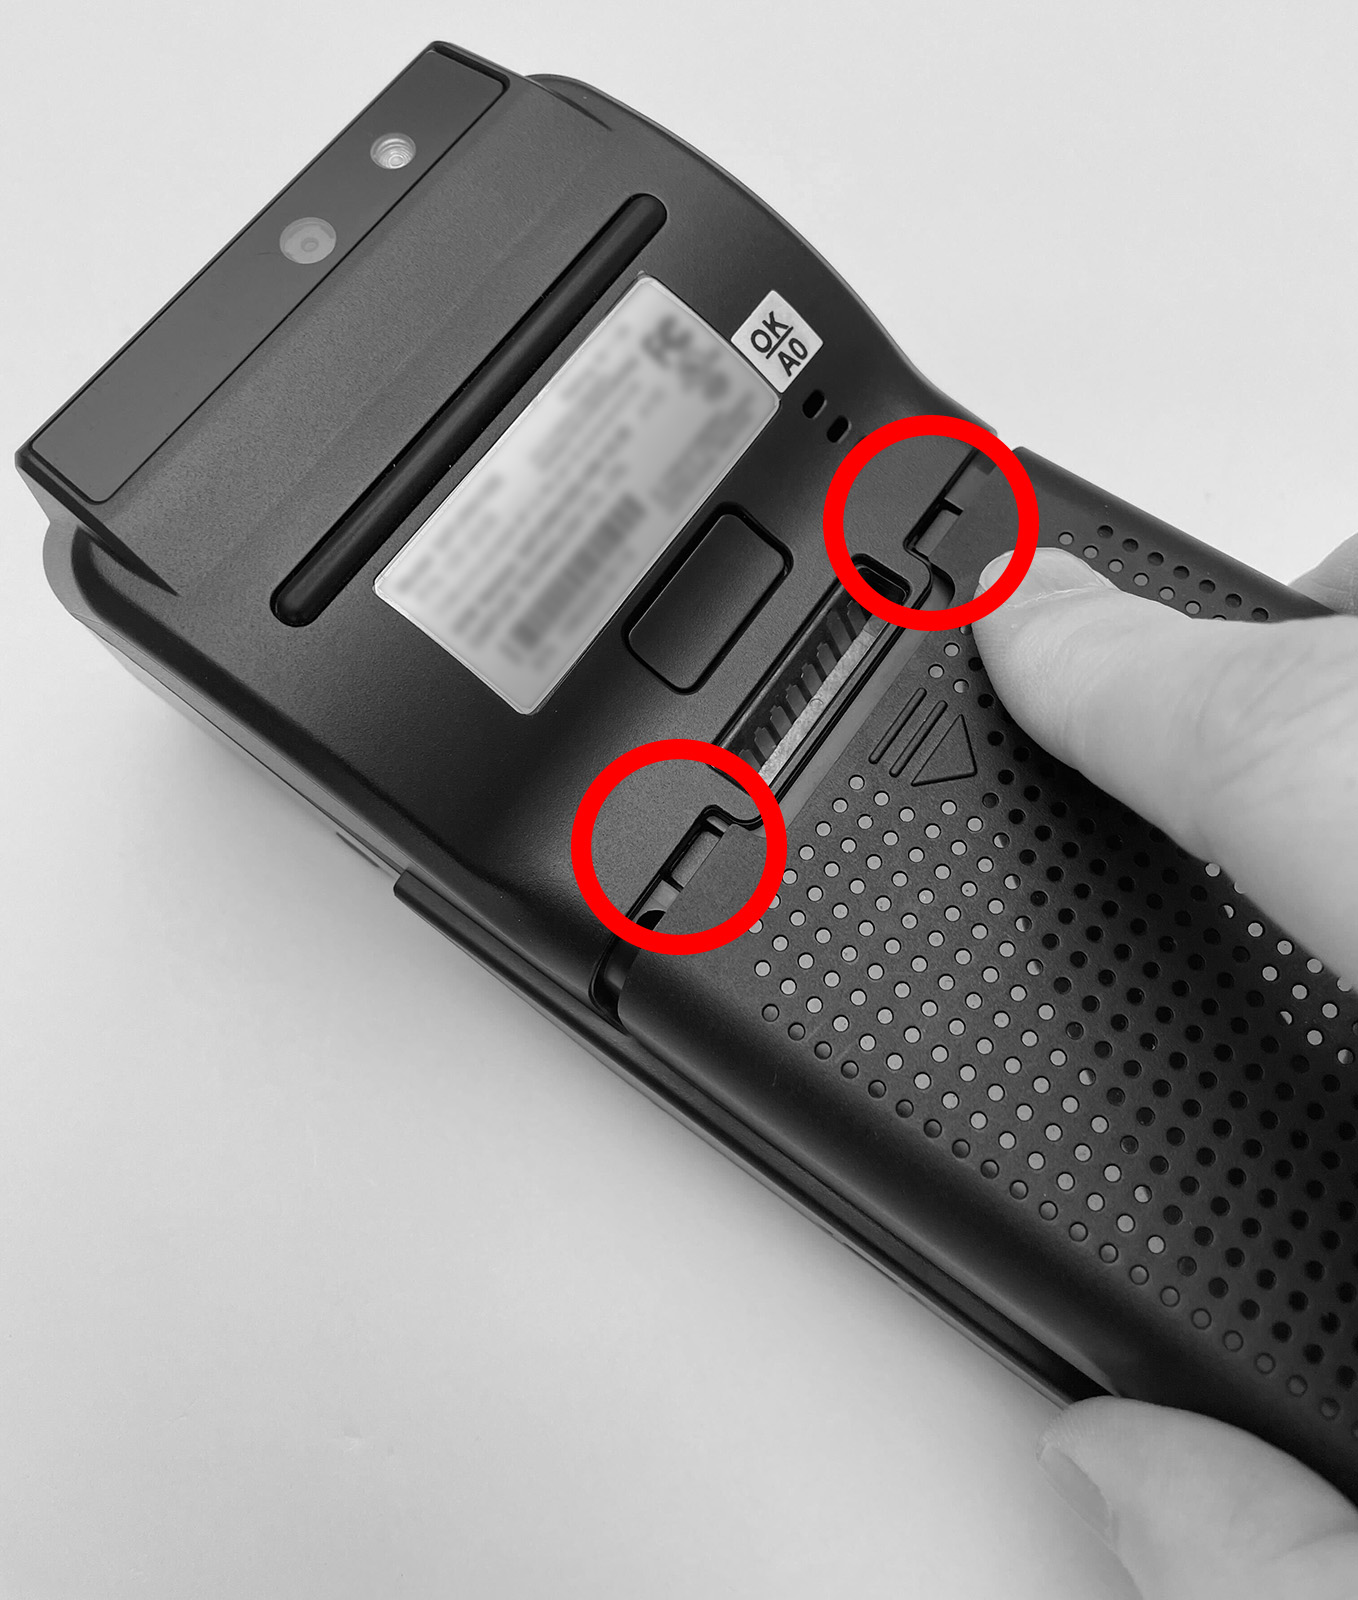
Replace the rear cover by inserting the two top connection tabs into the slots in the terminal enclosure.
-
Slide the cover up until it snaps into place.