Home
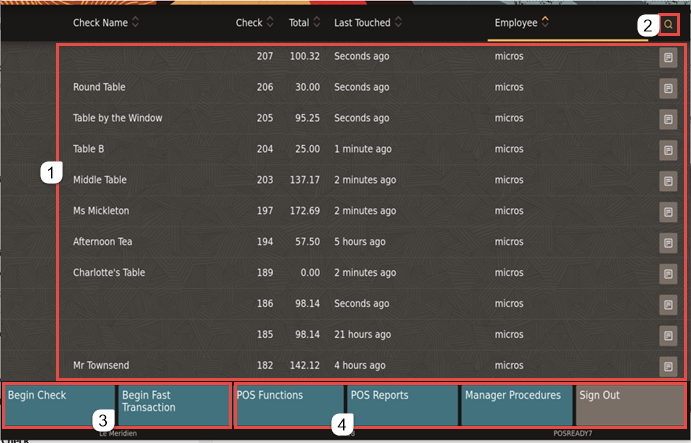
After you sign in to the workstation, the home page appears. The home page shows a list of open checks.
Figure 1-2 Bar Home Page on Workstations and Tablets

The following table describes the areas called out in the image.
Table 1-1 Bar Home Page
| Callout Number | Area | What You Use It For |
|---|---|---|
|
1 |
Checks |
Click the check line to open a check. View details such as the check name and number, total, and employee. Click
the View Check icon ( |
|
2 |
Search |
Look for checks by employee, check name, or total. |
|
3 |
Begin check buttons |
Click Begin Check to begin a check using a pre-authorized credit card. You can add menu items to the check after the pre-authorization has been applied. The pre-authorization appears on the Transaction page. If the credit card has a customer name, it is automatically used as the check name. Click Begin Fast Transaction to have the workstation automatically generate the next check number and move to the Transaction page. |
|
4 |
Functions panel |
Access non-check functions using POS Functions. For example, complete cash drawer operations and printing operations. Access reports such as financial reports and check reports using POS Reports. Access functions such as edit menu items and edit menu item availability using Manager Procedures. Return to the Sign In page using Sign Out. |
Parent topic: Bar Operations