Check Attributes
Click the attributes icon (![]() ) in the upper left area of the
Transaction page or the check detail.
) in the upper left area of the
Transaction page or the check detail.
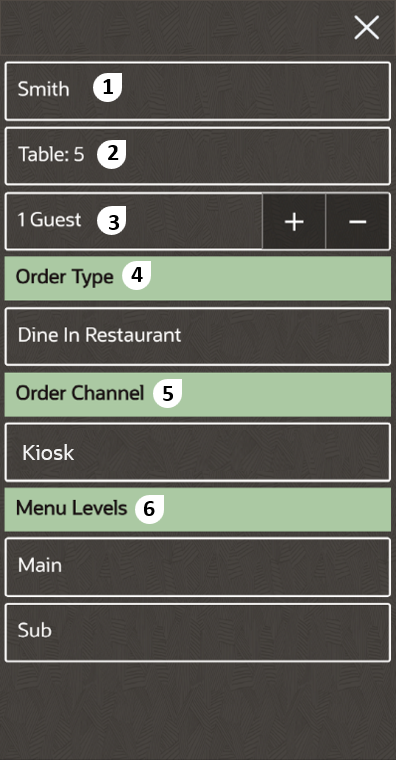
Figure 1-28 TSR Mobile Device Check Attributes

The following table describes the areas called out in the image.
Table 1-16 TSR Check Attributes
| Callout Number | Area | What You Use It For |
|---|---|---|
|
1 |
Check Name |
Enter a name for the check. This is often the customer name (optional). If a name is entered, it appears on the check detail. |
|
2 |
Table Number |
Enter the table number to assign to the check (optional). Entering a table number displays the seat selection on Transaction pages. |
|
3 |
Guest |
Enter the number of guests; the default value is 1. |
|
4 |
Order Type |
Select the order type to change the value. In the image example, click Dine In Restaurant to change the order type to another (such as Take Out). |
|
5 |
Order Channel |
Select the order channel to change the value. In the image example, click Kiosk to change the order channel to another (such as Drive Thru). This only appears if configured. |
|
6 |
Menu Levels |
Select the Main and Sub Menu Levels to change the value. In the image example, click Main to change the menu level to another. |
Parent topic: Table Service Restaurant Operations