Configuring Workstations

Add a SimphonyTransaction Services Generation 2 (STS Gen2) workstation or validate that an existing STS Gen2 workstation is configured for each location. The STS Gen2 workstation must be a CAPS Service Host and the Type must be POS API Client.

If you have more than one POS API Client workstation type available in a revenue center, Oracle Food and Beverage recommends enabling at least two workstation devices that can receive checks and orders as this will provide resiliency should one of the workstations become unavailable.

  1. Log in to EMC.
  2. Select the location (property), click Setup, and then click Workstations.
  3. If you do not see an STS Gen2 workstation in the list that is a CAPS Service Host with Type POS API Client, follow these steps:
    1. Locate the workstation record with the Check and Posting Service (CAPS), and then double-click the column number to the left of this workstation record to open it.

      The CAPS workstation record is usually the first one listed.

    2. Click the Service Host tab, and confirm that the Type value shows Check and Posting (CAPS).
    3. Select the CAPS workstation in the list in the left pane, and then click the General tab.
    4. Click the insert icon (This image shows the Insert icon, which is a green circle with a white plus sign.) on the toolbar.
    5. Enter STSCAPS in the Record Name field, and then click OK.
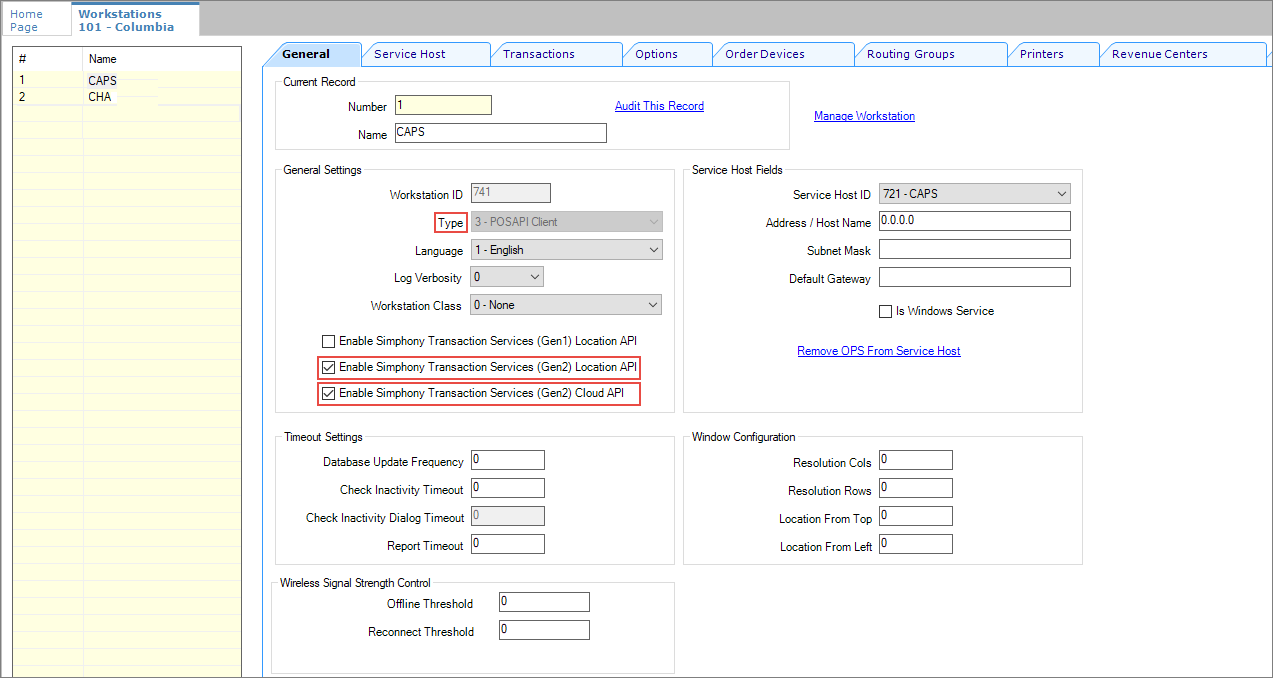
    6. Click the General tab, and then select 3 - POS API Client from the Type drop-down list.

      Figure 3-1 Workstation General Settings


      This figure shows the Workstation module, General tab.
    7. In the General Settings section, enable the following:
      • Enable Simphony Transaction Services (Gen 2) Location API

      • Enable Simphony Transaction Services (Gen 2) Cloud API

    8. In the General Settings section, confirm that the Type value shows 3 - POS API Client.
    9. In the Service Host ID field, select the Service Host that is running CAPS.
    10. Click the Order Devices tab, and then enable the order devices on which online orders will print.
    11. Click the Transactions tab, and then select the Default Order Type for the workstation.
    12. Click the Revenue Centers tab, and then select the revenue center from the drop-down list.
    13. Click Save.