Configuring Showing Checks on KDS Displays
This feature provides a single guest check image which is used for both the printing of the guest check and the display of the guest check on a KDS Display.
Note:
Some formatting details for printed checks (Bold/Red, Double-wide, or Centering) are not preserved for the Display Check KDS function when viewing checks on KDS Displays.Tender/Media Configuration
A service total type of tender media record must be created. To access the Tender/Media module:
-
Select the Enterprise or property, click Configuration, and then click Tender/Media.
-
Insert a Tender/Media record if it does not exist, name it, and then double-click the record to open it.
-
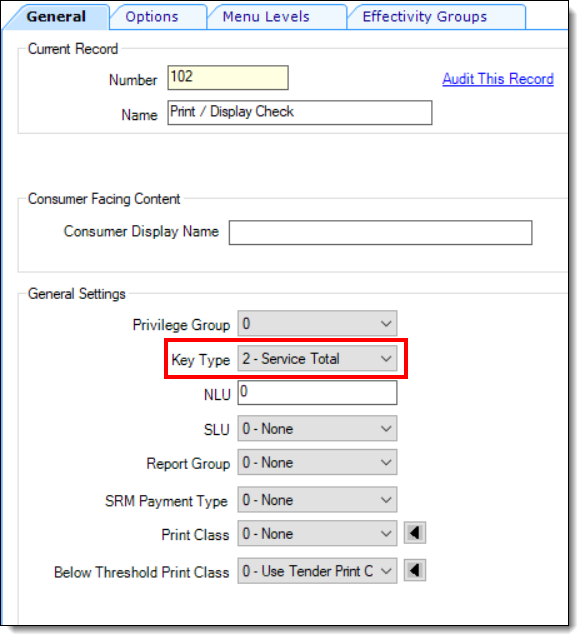
From the Key Type field’s drop-down list, select 2 - Service Total.
Figure 3-7 EMC Tender/Media Record - Service Total Type
-
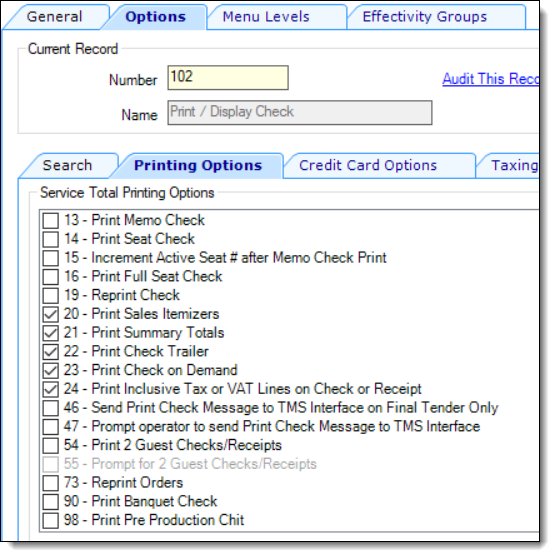
Click the Options tab, and then click the Printing Options tab. Enable the preferred printing options based on the content you want to show on guest checks and customer receipts.
Figure 3-8 EMC Tender/Media Record Options - Printing Options
-
Click the Menu Levels tab, and then enable all Main and Sub Levels for which this record’s behavior should apply. Click Save.
Tender Parameters Configuration
The newly created Tender/Media record must be assigned to the Tender Parameters module.
-
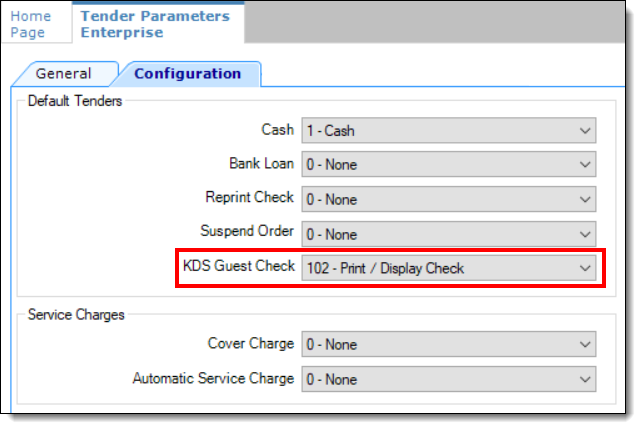
Select the Enterprise, property, revenue center, or zone, and then click Setup, Tender Parameters, Configuration, and then from the KDS Guest Check field’s drop-down list, select the recently added Tender/Media record.
Figure 3-9 EMC Tender Parameters Module - KDS Guest Check Field
-
Click Save.
Format Parameters Option Configuration
-
In order for Check Info Lines to be included on the check image, select the Enterprise, property, revenue center, or zone, click Setup, Format Parameters, Configuration, and then click the Options tab. Enable one of the following options:
-
26 - Print Guest Check Info Lines Before Header on Guest Checks
-
27 - Print Guest Check Info Lines After Header on Guest Checks
-
28 - Print Guest Check Info Lines After Trailer on Guest Checks
-
-
Click Save.
KDS Tool Bar Configuration
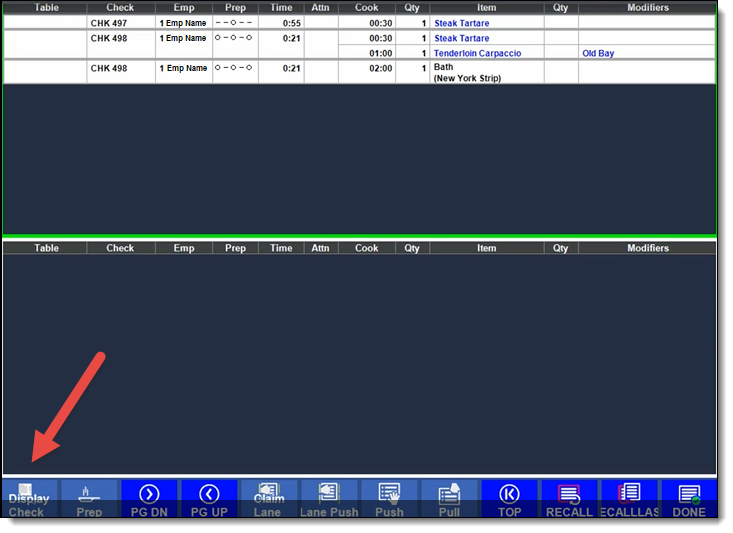
The Display Check function can be added to the KDS Tool Bars module.
-
Select the Enterprise or property, click Setup, and then select the KDS Tool Bars module.
-
Insert a new, or double-click an existing KDS Tool Bar record.
-
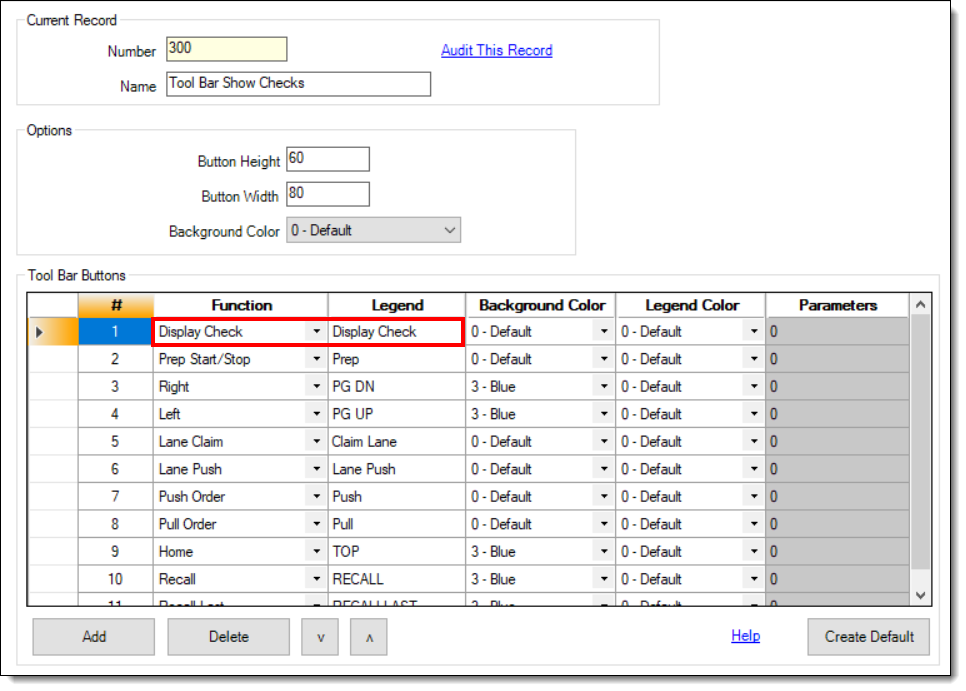
Click the Add button, and from the Function column drop-down list, assign the Display Check function in the desired button location.
-
Enter Display Check (or something similar) in the Legend field, configure the preferred color settings, and then click Save.
Figure 3-10 EMC KDS Tool Bars Module - Display Checks Function
-
Click Save.
KDS Bump Bar Configuration
The Display Check function can be added to the KDS Bump Bars module.
-
Select the Enterprise or property, click Setup, and then select the KDS Bump Bars module.
-
Insert a new, or double-click an existing KDS Bump Bar record.
-
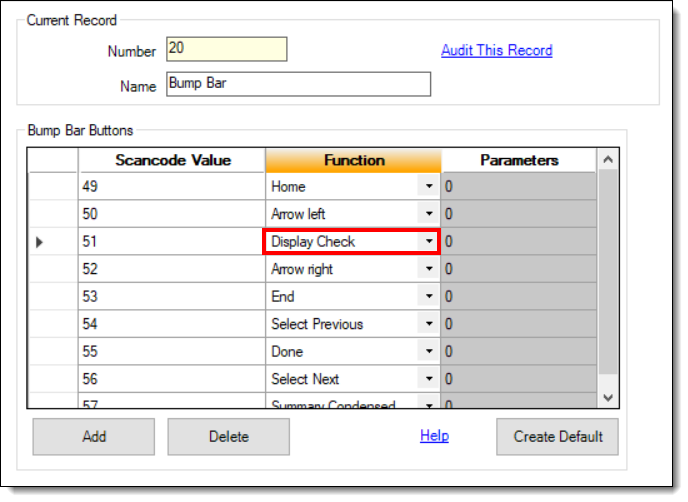
Click the Add button, and from the Function column drop-down list, assign the Display Check function in the desired button location.
-
Assign the Display Check function, and then click Save.
Figure 3-11 EMC KDS Bump Bars Module - Display Checks Function
Viewing Checks on KDS Displays
When viewing checks on KDS Displays, if necessary, when check images span more than one page, the following tool bar functionality is supported:
-
If the check image is able to show on a single page:
-
Any bump bar key dismisses the Check View message dialog.
-
-
If the check image is able to show on 2 pages or less:
-
Page up and Page down keys are provided.
-
-
If the check image requires more than 2 pages:
-
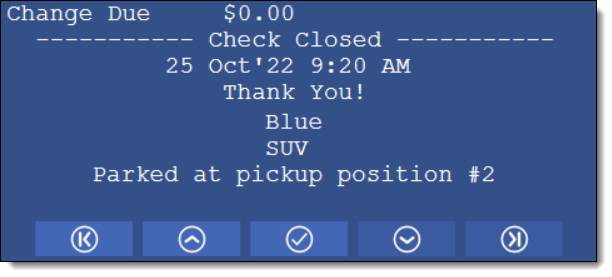
Page up, Page down, Home, and End keys are provided.
Figure 3-12 KDS Display - Check Image Toolbar
-
-
If the check has at least 2 pages:
-
The OK, Enter, and Cancel bump bar keys dismiss the Check View message dialog.
-
The Arrow Up, Arrow Left, Page Up, and Page Left bump bar keys toggle to the previous page.
-
The Arrow Down, Arrow Right, Page Down, and Page Right bump bar toggle to the next page.
-
The Home and End bump bar keys toggle to the First or Last page.
-
Parent topic: Basic KDS Configuration