Add Delivery Connector
- Click Add Delivery Connection.
- Under Select Delivery Service, click Start.
- Select the radio button for Skip, and then click Continue.
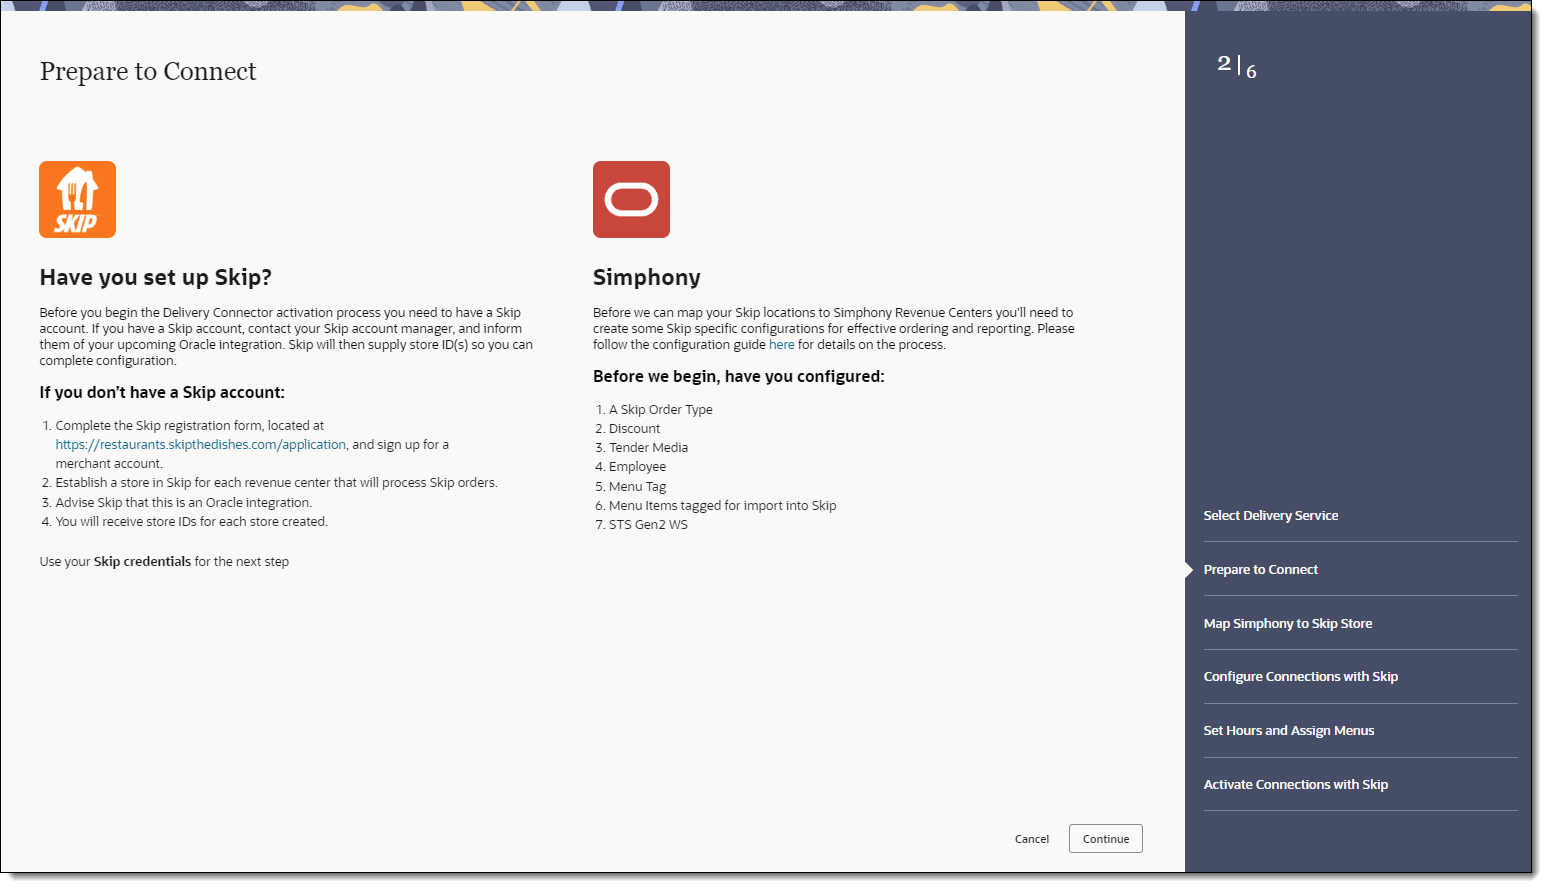
- On the Prepare to Connect page, ensure that you have registered
with Skip and completed the configurations in the Simphony EMC. Then
click Continue.
Figure 14-76 Prepare to Connect Page
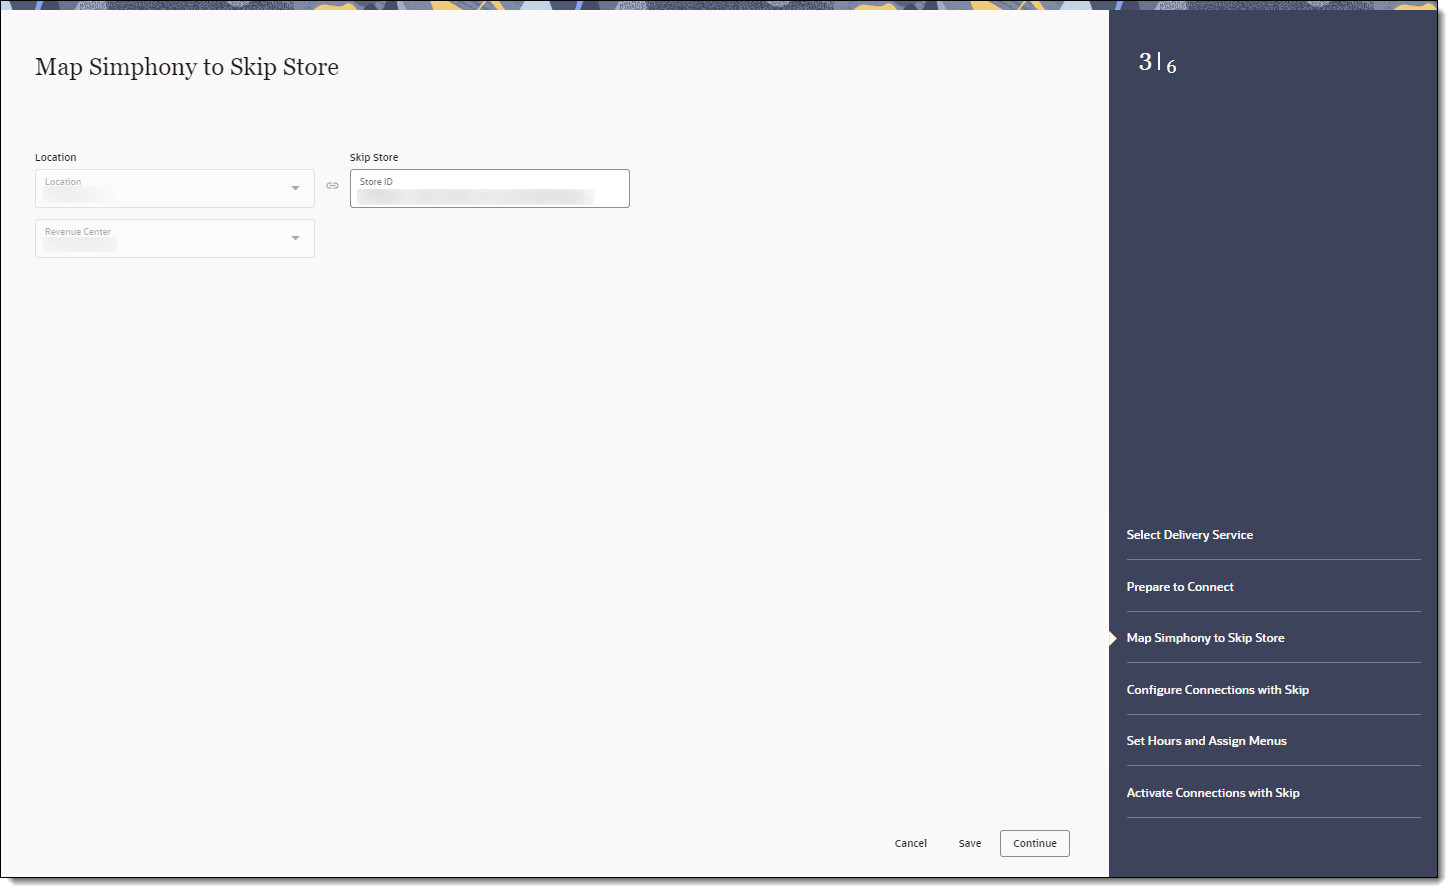
- On the Map Simphony to Skip Store page, select the Location, Revenue Center, and
the corresponding Skip Store, and then click Continue.
Figure 14-77 Map Simphony to Skip Store Page
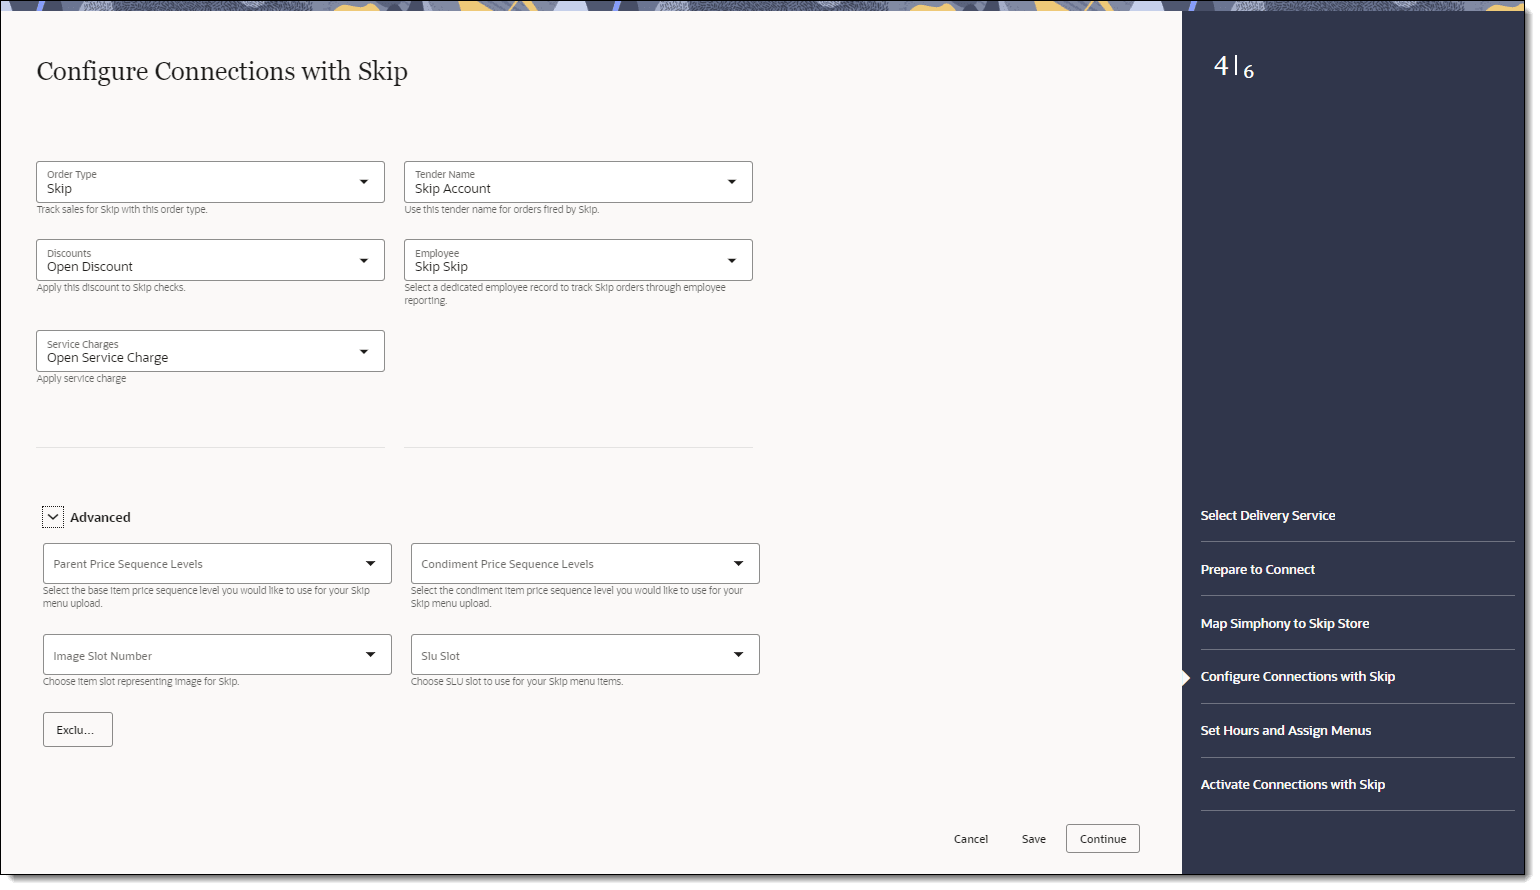
- On the Configure Connections with Skip page, select the
following items for the delivery service provider, and then click Continue.
-
Order Type: Select the order type to use for orders received from Skip.
-
Tender Name: Select the tender to use to settle orders received from Skip.
-
Discounts: Select the open discount to use for orders received from Skip.
-
Employee: Select the employee to use for orders received from Skip.
The Employee drop-down list shows a maximum of 1500 records. If the organization has a large number of employees, manually enter the employee object number for the delivery service provider employee.
-
Service Charges: Select the service charge to apply to orders received from Skip.
-
Parent Price Sequence Levels: Select the base menu item price sequence level to use for the Skip menu upload.
-
Condiment Price Sequence Levels: Select the condiment menu item price sequence level to use for the Skip menu upload.
-
Image Slot Number: Select the image slot number to use for the product display in Skip.
-
Slu Slot: Select the SLU slot to use for the product display of Skip menu items.
-
Combo Sizes: Enter the combo meal size names as they are to appear in the Skip combo ordering process. By entering text in these fields, Delivery Connectors determines that combo sizes are in use. There are a maximum of four combo sizes, and you can use none, all, or some of the four sizes. Leaving Combo Size fields blank will exclude them from delivery platform ordering.
-
Default Condiment Group Name: Select the default condiment group to use for menu items ordered via Skip.
If you have default condiments configured for a menu item in Simphony, you can pass them to Skip without having to create additional Menu Item Classes and condiment groups.
Is the condiment group configured as a Default Condiment master group in the Menu Item Classes module of the EMC? Appearance of condiments in Skip online ordering site Examples of condiments displayed on KDS and order receipts Yes
Condiments display as a removable option.
Hamburger menu item with Lettuce, Tomato, and Pickle as the Default Condiment master group displays as Hamburger, No, Lettuce.
No
Condiments display as selected items for the menu item, and must be disabled to remove them.
Hamburger menu item with Lettuce, Tomato, and Pickle as the Default Condiment master group displays as Hamburger, Tomato, Pickle.
-
Exclude: Click Exclude, select the condiment groups to exclude from Skip menus, and then click Close.
Figure 14-78 Configure Connections with Skip Page
-
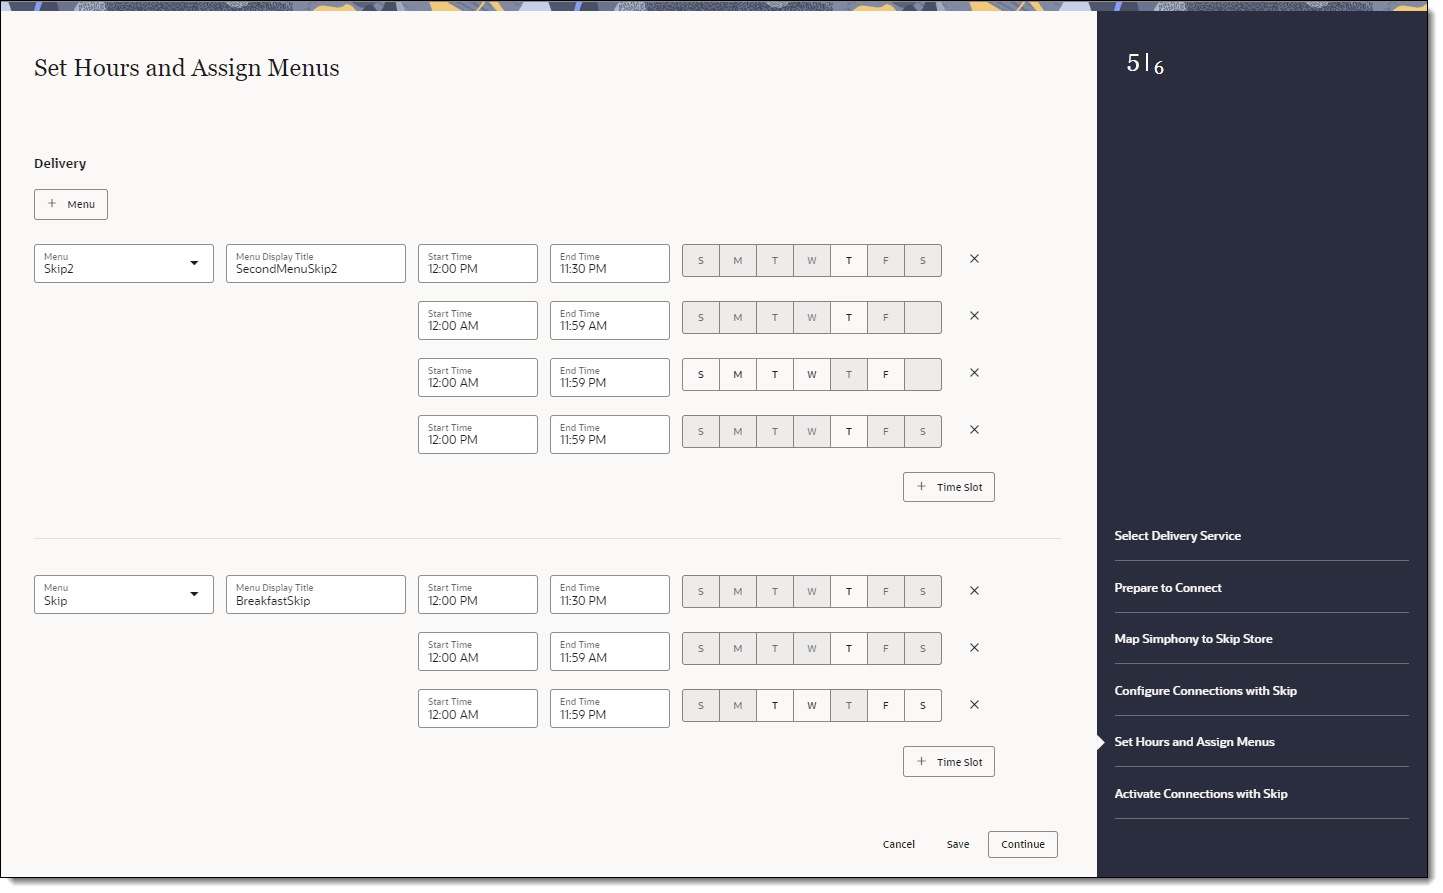
- On the Set Hours and Assign Menus page, select the following
menu and schedule information for both Delivery and Pickup order types,
and then click Continue.
-
Menu: Select the menu from the drop-down list. This menu is to be used in tags for Skip.
-
Menu Display Title: Enter the display name for the menu.
-
Start Time: Enter the start time for the service period, in (hh:mm AM/PM) format.
-
End Time: Enter the end time for the service period, in (hh:mm AM/PM) format.
-
Days of Week: Click the days of the week for the service period.
-
+ Time Slot: Click the + Time Slot button to add serving periods for the menu.
To add a menu, click the + Menu button, and complete the fields as described above.
Figure 14-79 Set Hours and Assign Menus Page
-
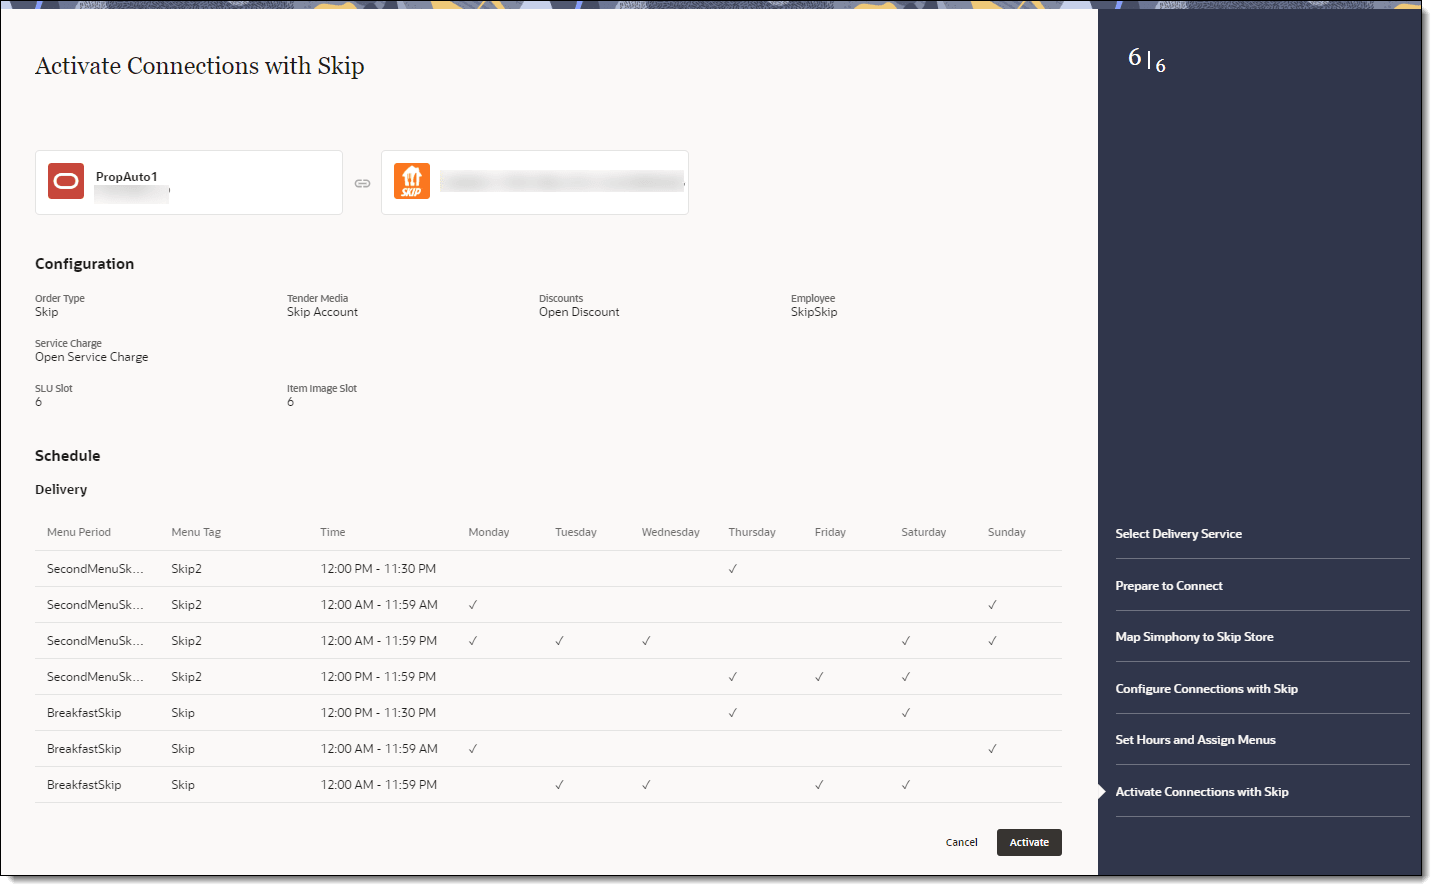
- On the Activation page, review a summary of the configuration,
and then click Activate.
WARNING:
Ensure that all configuration has been completed before activating the delivery platform.Figure 14-80 Activate Connections with Skip Page
One hour after activation, the store will be visible and ready for ordering on the delivery service provider website.
Parent topic: Skip