Configuring Automatic Start of Day

  1. Set the Start of Day (SOD) role privilege:
    1. Select the Enterprise, click Configuration, and then click Roles.
    2. Select the role type (such as a system administrator), click the Operations tab, and then click the PMC Procedures subtab.
    3. Set the appropriate role privilege.

      30059 - Prevent Running SOD from OPS with Open Checks: Select this option so that SOD cannot run when open checks exist.

    4. Click Save.
  2. To configure an automatic SOD for a property:
    1. Select the property, click Setup, and then click Property Parameters.
    2. Click the Calendar tab.
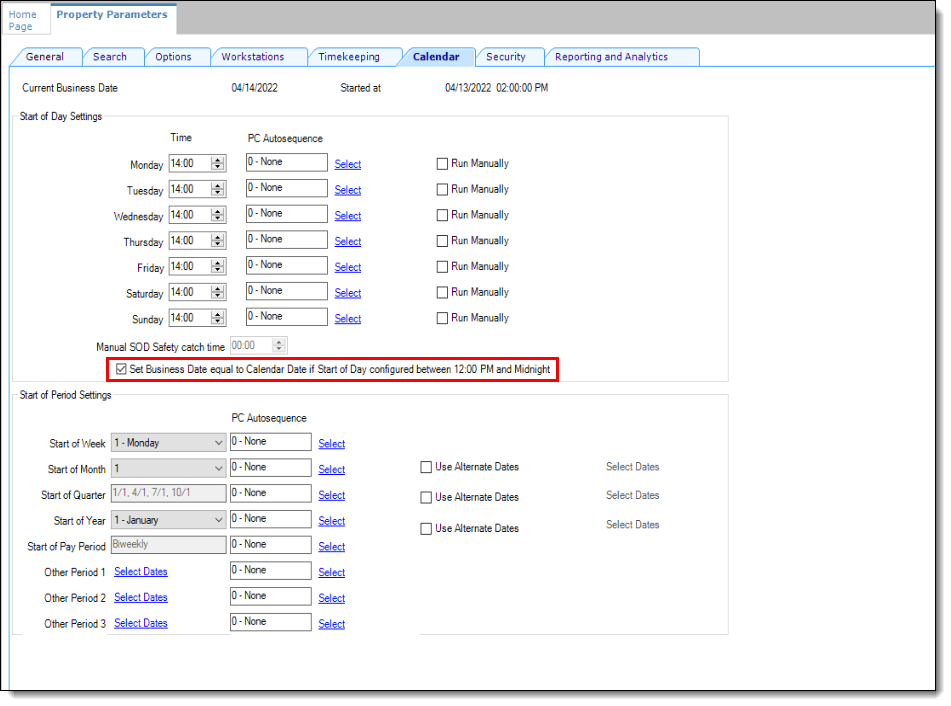
    3. Set the time you want the SOD to automatically begin for each day of the week.

      Note:

      To automatically begin the SOD after 12:00 noon, but before 12:00 (00:00) midnight, enable the Set Business Date equal to Calendar Date if Start of Day configured between 12:00 PM and Midnight checkbox.

      Figure 26-1 EMC Property Parameters Module - Calendar Tab


      This figure shows the Property Parameters Calendar tab where automatic Start of Day times are configured for each day of the week.

      The application checks to see whether the SOD occurred within a 24-hour period for the selected property. This time is based on the time zone of the property.

    4. Click Save.
  3. To configure an automatic SOD for a revenue center:
    1. Select the revenue center, click Setup, and then click RVC Parameters.
    2. Click the Calendar tab.
    3. Set the time you want the SOD to automatically begin for each day of the week (in 24 hour format).
    4. To automatically begin the SOD after 12:00 noon, but before 12:00 (00:00) midnight, enable the Set Business Date equal to Calendar Date if Start of Day configured between 12:00 PM and Midnight checkbox.
    5. Click Save

      If you are using the Simphony Standard Cloud Service, it is not necessary to select autosequences within the PC Autosequence fields for any day of the week. The automatic SOD configuration is now complete.

  4. If you are using the Simphony Premium Cloud Service, perform the following steps:
    1. Select the Enterprise, click Configuration, and then click PC Autosequences.
    2. Insert a PC Autosequence record and name it Increment Business Day.
    3. Open the record, and then select the Allowed Properties to view the autosequence.
    4. (Optional) Add Parameters as appropriate. For example, you can enter a property number and exclude a revenue center number.
    5. On the Steps tab, add a step, and then from the Step Type drop-down list, select 3 - Increment Business Date.
    6. Click Save.
    7. Click Property Parameters, and then select the Calendar tab. Adjacent to each day of the week, click the Select link and assign the Increment Business Day autosequence.
    8. Click Save.